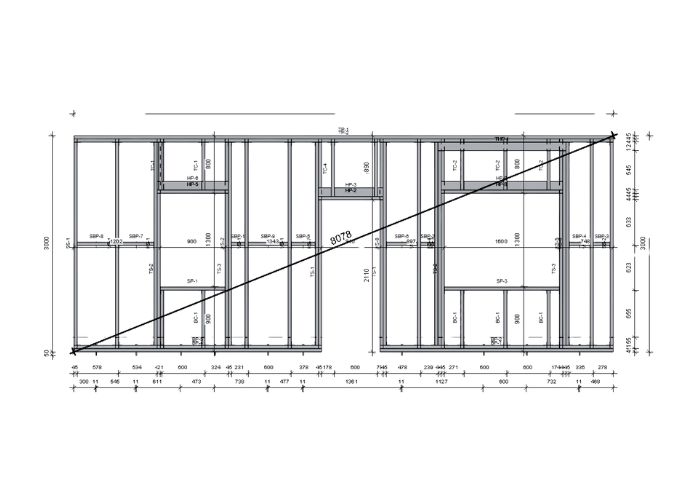
As we recently announced, our Wood Framing CLT add-in for Revit is available for the first time ever as a free trial.
To make using the software as smooth as possible, we developed an improved workflow for designing CLT walls, roofs, and floors. And we’ll be releasing a series of tutorials to make it even easier to follow along.
Without further ado, here’s the first tutorial. Stay tuned for subsequent CLT videos!
As you may already know, the user interface of our Wood Framing CLT add-on for Revit was recently enhanced to make the workflow more intuitive and the UI overall easier to use.
What you may not know is that we are now making Wood Framing CLT available to trial for free!
That being the case, we want to make it as simple as possible for you to try out our CLT solution on your own. In this blog post, I’ll go through the basic steps to follow so that your use of the software is as hassle-free as possible.
Note: Since these instructions are meant to simplify testing of Wood Framing CLT, I have used our sample configurations and families throughout.
Just keep in mind that all these sample rules can be modified to your own needs and standards.
The user interface of our Wood Framing CLT add-on for Revit is going to be enhanced within the next few weeks! The commands will be collected into a single ribbon and rearranged to make the workflow more intuitive and the UI overall easier to use.
This major new release is part of our ongoing quest to help optimize your work and reduce time spent on manual Revit tasks.
As you can see in the before-and-after image below, it was previously necessary to open separate Revit tools – like Wall+, Floor+, Roof+, Smart Connections, etc. – to access the functionality you needed.
With the new release, that is no longer the case. All functions are now available from a single compact ribbon, conveniently arranged according to the recommended workflow.
Excel2R has been one of our most popular Tools4Revit add-ons for a long time running. And there’s good reason for that. Besides quickly importing MS Excel spreadsheets into Autodesk® Revit® with all formatting intact, users really appreciate that they can sync their Revit data tables with the original spreadsheet at any time because the app maintains the link between Excel and the Revit project.
Through working together with our clients and listening to their requests, we’ve revamped Excel2R so that it can serve their needs even better. The two major enhancements have to do with conditional formatting and loading spreadsheets. Let’s look at the latter first.
During the past year, we implemented over 40 updates to our Wood Framing and Metal Framing BIM software for designing walls, floors, and roofs of prefabricated timber and light-gauge steel-framed buildings in Revit®.
These updates include new features, enhanced sample families, and requests made by clients that benefit many of our users. In the spirit of sharing BIM advances, we walk through over 30 of them now in the hopes that this summary will be of use to not only current users but also Revit users generally and those who may be considering making the switch over to a BIM workflow for framing design.
We’ve put a lot of work into our Wood Framing and Metal Framing BIM software over the past year to make sure it continues advancing to meet the needs of architects and structural engineers around the world. Click a topic in the list below to auto-scroll down for more about it.
By the way, we also hosted this webinar in June 2021 that goes over most of the features enumerated below.
Want to frame walls, floors, and roofs quickly in Revit®? Our Wood Framing and Metal Framing BIM software for Revit streamline the framing process for architects, structural engineers, and framed building contractors and provide a wide range of options for modelling framed buildings.
The great thing about our framing software is that we’ve built best practices right into the tools, based on the insights of leading users. Those just starting out with our framing tools, however, sometimes feel overwhelmed doing the initial setup for a new project. That’s why we’ve pulled together these best practices, which will help even experienced users navigate more confidently from the start.
In this blog post, you‘ll discover the essential steps for getting your project started on the right foot. We’ll start from the very beginning of the workflow so new users can start working on their own projects with confidence. And if you’re a seasoned user, knowing these steps will reinforce techniques with which you may already be familiar.
These essential steps – along with other useful recommendations – were also given in our recent webinar, so be sure to check that out for more visuals and explanation.
Modeling Recommendations
The Wall/Floor/Roof structure should be layered the way the parts of the framing will be modeled, e.g.:
The latest release of our Wood Framing and Metal Framing BIM Solutions includes five useful new features for Revit users. Our thanks go out to those BIM and Revit experts with whom we’ve been in contact to bring these to fruition. Together, we’re building BIM up and making it better for the good of the industry.
Let’s take a look at each of the updates.
WATCH our webinar (February 18, 2021) that goes through these and other updates.
Framing in Groups
This feature lets you frame walls in groups that may be replicated and mirrored throughout a project. Needless to say, it can save architects and designers copious amounts of time, especially with large framing projects in Revit.
We‘ve updated our Wood Framing Wall and Metal Framing Wall BIM Solutions for Revit with an important new feature called Framing in Groups. This major enhancement comes from working with top experts in the framing design industry and will especially benefit Revit users who work with large projects or projects comprising mirrored building parts. In the spirit of sharing BIM advances, we bring it to you now.
The Framing in Groups command allows you to frame walls in groups, a valuable feature because walls that are grouped may be used to repeat and also mirror framings many times throughout a project. Incorporating this into the framing workflow has the potential to save architects and designers a lot of time.
Please note that this update to our framing software is part of the final release for Revit 2019. Our programmers are turning their attention to the Revit 2020 (and 2021 and upcoming 2022) version, which means that the 2019 version of our software will be no longer be supported.
Watch our webinar about multi-framing:
There are five new functions that fall under the Framing in Groups feature. Let‘s take a look at each one as enumerated in the image above.
Framing professionals from around the world who use our BIM solutions for timber and steel framing in Autodesk Revit are in regular contact with us, letting us know what their needs are and giving suggestions on how the tools can be further enhanced. The latest version of our Wood Framing and Metal Framing design software for Revit incorporates their requests to be able to control top and bottom cripples independently, to be able to manipulate top and bottom plates in wall-to-wall connections, to have increased functionality for modifying sheathing and paneling, to add some dimensioning options, and more.
Note to current users: if you haven’t already, download the latest version via the TOOLS4BIM Dock to take advantage of all the updates below. Not yet a user? Take a 14-day free trial by downloading the TOOLS4BIM Dock.
Without further ado, let’s go through the updates that have been made in the latest version of Wood Framing and Metal Framing.
WATCH our webinar (February 18, 2021) that goes through these and other updates.
Our Wood Framing and Metal Framing BIM software for Revit has gotten another round of new features. Among the latest enhancements: more flexibility to control brace groups (including adding partial brace groups and allowing braces to run across openings), separate preassemblies for joined openings, special layouts for paneling, and to align the secondary stud system with the Project Base Point.
Current users of Wood/Metal Framing Wall/Floor/Roof, be sure to get these updates installed via the TOOLS4BIM Dock and start benefiting from them today.
Let’s get into the new features that have been included in the latest version.
1. Separate Preassemblies for Joined Openings
This feature lets you make separate preassemblies for openings that are part of a joined opening — and the preassemblies will exclude other elements (like top plate supports, etc.) that extend across the joined opening. You can find this option to create separate preassemblies for joined openings in the ‘Modify Configuration Settings’ tab of the Default Framing Parameters window:
In this example of a joined opening consisting of a door and a window, we want a separate preassembly for the door and another for the window. Since the top support runs the width of the joined opening, it will not be included into either preassembly.
Later on down the road, you can use the Wood/Metal Framing software to create separate shop drawings and schedules automatically, with the help of Revit Filters:
This site uses cookies - they help us provide you with a better online experience. By using our website you accept that we may store and access cookies on your device. | Privacy policy.
This website uses cookies to improve your experience while you navigate through the website. Out of these, the cookies that are categorized as necessary are stored on your browser as they are essential for the working of basic functionalities of the website. We also use third-party cookies that help us analyze and understand how you use this website. These cookies will be stored in your browser only with your consent. You also have the option to opt-out of these cookies. But opting out of some of these cookies may affect your browsing experience.
Necessary cookies are absolutely essential for the website to function properly. This category only includes cookies that ensures basic functionalities and security features of the website. These cookies do not store any personal information.
Functional cookies help to perform certain functionalities like sharing the content of the website on social media platforms, collect feedbacks, and other third-party features.
Performance cookies are used to understand and analyze the key performance indexes of the website which helps in delivering a better user experience for the visitors.
Cookie
Duration
Description
YSC
session
This cookies is set by Youtube and is used to track the views of embedded videos.
Analytical cookies are used to understand how visitors interact with the website. These cookies help provide information on metrics the number of visitors, bounce rate, traffic source, etc.
Cookie
Duration
Description
_ga
2 years
This cookie is installed by Google Analytics. The cookie is used to calculate visitor, session, campaign data and keep track of site usage for the site's analytics report. The cookies store information anonymously and assign a randomly generated number to identify unique visitors.
_gid
1 day
This cookie is installed by Google Analytics. The cookie is used to store information of how visitors use a website and helps in creating an analytics report of how the wbsite is doing. The data collected including the number visitors, the source where they have come from, and the pages viisted in an anonymous form.
Advertisement cookies are used to provide visitors with relevant ads and marketing campaigns. These cookies track visitors across websites and collect information to provide customized ads.
Cookie
Duration
Description
_fbp
3 months
This cookie is set by Facebook to deliver advertisement when they are on Facebook or a digital platform powered by Facebook advertising after visiting this website.
fr
3 months
The cookie is set by Facebook to show relevant advertisments to the users and measure and improve the advertisements. The cookie also tracks the behavior of the user across the web on sites that have Facebook pixel or Facebook social plugin.
IDE
1 year 24 days
Used by Google DoubleClick and stores information about how the user uses the website and any other advertisement before visiting the website. This is used to present users with ads that are relevant to them according to the user profile.
test_cookie
15 minutes
This cookie is set by doubleclick.net. The purpose of the cookie is to determine if the user's browser supports cookies.
VISITOR_INFO1_LIVE
5 months 27 days
This cookie is set by Youtube. Used to track the information of the embedded YouTube videos on a website.