We recently released a new feature for our Precast Concrete design software that automates column rebar placement in Revit. The Column Reinforcement tool makes it efficient to model main rebar, stirrups, and corbel rebar, a task that structural engineers and precast modelers have to spend hours on if they’re stuck doing it manually.
Here’s the basic workflow for using Column Reinforcement.
1. Open configuration window of Column reinforcement and create new configuration.
AGACAD is well-known for developing tools for prefab structures, particularly wood framing, metal framing, and precast concrete. Revit-based addons help with modeling highly-detailed building models reaching LOD (Level of Detail) 400 and creating necessary documentation efficiently.
The latest feature added to our Precast Concrete design software is Column Reinforcement. Revit already has quite good tools for rebar, and the most recent versions have made it more stable than ever. But with thousands of reinforcement bars in each BIM project, it can still take a lot of time to model them, so precast engineers can benefit from other tools to work with rebar in a timely manner.
Each step is important in building design, so in this blog post we will go over the full workflow for modeling precast concrete columns and generating documentation in Revit using AGACAD’s Precast Concrete solution.
1. Modeling precast columns
Create structural columns in Revit. These are just simple standard Revit Structural Column families drawn to define the top and bottom level constraints.
Within the past year, we’ve released tools that automate the modeling of reinforcement in walls and beams in Revit. Now it’s time to introduce Column Reinforcement.
In this initial release, you can use it to place main rebar, stirrups, and corbel reinforcement in rectangular columns. While it’s primarily made for precast, it also works for cast in-situ. See the workflow for reinforcing columns in Revit.
Column Reinforcement is a feature of our Precast Concrete design software, which covers modeling and documentation of precast elements and reinforcement of walls, beams, and now columns.
Want to efficiently model reinforcement for precast concrete columns in Revit? We’ve got a new tool coming out called Column Reinforcement that does exactly that. Made for rectangular columns with corbels, it’s ideal for precast designs though it can also be used for cast-in-situ.
On September 17th we’re hosting a free webinar in which we’ll showcase the automated placement of main reinforcement, stirrups, and corbel rebar via user-defined layout rules in the Column Reinforcement addin. Sign up in the table below!
The results you’ll see in this webinar are various rebar configurations applied to several types of columns with corbels as well as how to model precast columns with connection details and generate the requisite shop drawings.
The 45-minute webinar will be held twice, so please register for the session that’s more convenient for you. We invite structural engineers, modelers, and really anyone who wants to place reinforcement in Revit more efficiently. Join in and get a look at the newest feature of AGACAD’s Precast Concrete BIM design software for Revit!
Join our free 30-minute webinar on June 18th for an expert-level tutorial on how to efficiently design precast concrete structures in Revit. Hours of tedious manual tasks in the modeling, detailing, and documentation processes will be eliminated using our Precast Concrete BIM software, which handles slab layouts, wall panelization, detail distribution, rebar placement, and shop drawing prep.
The results you’ll see: Revit walls will be split into precast wall panels. Floors will be divided into slabs. Connections, grout tubes, plates, and lifting anchors will be inserted based on predefined configurations. Rebar for walls and beams will be placed. Shop drawings with proper dimensions and views will be generated in a snap. All of those tasks are automated by using our Precast Concrete Revit tool, so it saves lots of time for structural engineers, drafters, and BIM modelers.
The webinar will be held twice, so please register for the session that’s more convenient for you. We especially invite out-of-box Revit users and those thinking of switching from AutoCAD 2D to BIM to come see what’s up!
Parking garages can be built from a variety of materials – cast-in-place, precast concrete, steel framing with concrete, even wood. Perhaps most often seen as stand-alone buildings, they are frequently incorporated into a larger structure, concealed below ground level or several floors above ground. Architecturally speaking they can range from simple to highly unique, boasting tailor-made façades. Functionally most are quite plain though they may be outfitted with complex automatic parking systems.
At any rate, we need them. A lot. That’s why they’re being built all over the place. Here in Vilnius, Lithuania, car parks are gradually relieving the lack of parking spaces, an all-too-common problem affecting cities worldwide. Underground ones are ideal in the city center here for preserving views of the city’s splendid architecture. Although every situation is different, precast concrete is probably the best choice for your typical, economical, functional parking structure due to its relatively simple design and fast construction timetable that’s less affected by weather conditions. Plus architectural ideas can easily be implemented in façade wall panels.
The AEC industry has been undergoing the transition from 2D digital drafting to 3D informational modeling, data management, sharing, linking between people and software platforms. In four words, building information modelling/management. In a word, BIM.
If we look at the case of an independent, standalone parking garage building, most of it is structural. A typical one has simple architecture, and there’s hardly any MEP or other parts of the project to deal with. So in this article, I want to review the design workflow and available tools that make the process efficient in structural BIM models, particularly as regards modeling and documentation.
We’ve been diligently testing our Tools4BIM DOCK* against Revit 2021 to ensure complete compatibility of all the BIM Solutions and Tools4Revit Add-ins therein. Thanks for your patience, those of you who’ve been awaiting the pronouncement. We’re glad to say our tools are ready to use with Revit 2021!
*The Dock is an interactive window in Autodesk® Revit® that allows you to access and manage all software products developed by AGACAD to help you get more out of Revit. Read more about the Tools4BIM Dock.
Here’s how to get our tools running on Revit 2021.
For current users of our software
To companies/individuals who have an active license maintenance/subscription of at least one of our tools, we’ve sent an email containing software activation codes and a link to download our 2021 Tools4BIM Dock. (If you can’t find it in your inbox, please check your spam folder.)
NB: If you’re with a company, please ask your BIM manager or IT coordinator for these codes.
In this free 30-minute webinar on May 21st we’ll show how our Precast Concrete design software for Revit streamlines the modeling, detailing, and documentation process.
The results you’ll see are Revit walls split into precast wall panels, floors divided into slabs, and connections, grout tubes, plates, and lifting anchors automatically inserted on all of them based on predefined configurations. Rebar for walls and beams will be auto-generated, avoiding the hours it would take to do manually. And the long, tedious process of making shop drawings with proper dimensions and views will be done in a snap during this webinar using our Precast Concrete software tool.
The webinar will be held twice, so you structural engineers, drafters, and BIM modelers please register for the session that’s more convenient for you. We especially invite out-of-box Revit users and those thinking of switching from AutoCAD 2D to BIM to join in!
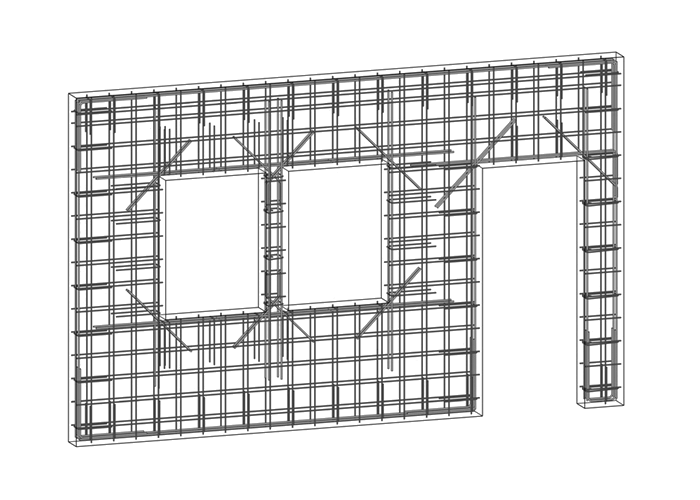
AGACAD Ltd, the developer of advanced technologies for building information modelling and management, is proud to introduce BIM tools that generate detailed reinforcement for concrete walls and beams in Revit along with all shop drawings and production files.
The new Wall Reinforcement and Beam Reinforcement software with automated rebar-modelling functionality are part of AGACAD’s popular Precast Concrete suite of Revit add-ons.
“The addition of reinforcement detailing for precast concrete is a step forward that structural professionals have long awaited. There is a big need – modelling rebar can be very time-consuming but is increasingly important as BIM takes hold and models get more and more detailed. Now it is even clearer, as we like to repeat, that BIM is very good for precast and Revit is ideal,” says Donatas Aksomitas, the CEO of AGACAD.
This site uses cookies - they help us provide you with a better online experience. By using our website you accept that we may store and access cookies on your device. | Privacy policy.
This website uses cookies to improve your experience while you navigate through the website. Out of these, the cookies that are categorized as necessary are stored on your browser as they are essential for the working of basic functionalities of the website. We also use third-party cookies that help us analyze and understand how you use this website. These cookies will be stored in your browser only with your consent. You also have the option to opt-out of these cookies. But opting out of some of these cookies may affect your browsing experience.
Necessary cookies are absolutely essential for the website to function properly. This category only includes cookies that ensures basic functionalities and security features of the website. These cookies do not store any personal information.
Any cookies that may not be particularly necessary for the website to function and is used specifically to collect user personal data via analytics, ads, other embedded contents are termed as non-necessary cookies. It is mandatory to procure user consent prior to running these cookies on your website.