AGACAD is well-known for developing tools for prefab structures, particularly wood framing, metal framing, and precast concrete. Revit-based addons help with modeling highly-detailed building models reaching LOD (Level of Detail) 400 and creating necessary documentation efficiently.
The latest feature added to our Precast Concrete design software is Column Reinforcement. Revit already has quite good tools for rebar, and the most recent versions have made it more stable than ever. But with thousands of reinforcement bars in each BIM project, it can still take a lot of time to model them, so precast engineers can benefit from other tools to work with rebar in a timely manner.
Each step is important in building design, so in this blog post we will go over the full workflow for modeling precast concrete columns and generating documentation in Revit using AGACAD’s Precast Concrete solution.
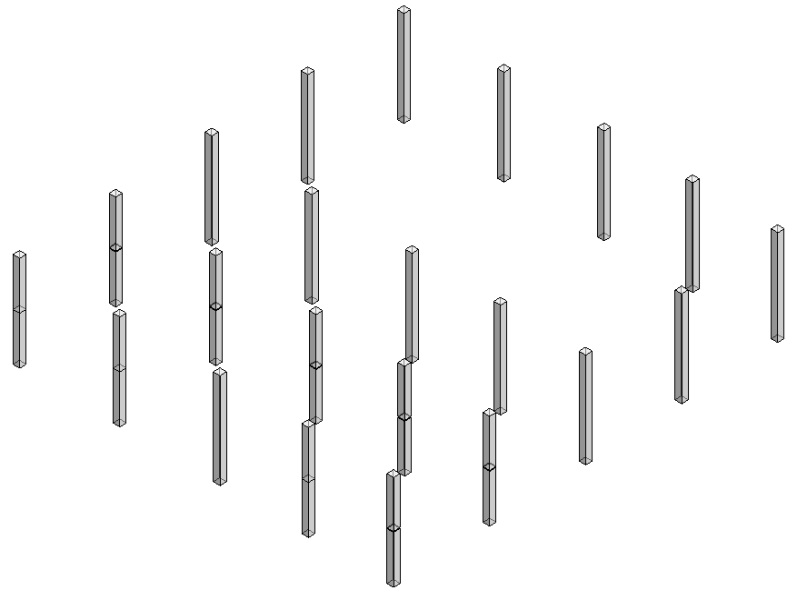
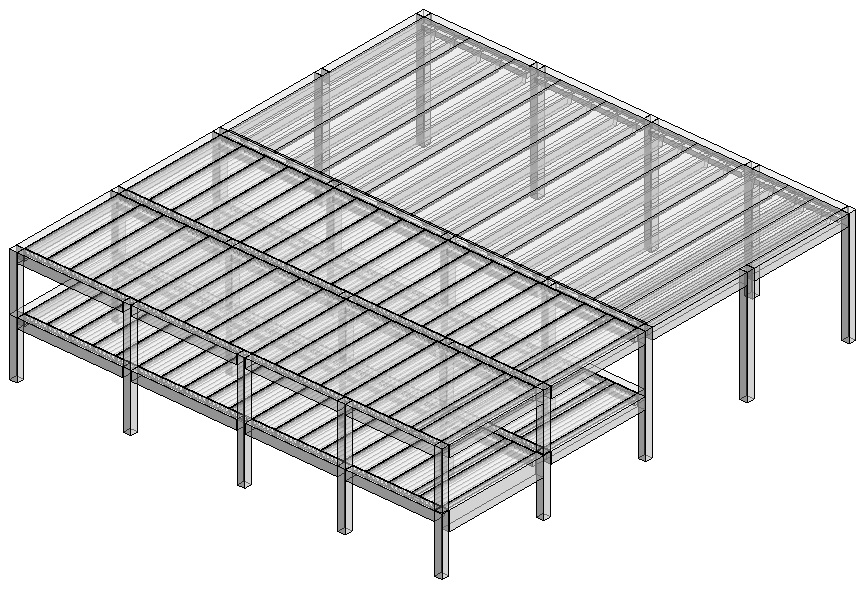
1. Modeling precast columns
Create structural columns in Revit. These are just simple standard Revit Structural Column families drawn to define the top and bottom level constraints.
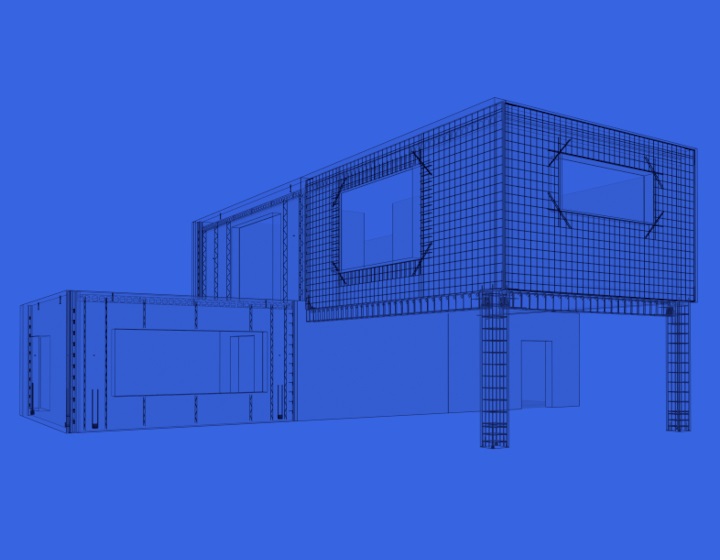
2. Adding other building elements
The rest of the building components are also added with Revit and Precast Concrete.
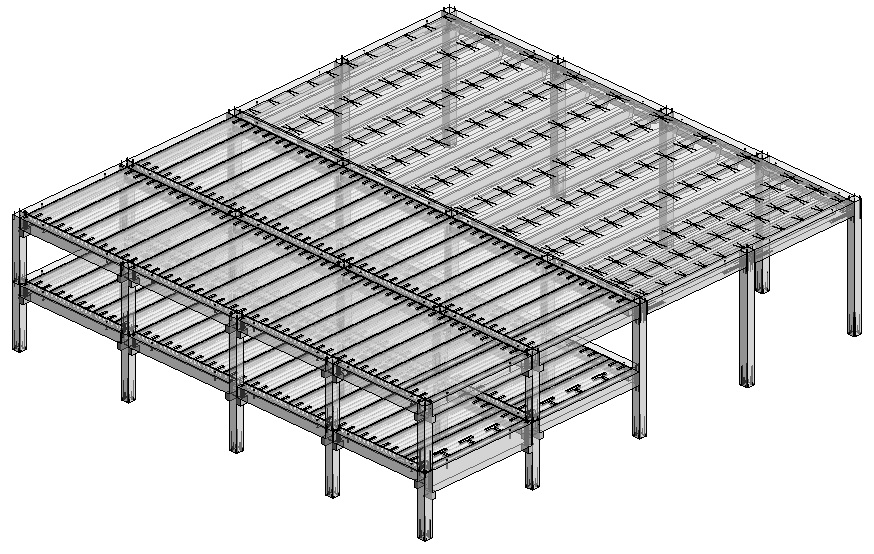
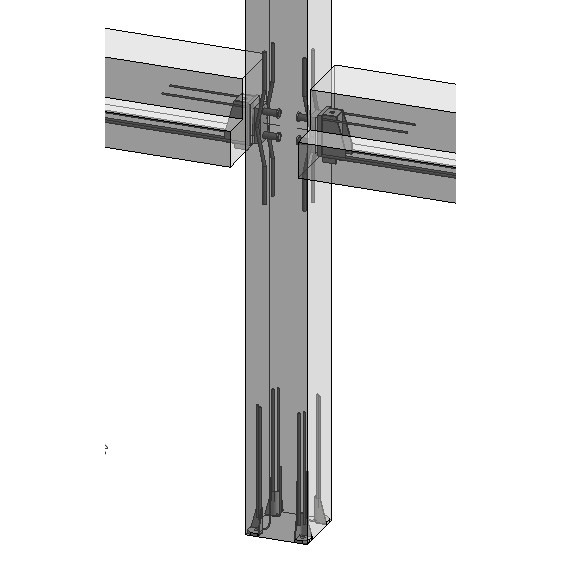
3. Inserting connections
The next step is developing a more detailed version of the BIM model – usually described as LOD350 – so we need to distribute connection hardware. For that we have Smart Connections, which is another tool within our Precast Concrete solution. By using some face-based families, which have to be in the model, the user can define rules to place bolts at the top, column shoes at the bottom, and corbel families automatically positioned where beams join columns. And then with one click all these details are inserted into selected columns. The number and type of connections depend on the user, so the tool can be used in any country with any type of connections.


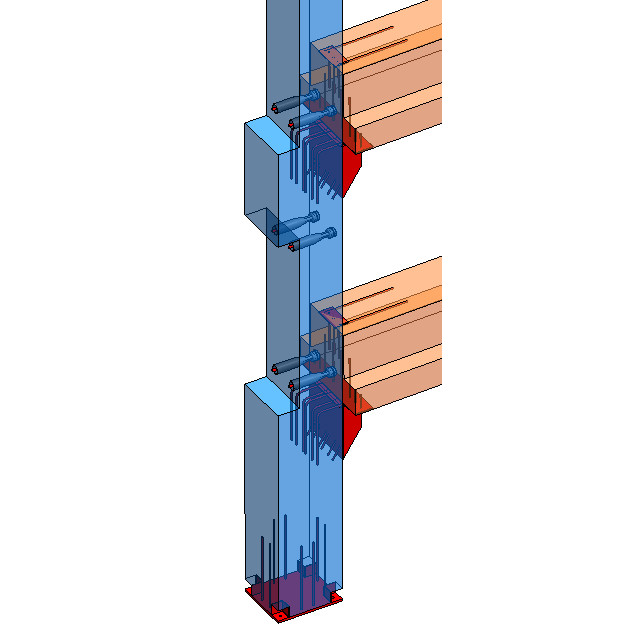
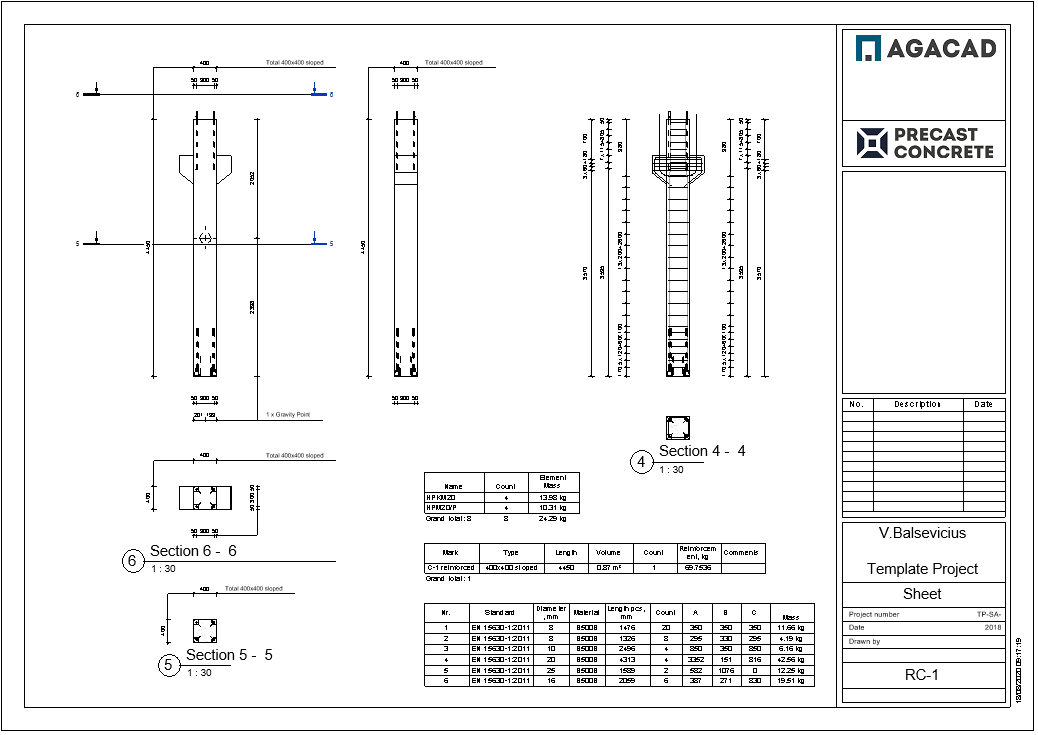
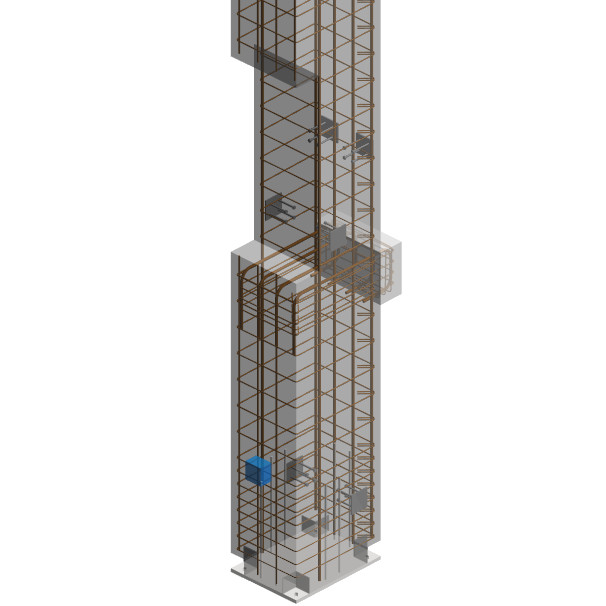
4. Placing rebars
An even more detailed project needs rebar, and that’ll bring us up to LOD400. For that we’ve got Column Reinforcement, another tool that’s part of our Precast Concrete design software (it’s also got tools for placing wall and beam rebar). The rebar tool lets us define configurations for different types of columns and corbels, and then we just select columns, run the Create Rebar command, and all reinforcement for all selected columns is created at once.

All connection families and reinforcement are created by using standard Revit families. That means they can be adjusted, tweaked, added, removed, moved, or copied later as the situation calls for.
5. Numbering of columns panels
Once modeling is done, use Sort Mark to add mark values automatically via your predefined configurations.
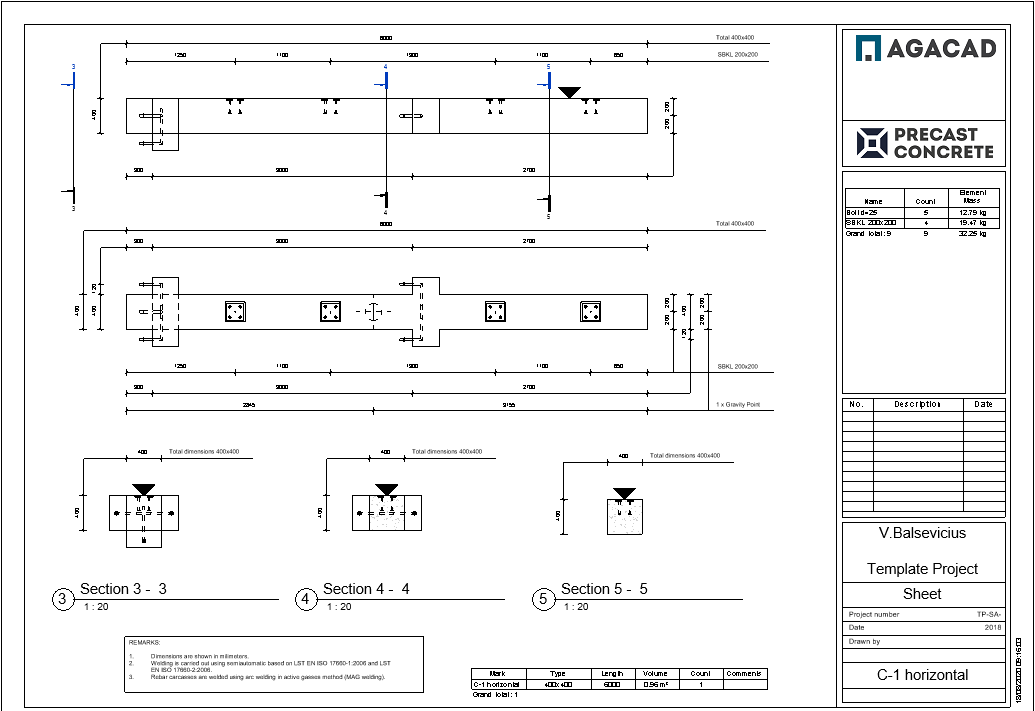
6. Creating shop drawings
And the last step would be to create shop drawings, which is quite easy if you know how to do it with Smart Assemblies – another tool from Precast Concrete. It will create any number of views, dimensions, and schedules and place everything on the sheet according to your standards.