Dimensioning rebar depends on company standards or on requirements coming from the manufacturer. Either way, it’s relatively easy to do once you’ve got the rebar modeled in Revit®.
One way you can do it is by placing dimensions and changing visibility settings using native Revit commands. Another way is to automate that process with a Revit plugin. For precast elements, I would suggest Smart Assemblies, as it can create views, dimensions, schedules, and sheets – everything you need for shop drawings.
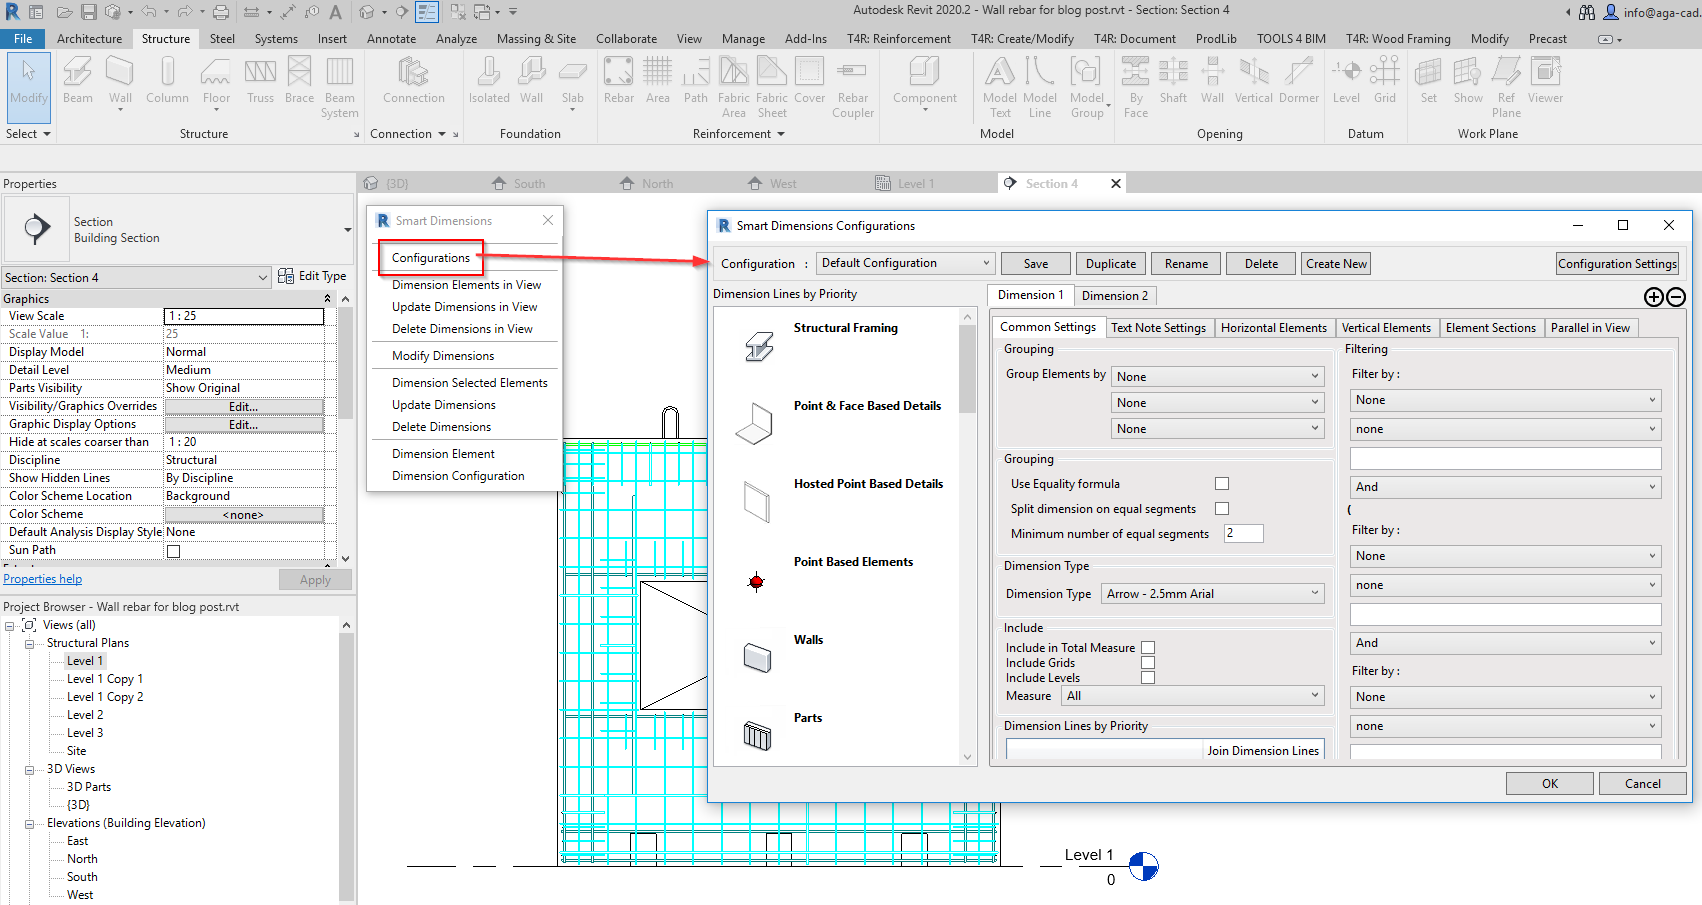
Alright, so I will skip how to do the process manually in Revit, which hopefully is covered on YouTube or by your Revit software providers, but here is how you can do it with our tools. I will jump straight into the Smart Dimensions tool that’s part of Smart Assemblies and open its configuration. (Video below.)
1. Open Smart Dimensions
Once you’ve opened Smart Dimensions, go to its configurations.

2. Set up rebar dimensions
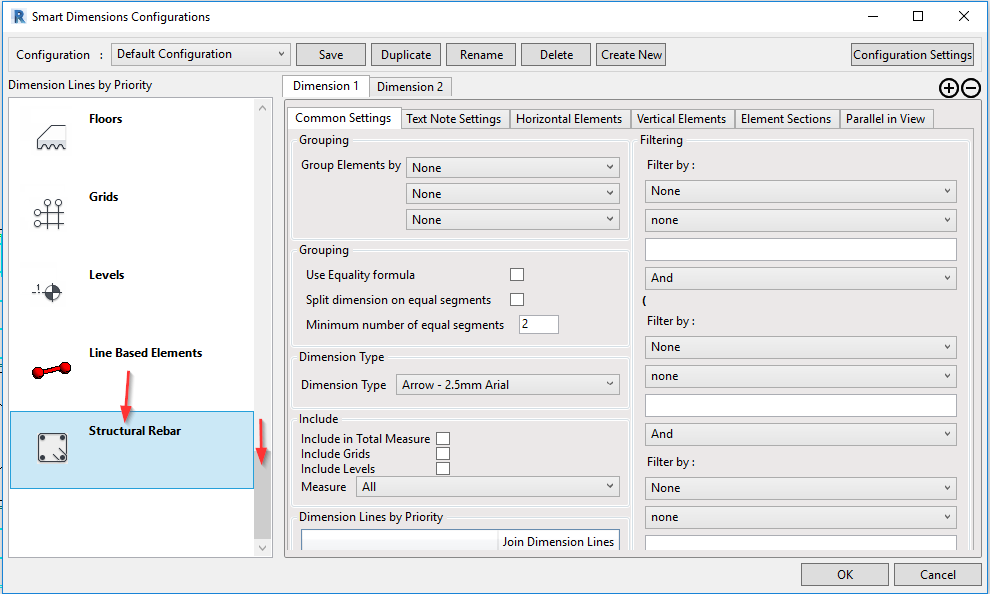
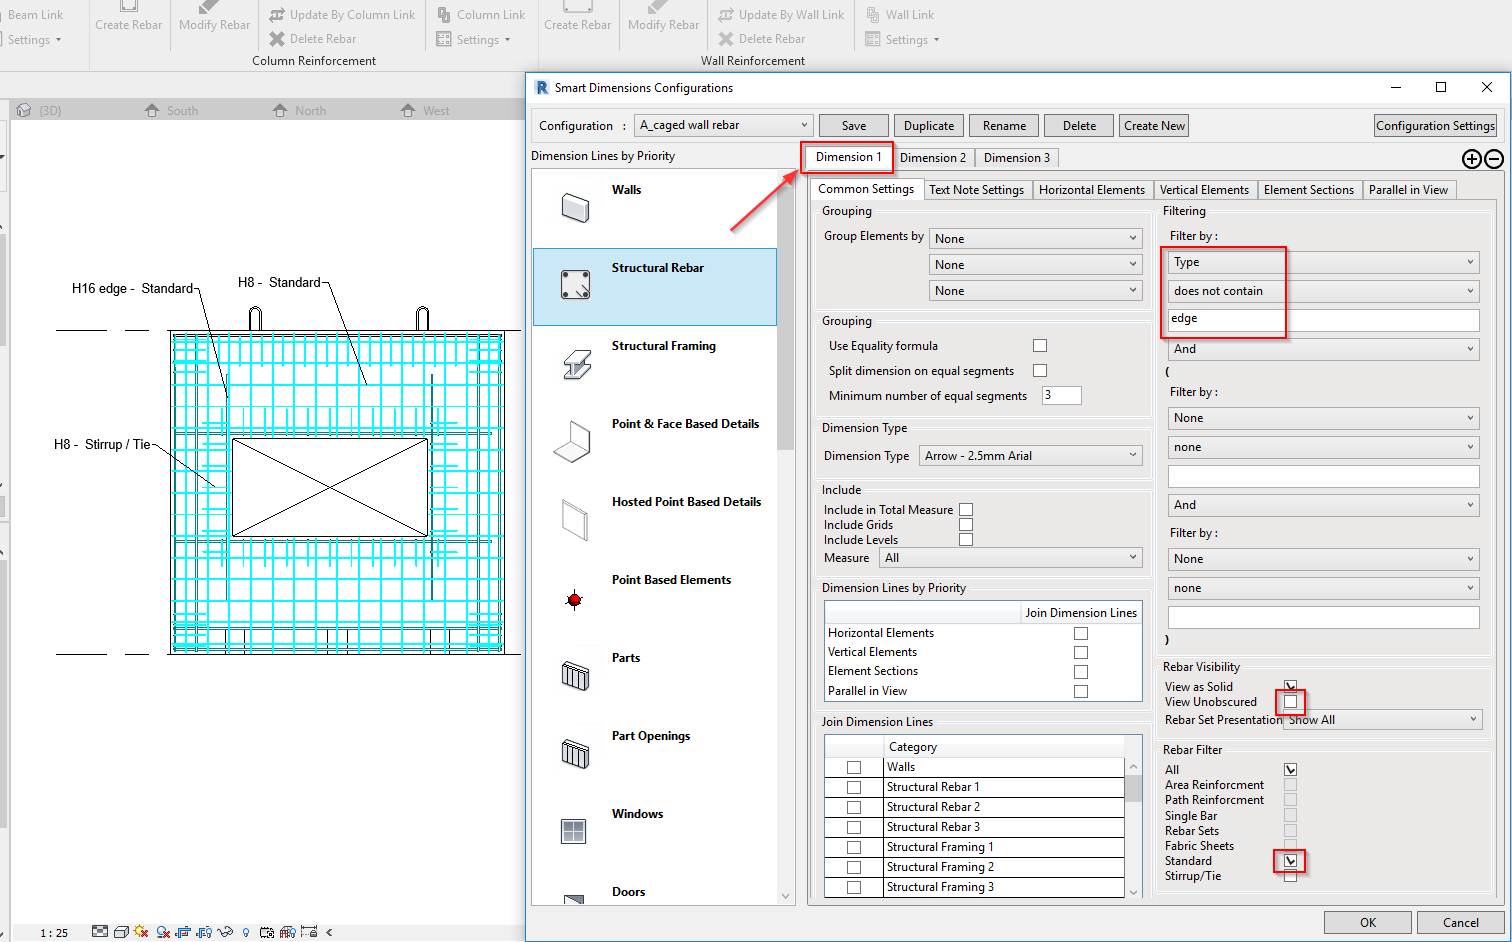
At the very bottom of the left scrolling section is the ‘Structural Rebar’ tab. That is where I will set up rebar dimensions.
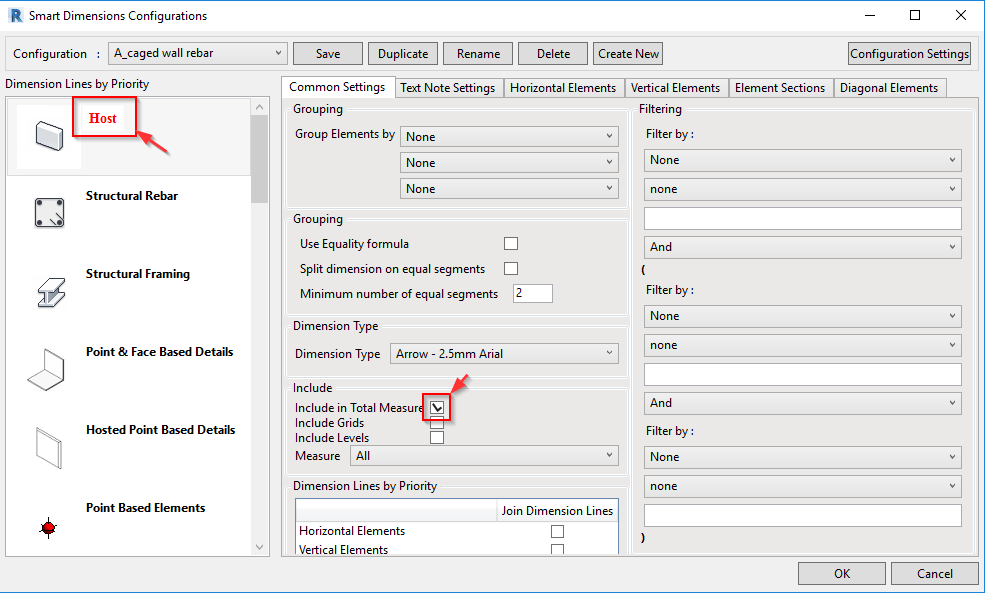
I created a new configuration with the selected name and then drag-n-dropped the Rebar tab to the top of the category list. Another thing that I need to do is to select a host for the rebar – whether it will be a wall, column, floor, or beam. To do that, open the Host category tab and select ‘Include in Total Measure’. That way the software will know where to start dimensioning.
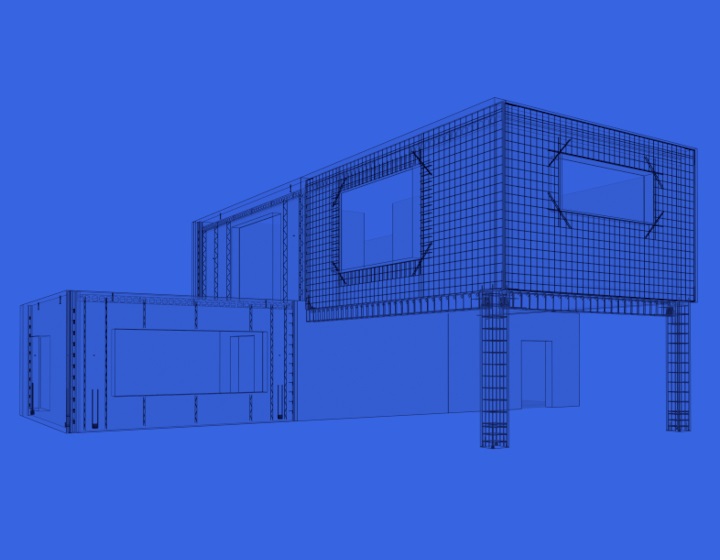
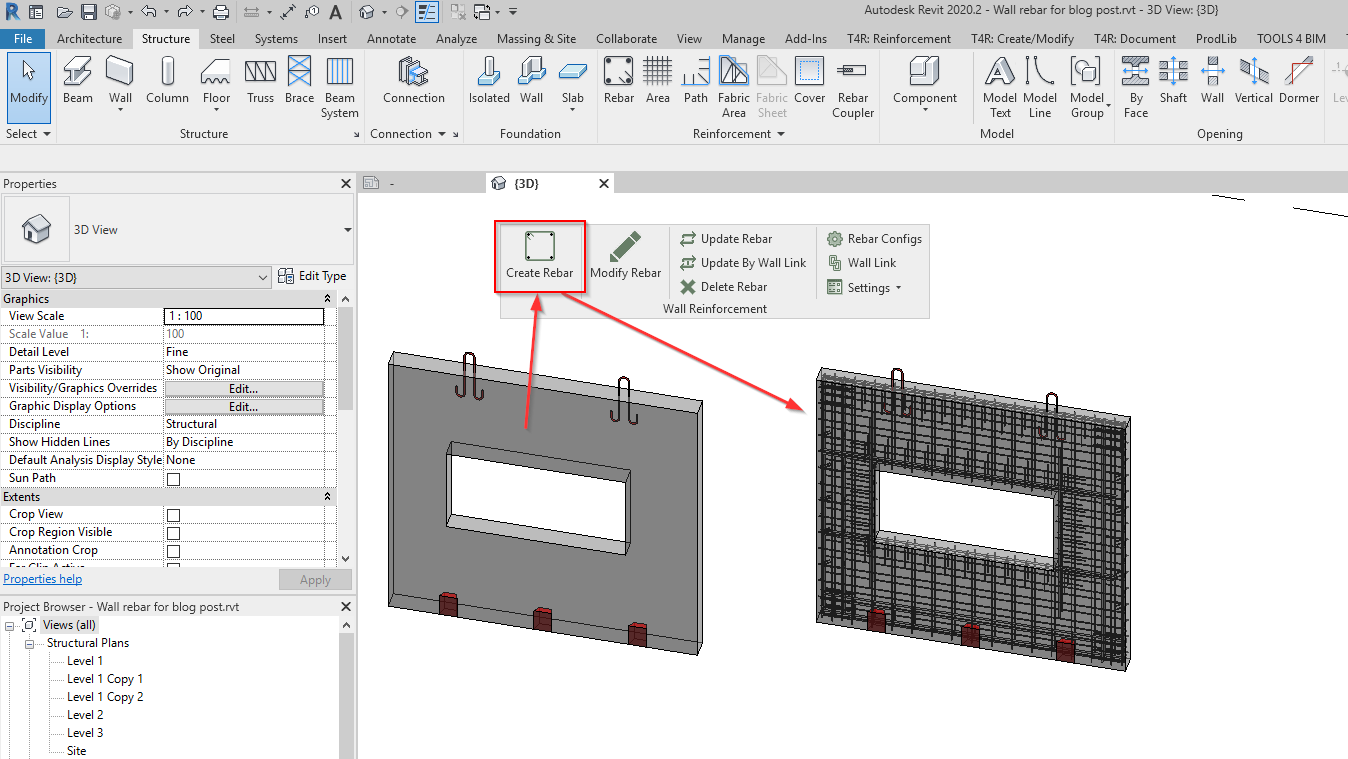
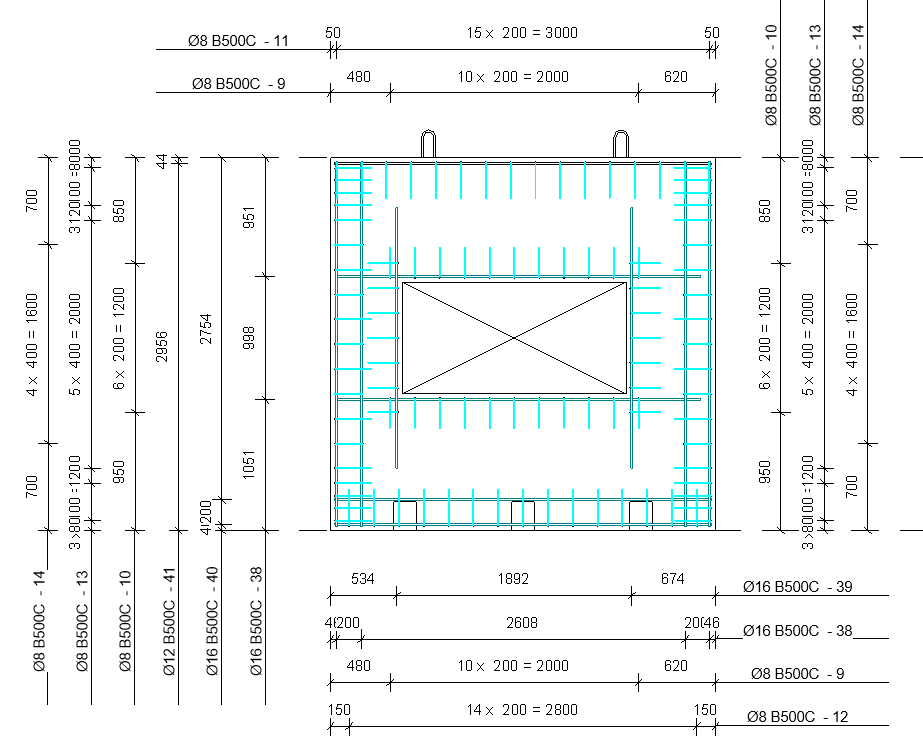
Now let’s see an example with a wall. I have created rebar with our Wall Reinforcement tool, and I’ve used different rebar types.
Based on that, I will apply my dimensioning and visibility settings. I want to hide (set to be unobscured) all standard bars, whose type name does not include the word ‘edge’. In my case here, it’s the main mesh of the wall.
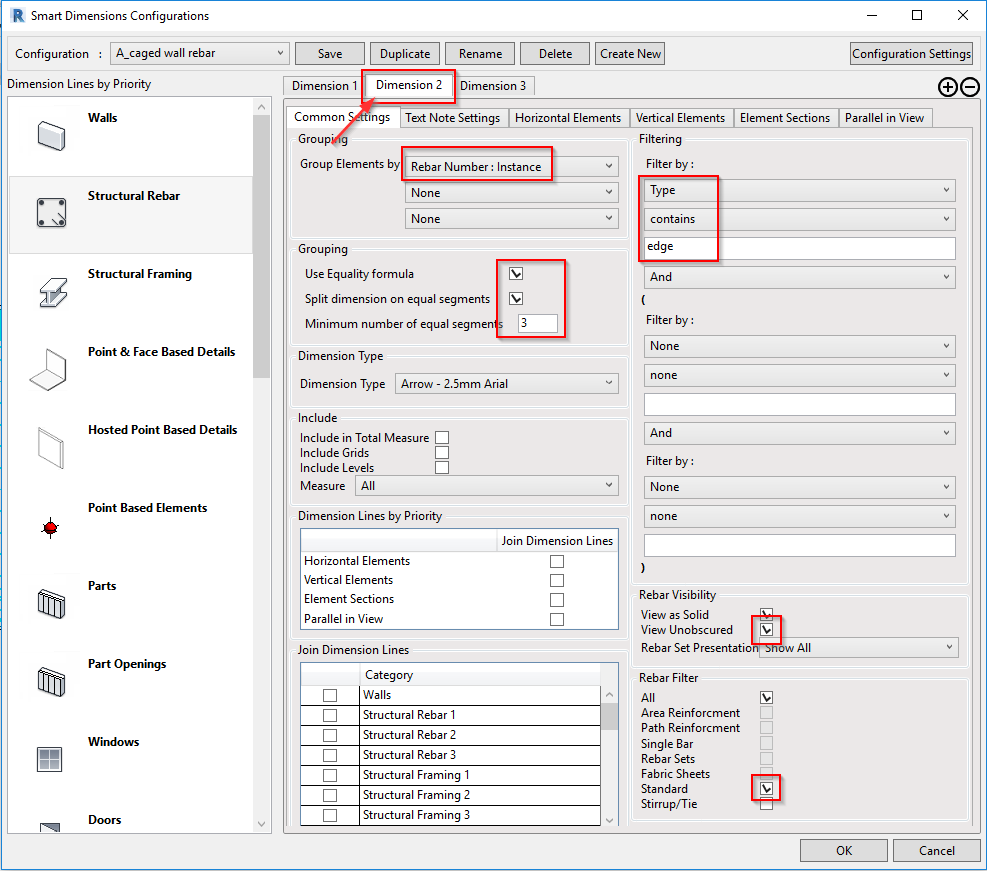
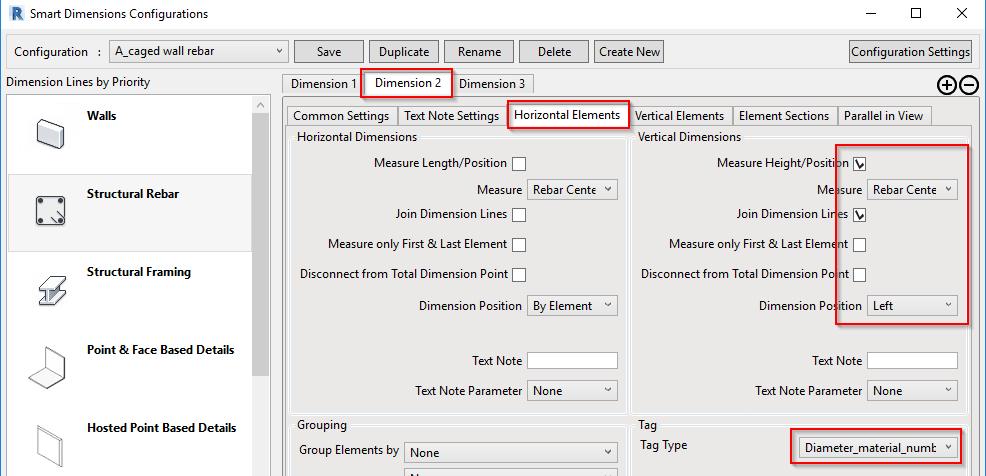
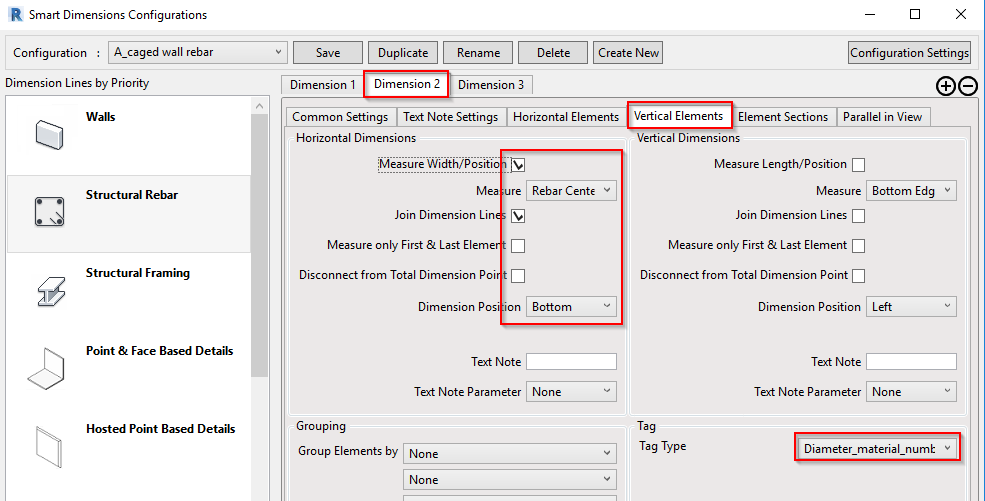
But edge bars should be visible and dimensions should be grouped by Rebar Number, which is automatically given by Revit for all different rebar. So, I do this in the tab ‘Dimension 2’:
Tags should be created and aligned with dimensions.
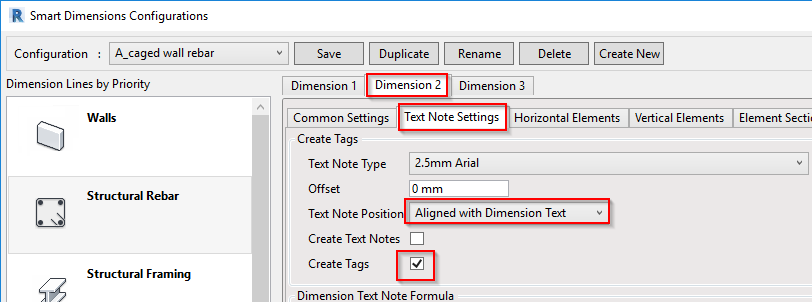
And I want to measure them at the same time when placing tags to get information about them in the view.
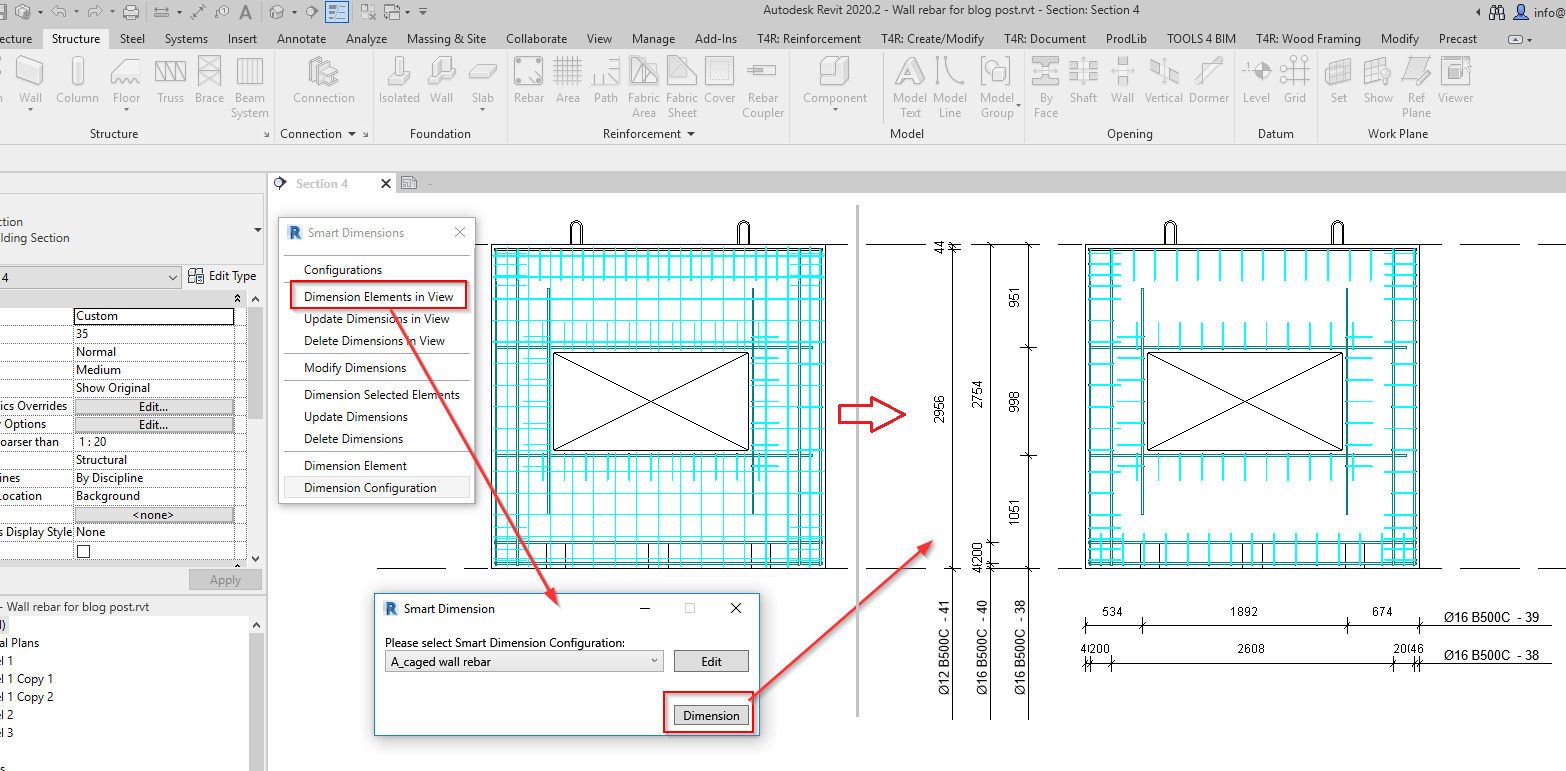
3. Apply dimensioning rules
After this relatively short setup, apply dimensioning rules on Wall front view. The result would be like so:
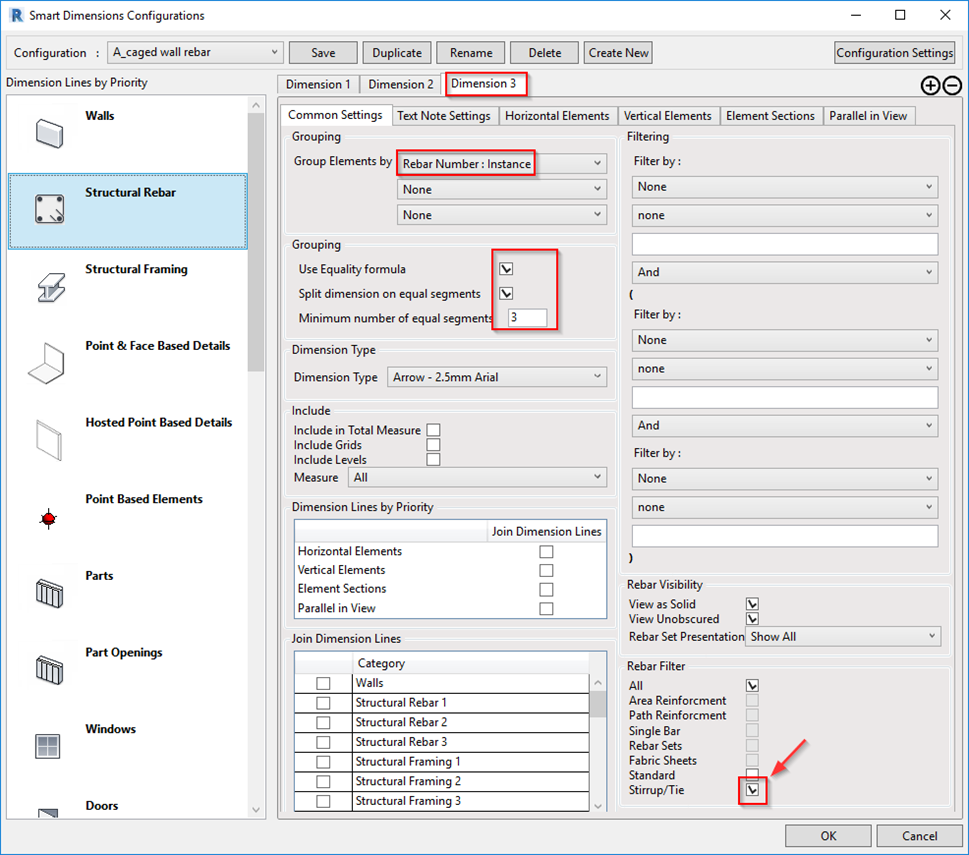
4. Dimension stirrups
Now I also have stirrups in my view, so I will go back to the configurations and the tab ‘Dimension 3’. Here I will make some settings for measuring my stirrups. Measuring and tagging options will be the same as for edge bars, but in Common settings, I select the ‘Stirrups/Tie’ option to be a filter for all settings in the tab Dimension 3.
5. Final result
And the final result I get for automatic rebar dimensioning in Revit looks like this.
These dimensioning settings can be added to Smart Assemblies dimensioning rules and automatically applied to all wall assemblies. Also, configurations are saved in your computer, so you can use them in a future project. Forget about recreating those configurations again – enjoy the fruits of your work!
Here’s a video of the above workflow:
So that’s how to place dimensions for rebar in Revit. We hope current Precast users will find this workflow helpful.