
Several new features have been added and UI changes have been made in the latest update of our Smart Assemblies BIM Solution for Revit®. Smart Assemblies is our plugin that makes preparing shop drawings in Revit a breeze.
The latest features, which we’ll go through below, come as a result of client requests that we had received. Now we’re happy to show what we’ve implemented so that Revit users can spend more time on design work and less on repetitive tasks that don’t add value.
Measure to any point of your element automatically
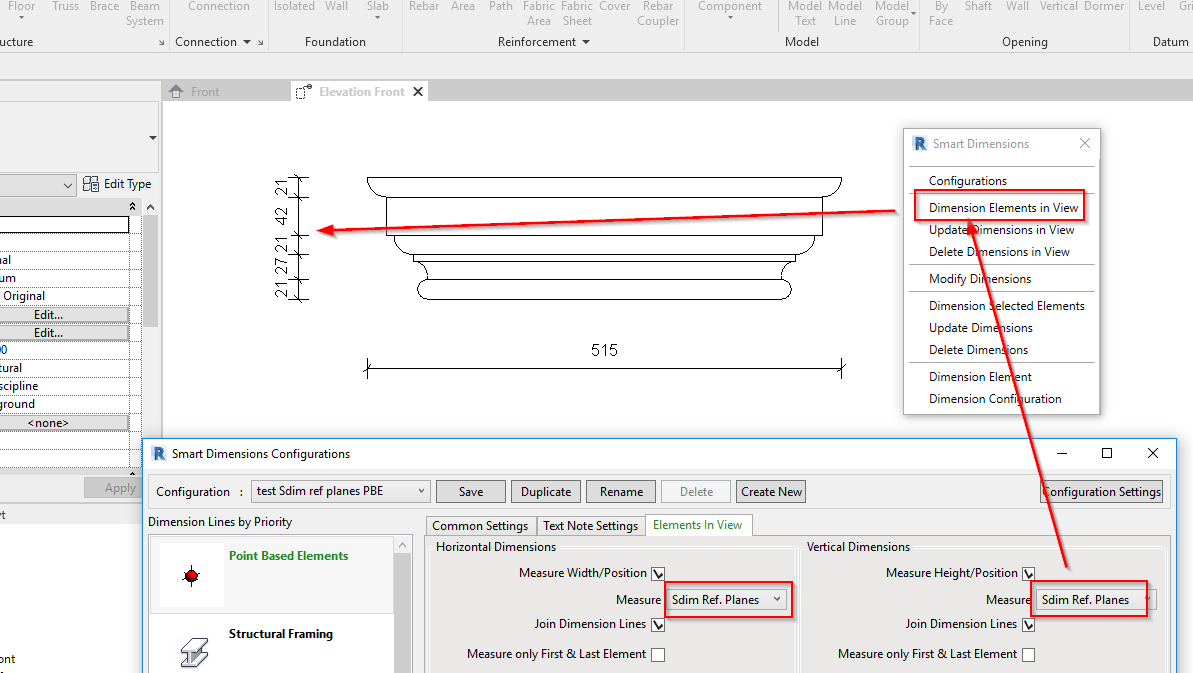
With the Smart Dimensions tool that’s part of Smart Assemblies, you now have the option to measure Sdim Ref. Planes.
How? Create ref planes in the family and just make sure their name contains “Sdim”.

Now you can set your dimensions to snap to them.
Automatically hide selected reinforcement in the view
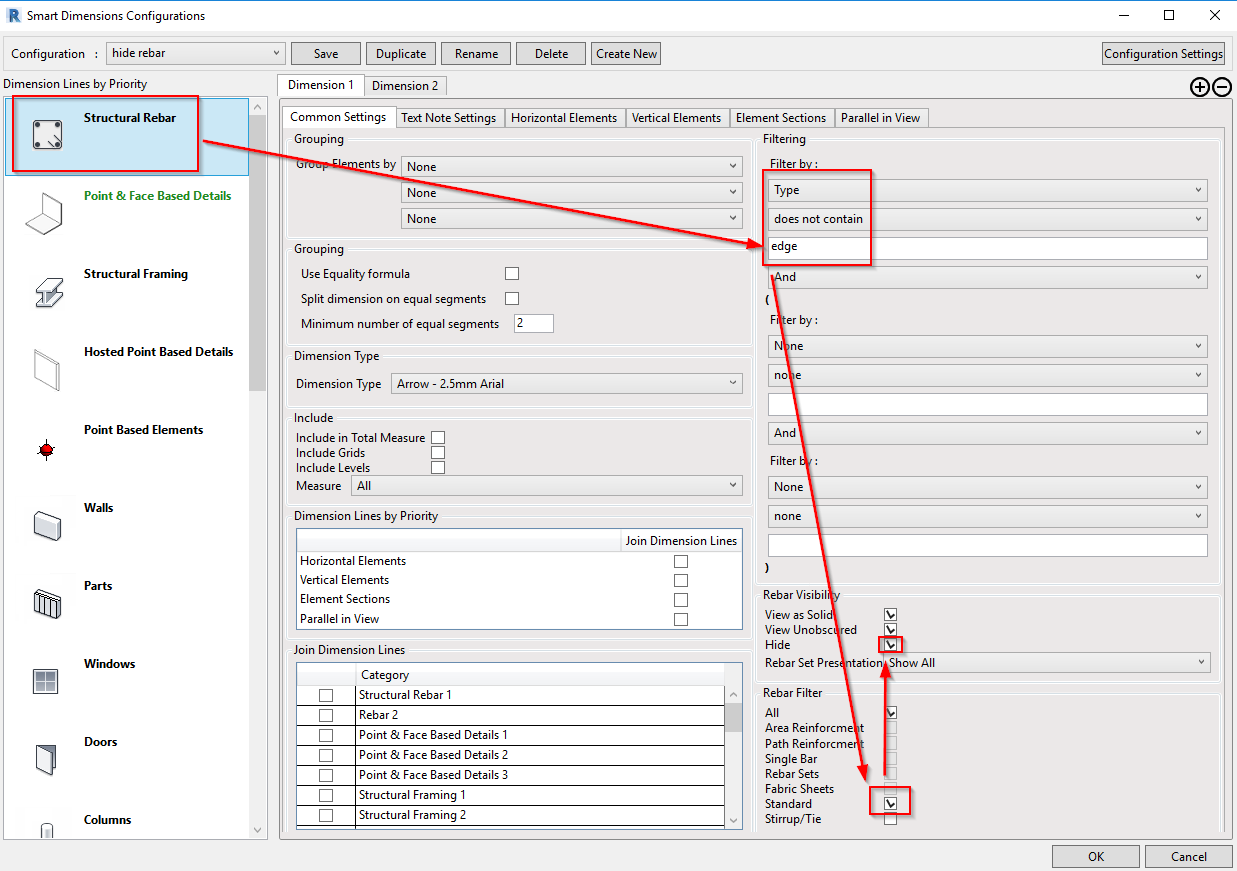
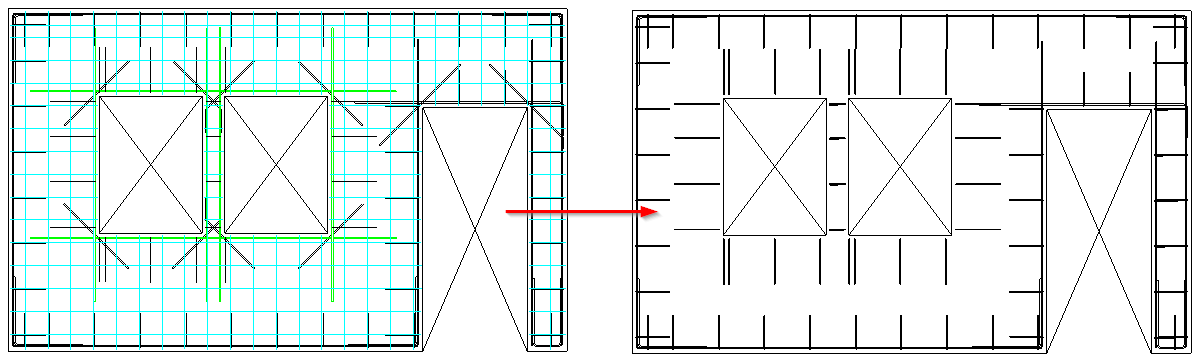
In the Rebar category of the Smart Dimensions configuration, now there’s an option to Hide rebar. If this option is turned ON, it will hide filtered reinforcement in the view.
After configuration settings have been applied:
Measure nested elements differently
An option to measure only the main Family or main and nested Families (as it was before) has been added to the Smart Dimensions configuration.

Measure elements from linked Revit models automatically
Elements from linked models can now be measured with Smart Dimensions. It’s particularly important when applying Smart Dimensions in plan views, sections, and elevations, not in Assembly views.
In Configuration Settings of Smart Dimensions, select ‘Measure Elements from Linked Models’.

Example – An MEP project has a linked Revit project with walls and openings (face-based void families). Smart Dimensions can measure those now:
Exclude selected elements from total measure
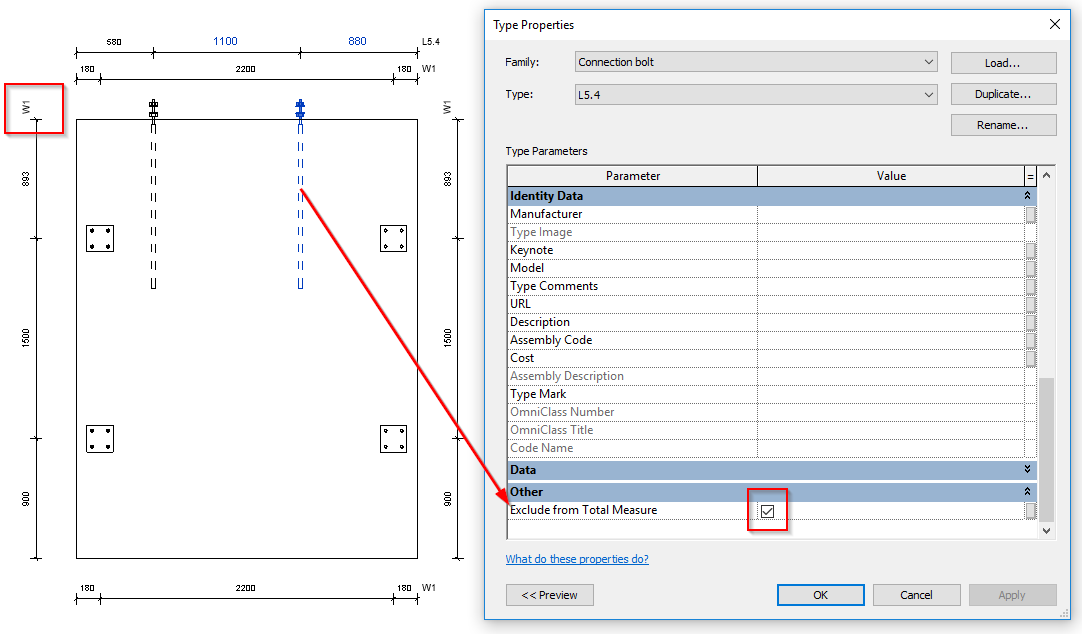
Sometimes engineers use the same Family templates to build Hosts and hosted elements, so it’s hard to tell what should be measured and how. Now it’s possible to separate them by adding a special parameter – Exclude from Total Measure – to any element and that element will not be used in the total measure. This parameter is a Yes/No parameter, can be Type or Instance, and should be turned ON to take effect.
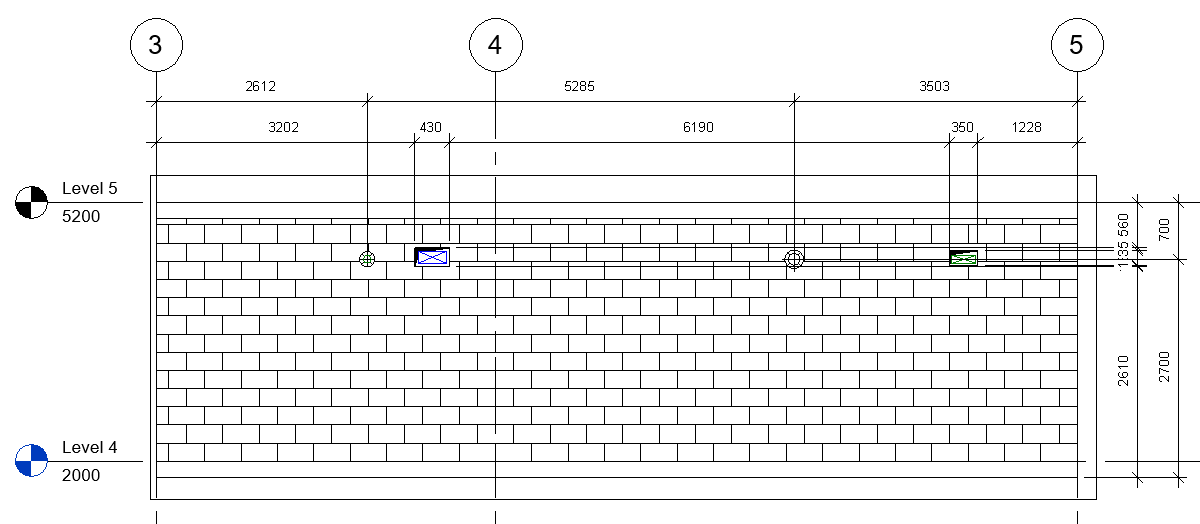
Example – Let’s say ALL elements were created on the same Family Template and all of them are work-plane based. The tool will measure from the boundaries of the most extended part; but that’s unacceptable because in this case the bolts should not be counted as the point from which to start measuring.
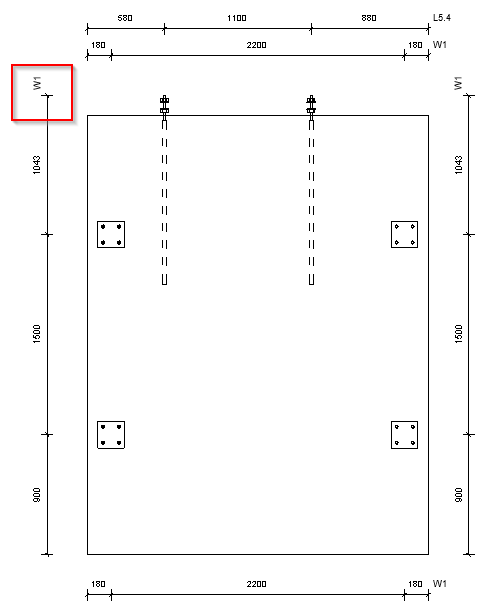
But after adding and turning ON the ‘Exclude from Total Measure’ parameter for the hosted element (i.e. the bolts, in this case), dimensions are placed as they should be:
Hide unnecessary options in UI of Dimensioning Rules
A toggle to hide old measuring options for hosted elements has been added to the Dimensioning Rules window. Tick ‘Hide Old Options’ ON/OFF to hide/unhide the old options. The old measuring options were working fine (and still do), but since we have Smart Dimensions, it’s better to use it, as it has more flexibility. This option makes the UI clearer.

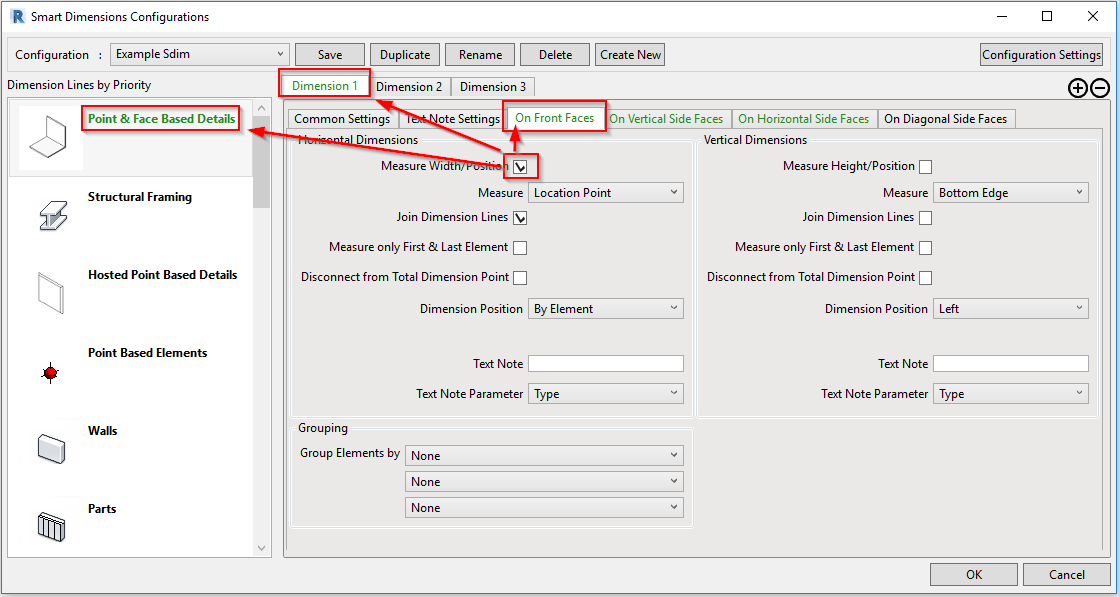
UI update simplifies navigating configuration settings
In Smart Dimensions’ configurations, tabs in which ‘Measure Position’ is selected will turn green, making it easier to track where measuring options are selected.
So those are the new features that we’ve added to Smart Assemblies. We hope it’ll make your job in Revit more enjoyable and less stressful!
@Current users of Smart Assemblies: Be sure to download this update and try it out.
Note: Smart Dimensions is part of not only Smart Assemblies but also part of Cut Opening, Wall Reinforcement, Precast Concrete, Wood Framing, and Metal Framing. The updates made to Smart Dimensions that were mentioned in this blog post will be pushed to the other solutions that contain Smart Dimensions.
Interested in trying out Smart Assemblies to speed up your design processes in Revit? Take a free 14-day trial! Start by downloading our TOOLS4BIM Dock.
Would you like a free demo to go along with that trial?
Yes? Then…
*Pro Tip: It’s best to have the demo before testing out the tool for yourself. That way you’ll go into your free trial period with a better idea of how to use the tool.


