By Povilas Sindriūnas, AGACAD Architectural Engineer & BIM Application Engineer

How many times have you faced pure frustration when a BIM model went on loading perpetually? Or when opening a model or when processing a not-too-complicated task has left you waiting and staring at the screen at the expense of your precious time? This unnecessary and wasteful practice is too often commonplace in the office of anyone working in BIM principles and generally handling large Autodesk® Revit® models. Time is scarce and issues like this aren’t fully appreciated when they appear. They are often overlooked and mistaken for poor performance of a workstation.
To fully understand why this is happening and what can be done to improve model performance, we need to address the core of the issue: regular model maintenance and staff training to model, draw, and manage information to a set out standard. Firstly, we should understand that Revit is controlled by rules and relationships that form the basis of all work. If they aren’t followed accordingly, things can get very messy. To keep good health in check and avoid the mess as much as possible, there are tools and techniques at your disposal.
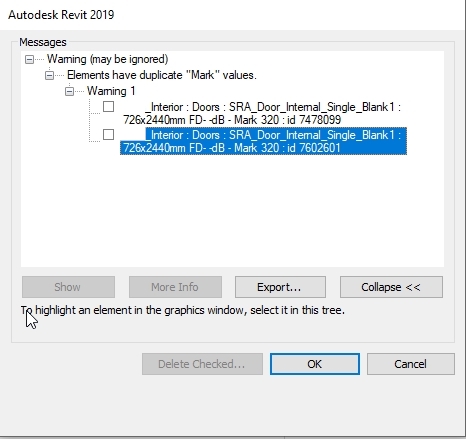
Inbuilt Revit Warning System
Warnings protect the integrity of the model and your data. Not all warnings affect performance; less serious ones are only there to inform the user. When confronted with 1000’s of warnings in a file, you need a strategy for resolving them timely. Best practice is to have a plan for how warnings will be taken on board and resolved by the team prior to labor-intensive modelling. Make priorities: performance, accuracy, documentation. Warnings typically peak before deadlines and some types of warnings are more common at different phases of the project. It is important to learn which warnings have a significant impact on model performance and need to be rectified.
Types of warning messages:
1. Informative Warning – lets you know about an error and is normally advisory. Not critical.


2. Serious Warning – can be ignored but should be addressed in due course.


3. Critical Error – must be resolved. Note that you can find elements in question by their ID number.


4. Fatal Error – indicates a serious error in the model or a one-off tantrum that normally will terminate the session.

Possible responses for managing Revit warnings:
1. Ignore them – unsustainable
2. Resolve as they appear – unsustainable
3. Employ someone to fix your model – can be done if time constraints are pressing, but issues will reoccur, and no one learns.
4. Empower the team with the knowledge of how to fix them – ideal, reduced likelihood of issues reoccurring and is a more efficient way of working.
Over time warnings tend to accumulate in Revit project files, ultimately affecting model performance. A convenient way of surveying and scheduling all warnings is to open the Review Warnings window located at the top of the ribbon. From there you can export an html Revit Error Report in text format and prepare an Excel-based report or simply share with your project team if necessary.

Inbuilt Revit Audit Tool
The Audit function scans, detects, and fixes corrupt elements in a model; however, it does not provide feedback on which elements have been fixed. Models should be regularly audited – every two weeks for a large project, once a month, or a minimum at the end of the design stage. Ideally, audits will be carried out by the most experienced users in the office. Auditing Revit models can be time-consuming depending on the Revit file size and model complexity.

To help further ease the workflow and performance, projects should be set in line with internal company standards, e.g. clear naming and numbering conventions, etc. This will avoid possible confusion when manipulating the Revit model and creating documentation. Worksets come in handy for making sure the project is organized consistently and would allow for a limited file size. A recommended practice is to develop a standardized template for regular auditing. This may consist of a model-vs-company-standards compliance check.
In Part II of this series on Revit Model Management we’ll take a look at how to keep Revit warnings to a minimum while retaining top performance.
Subscribe to our BLOG newsletter and stay updated on upcoming free webinars, Revit tips & tricks, and the latest news on AGACAD TOOLS4BIM development and applications!


