
Would you like to generate QR codes or barcodes that can be placed on your shop drawings in Autodesk Revit? We recently added a new feature to our Sort Mark tool for Revit that allows you to do exactly that.

One of our T4R Add-ons, Sort Mark is a powerful plug-in that automates sorting and numbering in Revit. In addition to renumbering elements the way you want, it can also detect and renumber grids, determine swing direction and orientation of doors, recalculate shared coordinates, and more.
In this post, we’ll show how to generate QR and barcodes using Sort Mark. This feature was something we had been thinking about for some time, especially after a client requested it. Since you can place anything you need into that QR/barcode, the possibilities are vast, as it can ensure better quality control, enhance collaboration between teams, or speed up the manufacturing process.

QR/Barcode Generator for Revit
The idea behind this new feature is to generate a code as an image based on your selected parameters (you can also crop the values of those parameters, add suffixes, prefixes, etc.).
The newly-generated image is placed by default in the Image type parameter, but you can create any parameter in which the image should be placed.
To see that QR or barcode, you need to make a Schedule with that Image parameter selected and drop that schedule in your drawings. You can do that manually or automate it by using AGACAD’s shop drawings BIM tool.
Let’s look at how to implement the QR / Barcode generator in your workflow.
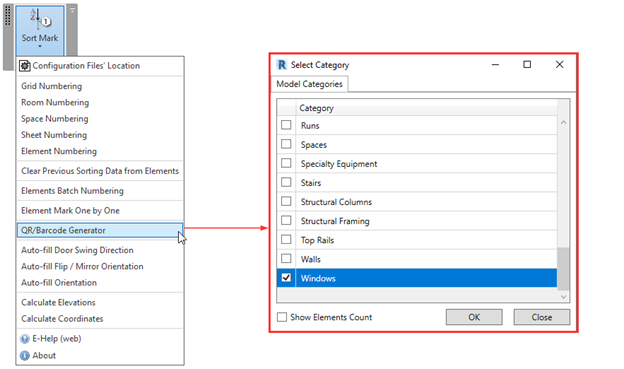
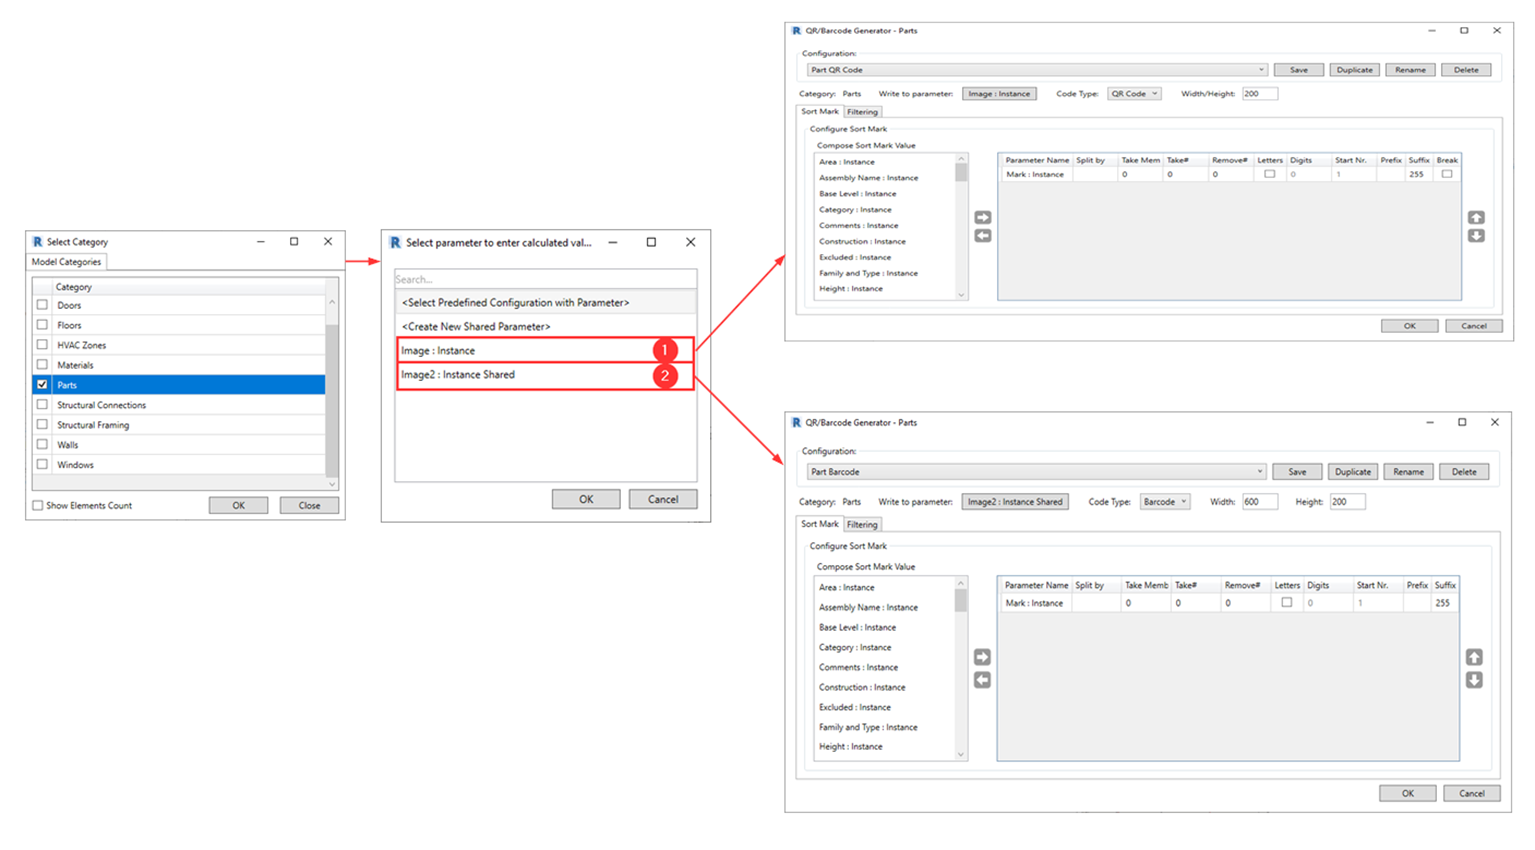
First, you need to decide which category of elements should get the QR or barcode. For this example, we will select the Windows category.
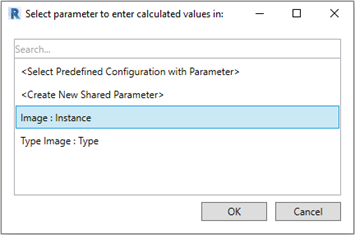
After selecting the category, you will be prompted with a window asking you to select a parameter where the new QR or barcode should be written. You can create a new Shared Parameter for the selected category, but in this case, we will select an existing ‘Image: Instance’ parameter.
After selecting the parameter in which to enter the new QR or barcode value, a configuration window will open where you will need to enter some settings before generating the new codes.
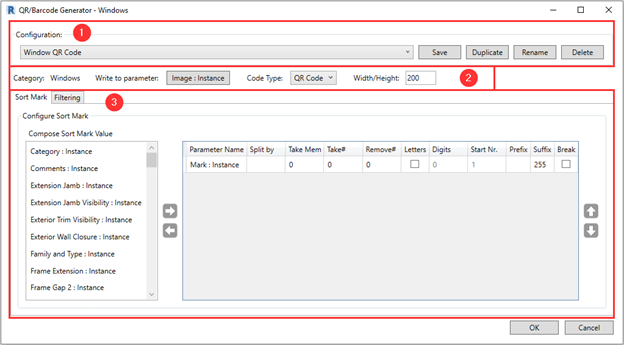
Expand the sections below for explanations of the configuration window seen above.
Here you can save your setting as configurations for future use. These will be saved in your selected Configuration file location. You can save, duplicate, rename or delete these configurations.
Information showing the chosen Category as well as the Parameter. Here you can change the parameter, if need be.
You can select the Code Type as QR Code or Barcode and define the size of the image to be generated:


In the Sort Mark dialog window you need to select parameters from the left that will override the chosen parameter’s value (in this case, Image: instance. You can then add a Prefix, Suffix, and Take or Remove segments of the chosen parameter’s value.
In this case, we will select the ‘Mark: Instance’ parameter and give it a Suffix of 255.
In the Filtering dialog window, you can filter out elements from the chosen category, if needed.

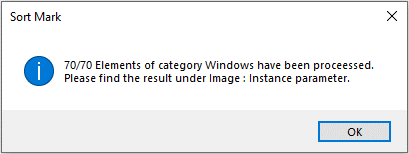
After clicking OK, a window will show how many elements have been processed of the chosen category. In this case, 70 windows were given the newly generated barcode.
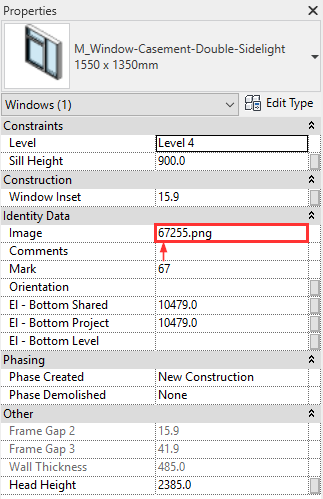
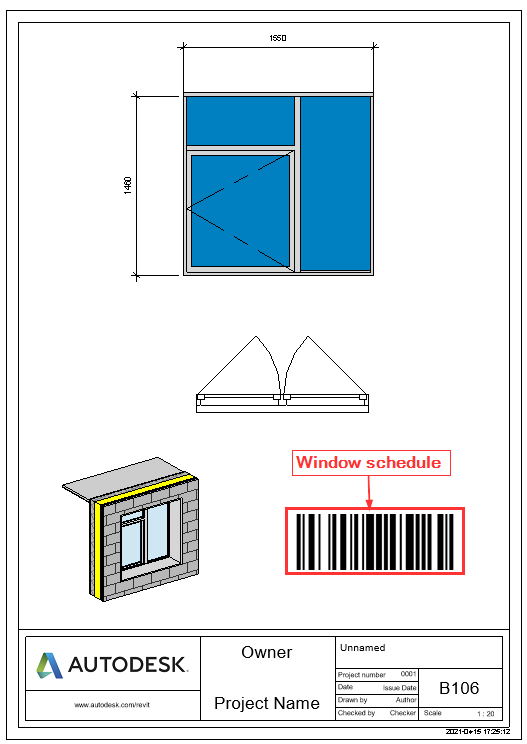
When selecting one of our windows, we can see that the barcode was generated as a .PNG image in the Image parameter with the Mark value and a suffix of 255.
To see this barcode, you will need to create a schedule adding the Image parameter and any additional parameters if you want to filter out certain elements. In this instance we add a Mark parameter to use for filtering out window instances.
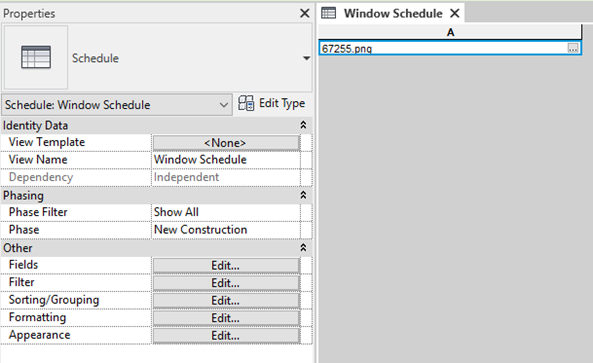
Finally, you can create your sheets, add your schedule where you want, and you will see the generated barcode as an image.
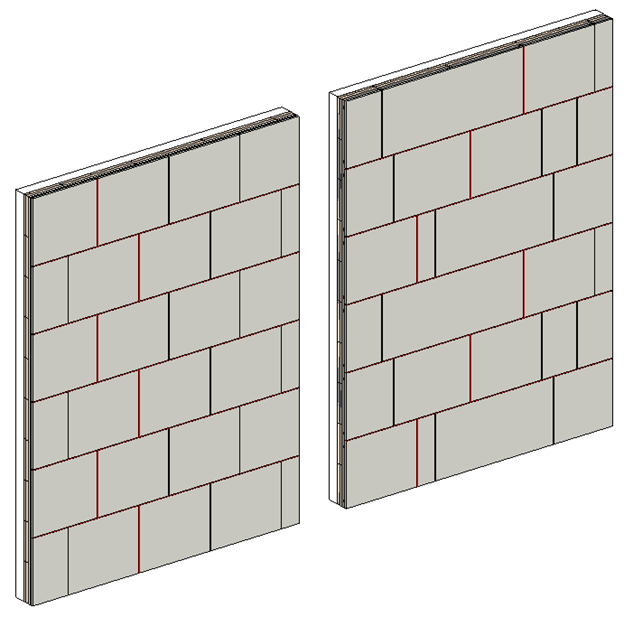
Let’s try and create a Barcode and a QR code for our parts and put them in our Assembly shop drawings.
For this example, we will use exterior cladding solution as our parts.
We will start with the same workflow as before. Generate QR and Barcode using Sort Mark. In this case, we need to have two image parameters — one for the QR code, the other for the Barcode. So we will run the QR/Barcode generator twice to populate both Image parameters.
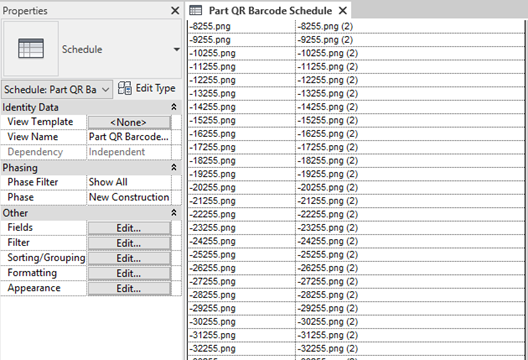
Once we have generated both codes, we can make a new schedule for our parts showing those codes as images.
Later, we place that schedule in our sheets automatically using the Shop Drawing Configurations from Smart Assemblies.

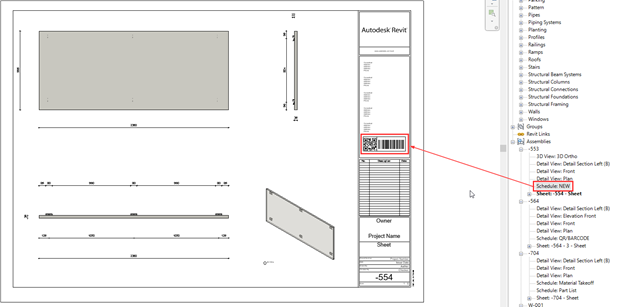
After creating assemblies for our parts, the QR/Barcode schedule named “NEW” will appear for our instance parts, and you can place it wherever you want. Then use the same sheet as a template when creating future assemblies, and every QR/Barcode will be unique per part instance.
So that’s the new QR/Barcode-generating feature that’s in our Sort Mark add-in for Revit. Hopefully designers in various fields of the AEC industry will find this option useful and find creative ways to use it.
Current users of Sort Mark: Don’t forget to download this update so you can start generating barcodes.
Interested in trying out our Sort Mark tool for Revit? Take a free 14-day trial! Start by downloading our TOOLS4BIM Dock.


