Tagging elements in Revit is a relatively straightforward task. Revit has a range of default tags to offer and some basic functionality as well. You can even place tags automatically by chosen category. That is a great feature…until you need to adjust each tag on the drawings…keeping in mind that each drawing may contain dozens of them.
It’s an issue that Revit users commonly face. That’s why we developed and recently released a configurations-based solution for it. Introducing Smart Tags.
Smart Tags dramatically extends native Revit tagging functionality, saving you a lot of time during the documentation process. It can be used in combination with Smart Views and Smart Dimensions to take full advantage of automated drawing creation. Based on your criteria, you can preset what views will be created and how tags and dimensions will be applied. All this is done automatically once configurations are confirmed.
Where is Smart Tags?
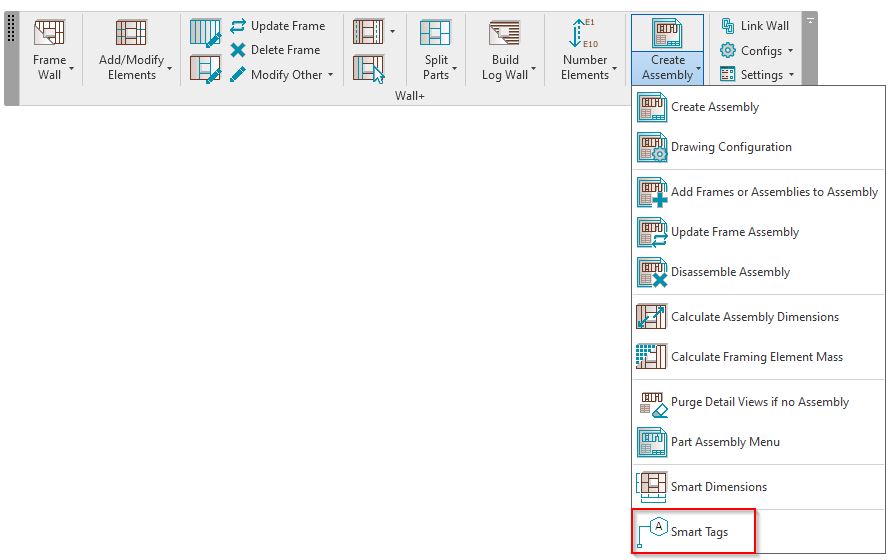
Smart Tags is an included feature in the Wall, Roof, and Floor modules of our Wood Framing and Metal Framing software packages, including our software for framing buildings comprising SIPS, CLT, oak, ventilated facades, curtain walls, and sandwich panels. You can find Smart Tags under Create Assembly.
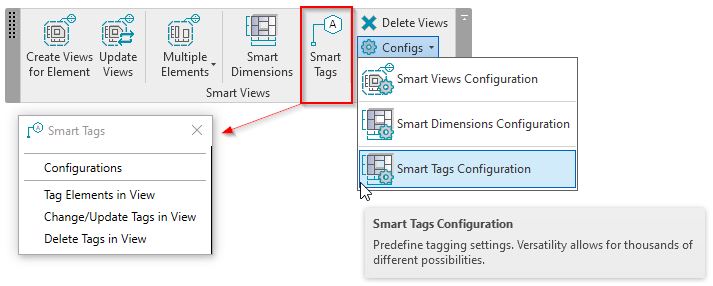
We also integrated Smart Tags into our Smart Views add-on.

Let’s look at how to automate tagging using Smart Tags.
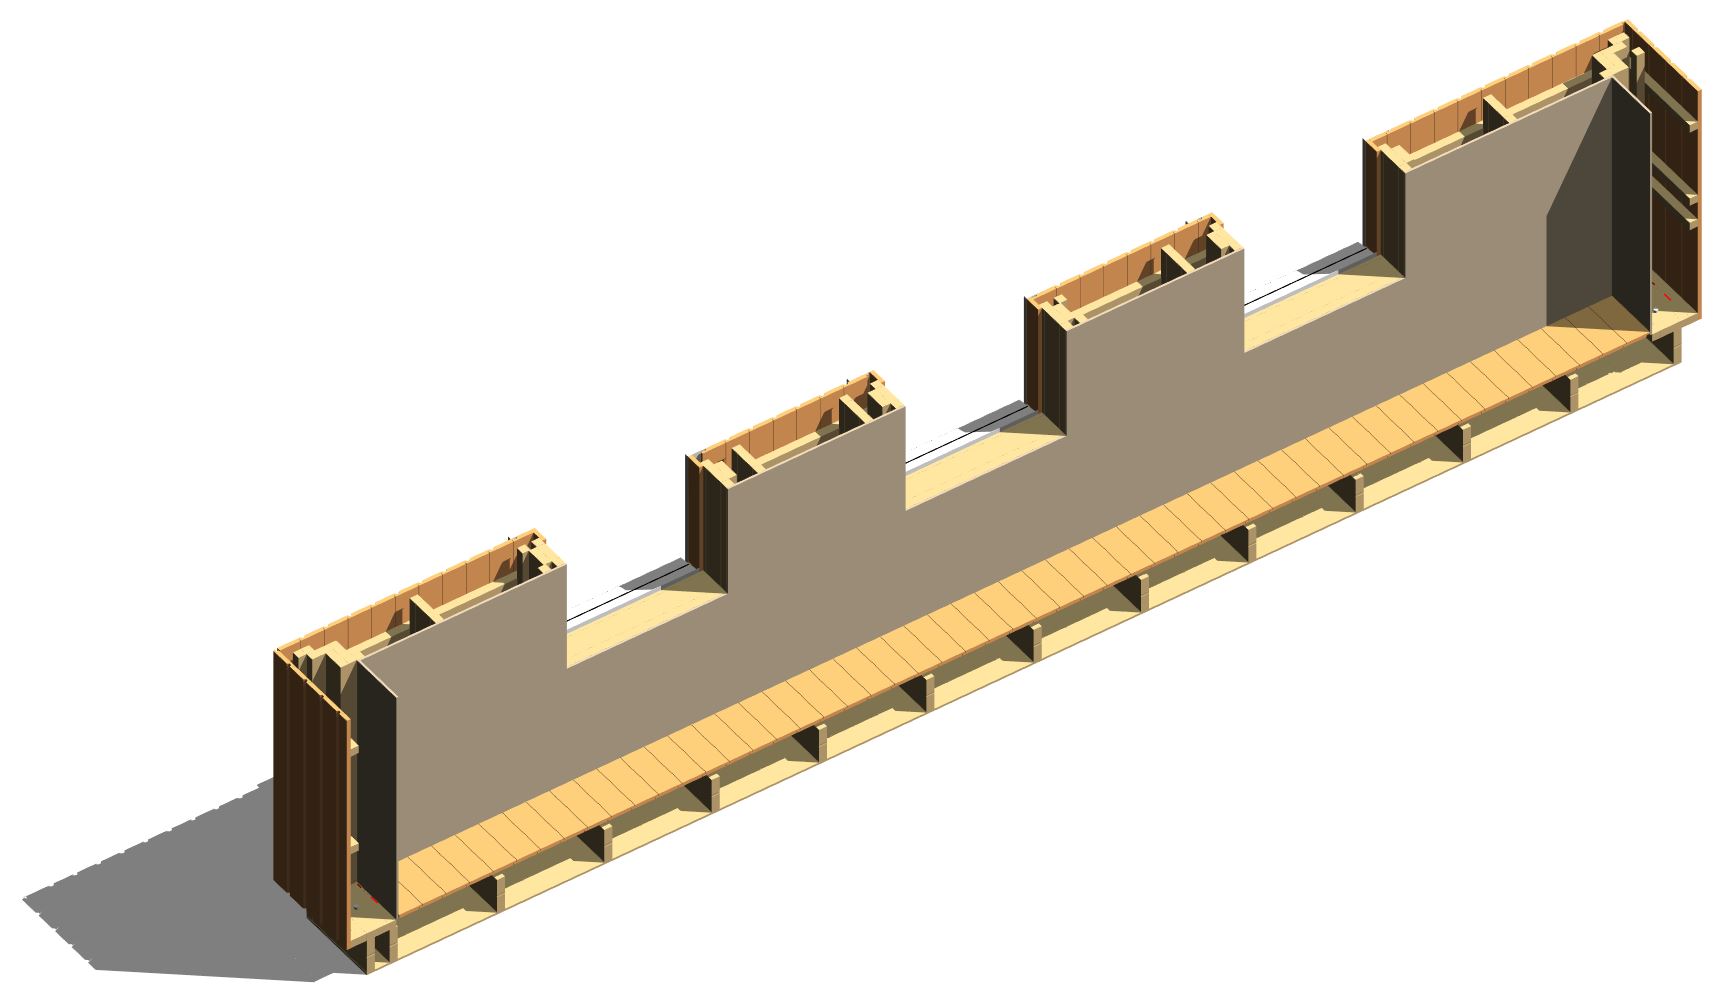
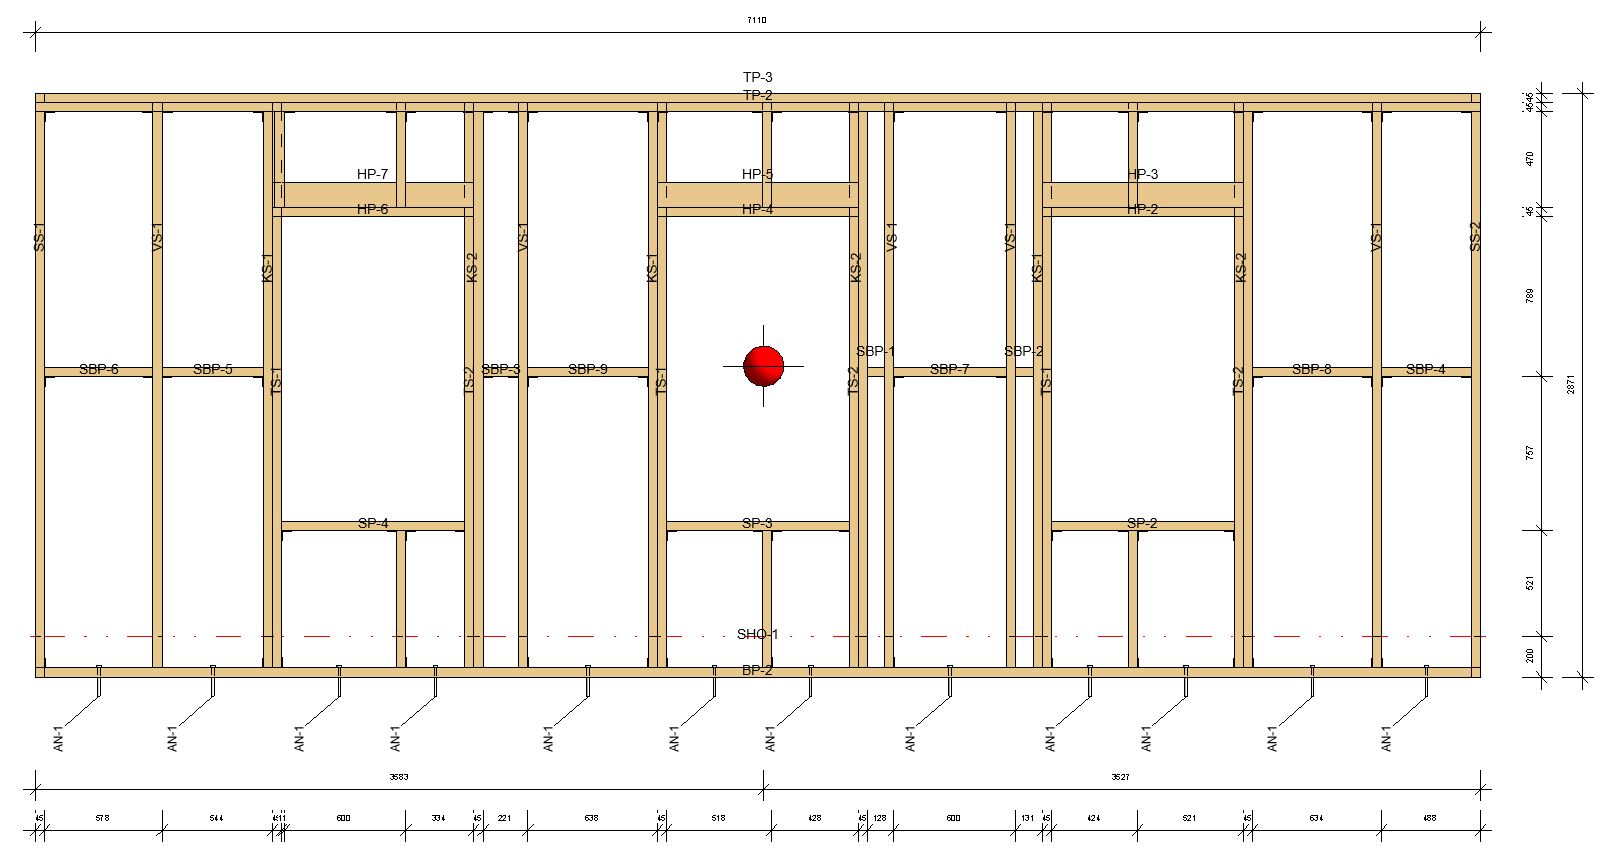
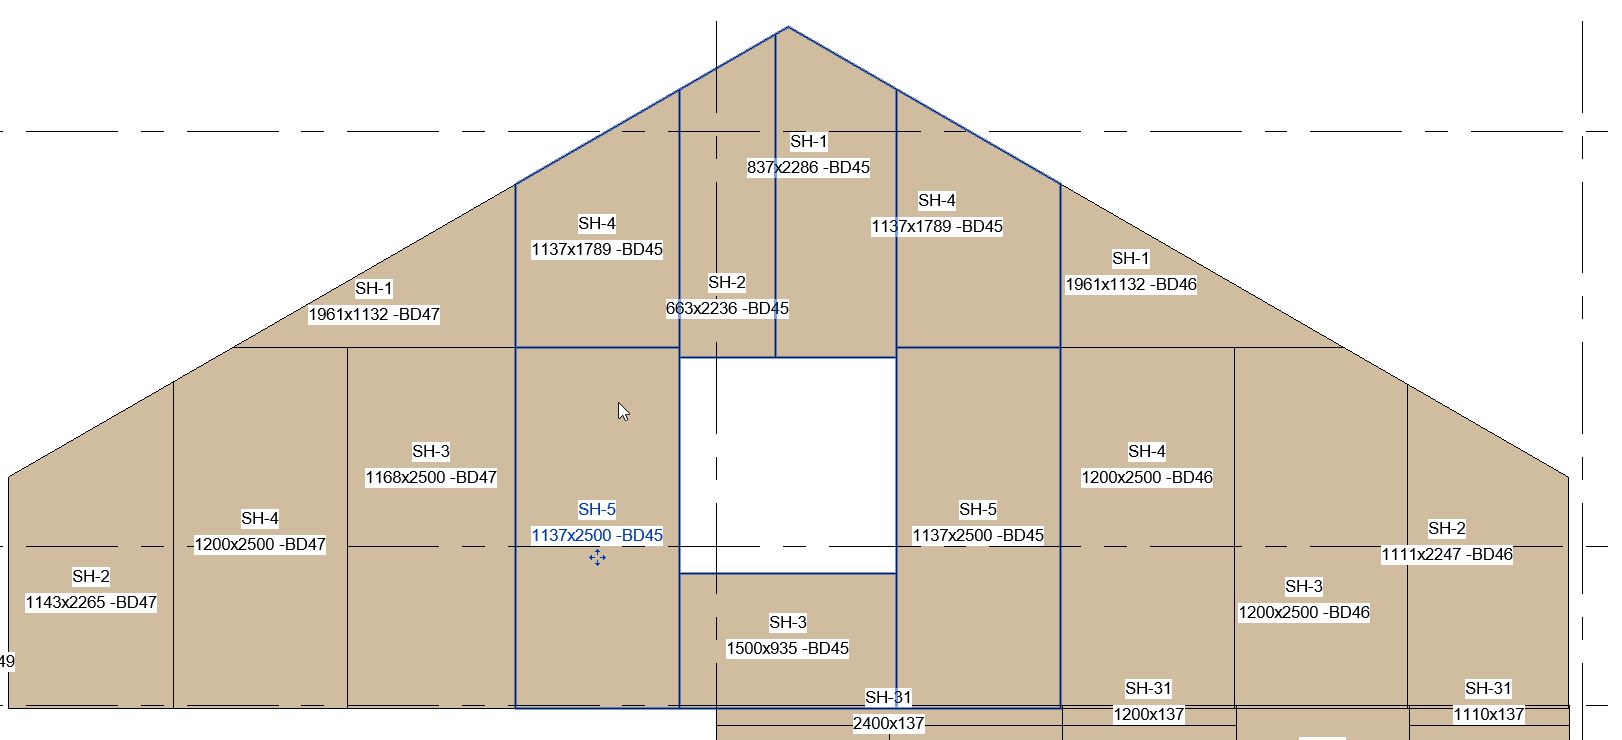
There can be quite a lot of elements to tag in drawings…
How to use Smart Tags
Start off with generating some views. In this example, we are going to create elevation views off all four sides of the building. Navigate to Create Views under Multiple Elements found in the Smart Views panel.
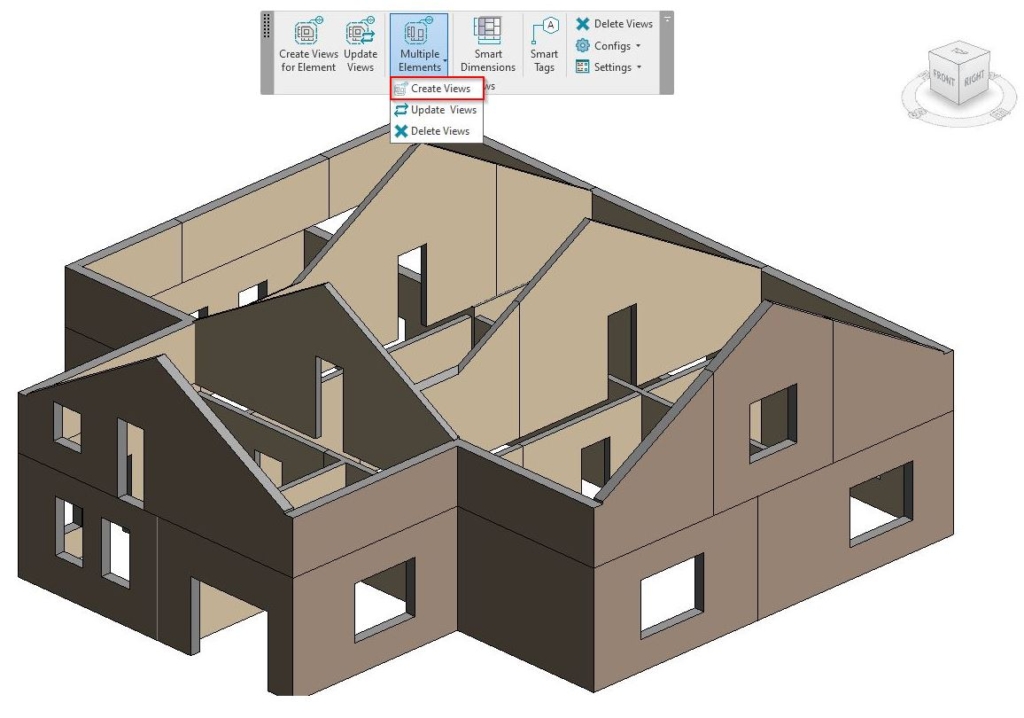
Select all walls you want to see in the elevation view, and click Finish in the top left corner.
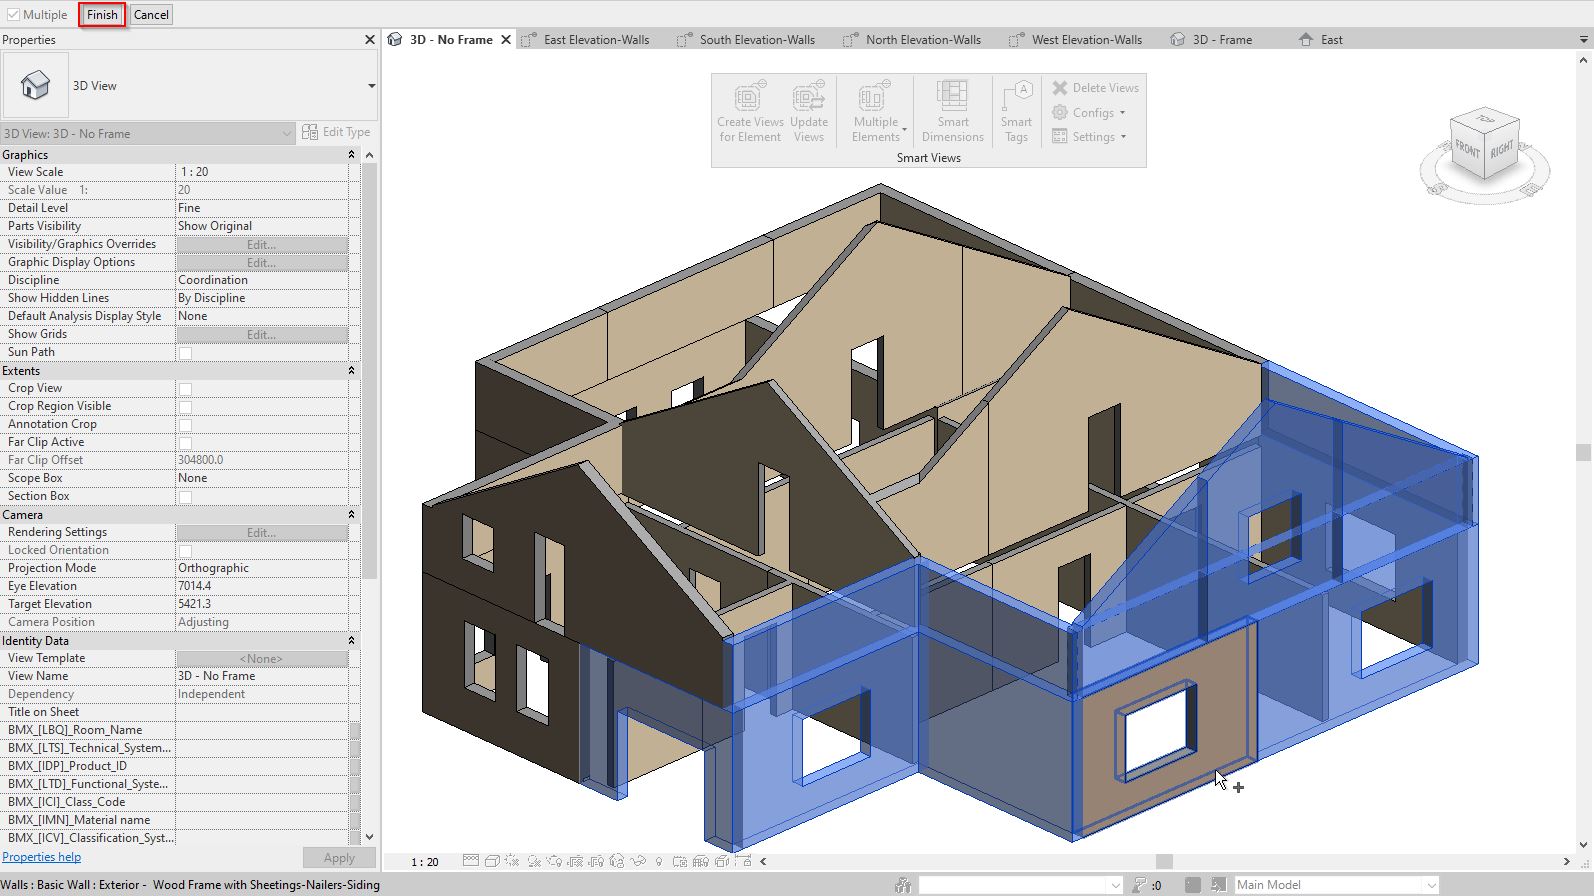
The views will go under Detail Views in the project browser. In such views you can have levels, grids, dimensions, tags, and elements you’ve selected to be visible. Smart Views allows you to isolate selected elements and include hosted elements in the view. In our case these are wall elements with doors and windows.

Having generated elevation views, you can still tweek some areas, for example how tags appear in the view. Once that’s set, views can be dropped on the sheet with company standard titleblock.
Ideally you would have view templates setup beforehand. Also, it’s good practive to work out your Smart Views configurations since views will be created based on those. In there you can assign Tagging Configurations, Dimensioning Configurations, View Templates, and View Names based on the requirement for each view type you are going to create.
Here is an example of how it would look. In the configuration windows below we have Views Templates, Dimensioning Rule, and Tagging Configuration assigned.
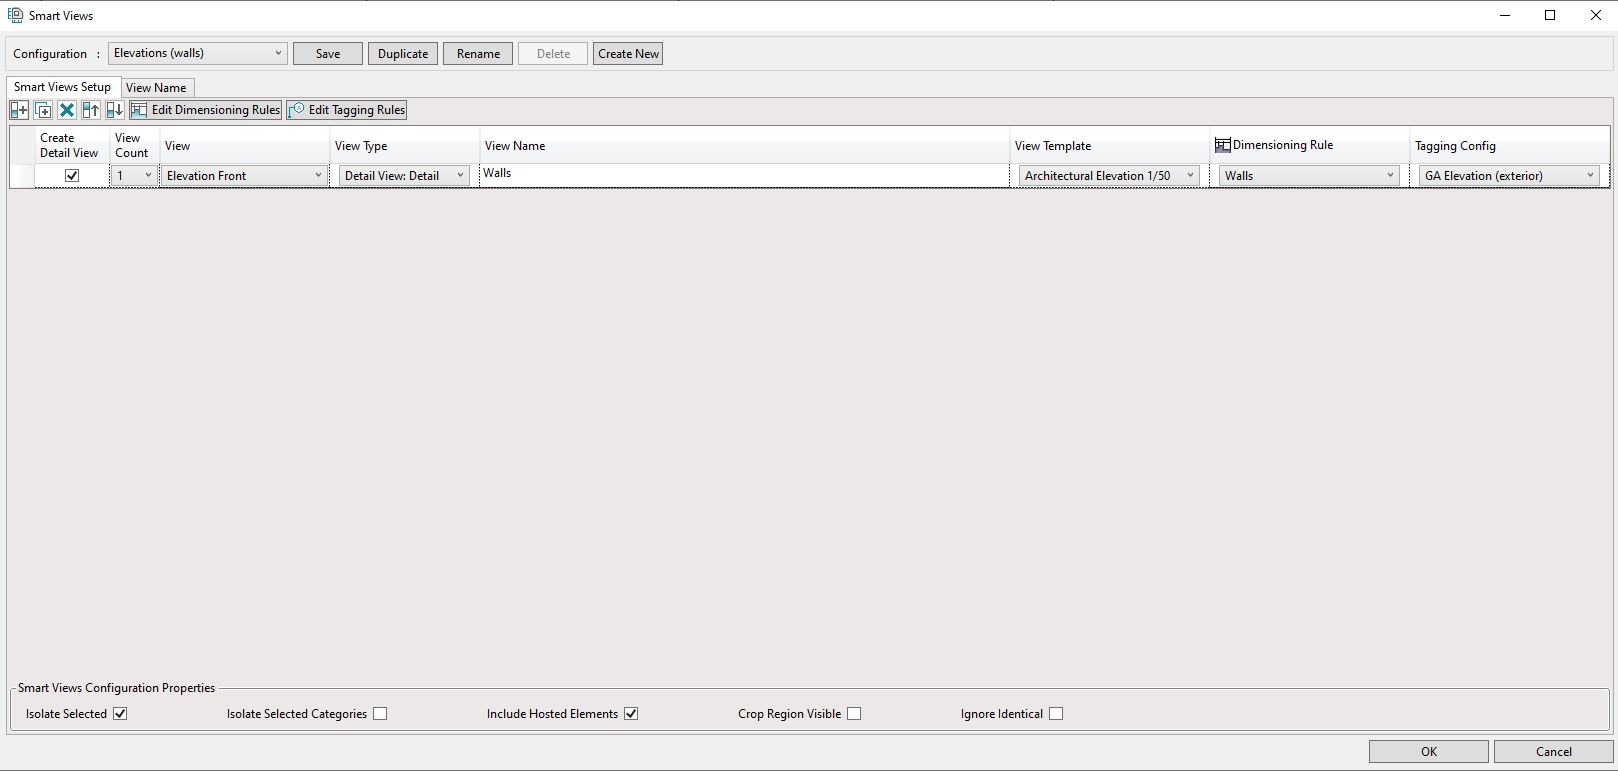
View Template – Architectural Elevation 1/50
Dimensioning Rule – Walls
Tagging Config – GA Elevation (exterior)

View Template – Framing Elevation 1/50
Dimensioning Rule – Structural Framing
Tagging Config – Elevation – Parts (exterior)
More possibilities for tagging elements in Revit views
Smart Tags functionality was developed to address issues that Revit users would face when tagging in the typical manner using standard Wood Framing or Metal Framing functionality. In a word, it was restrictive. Smart Tags has opened up more possibilities for tagging elements in views.
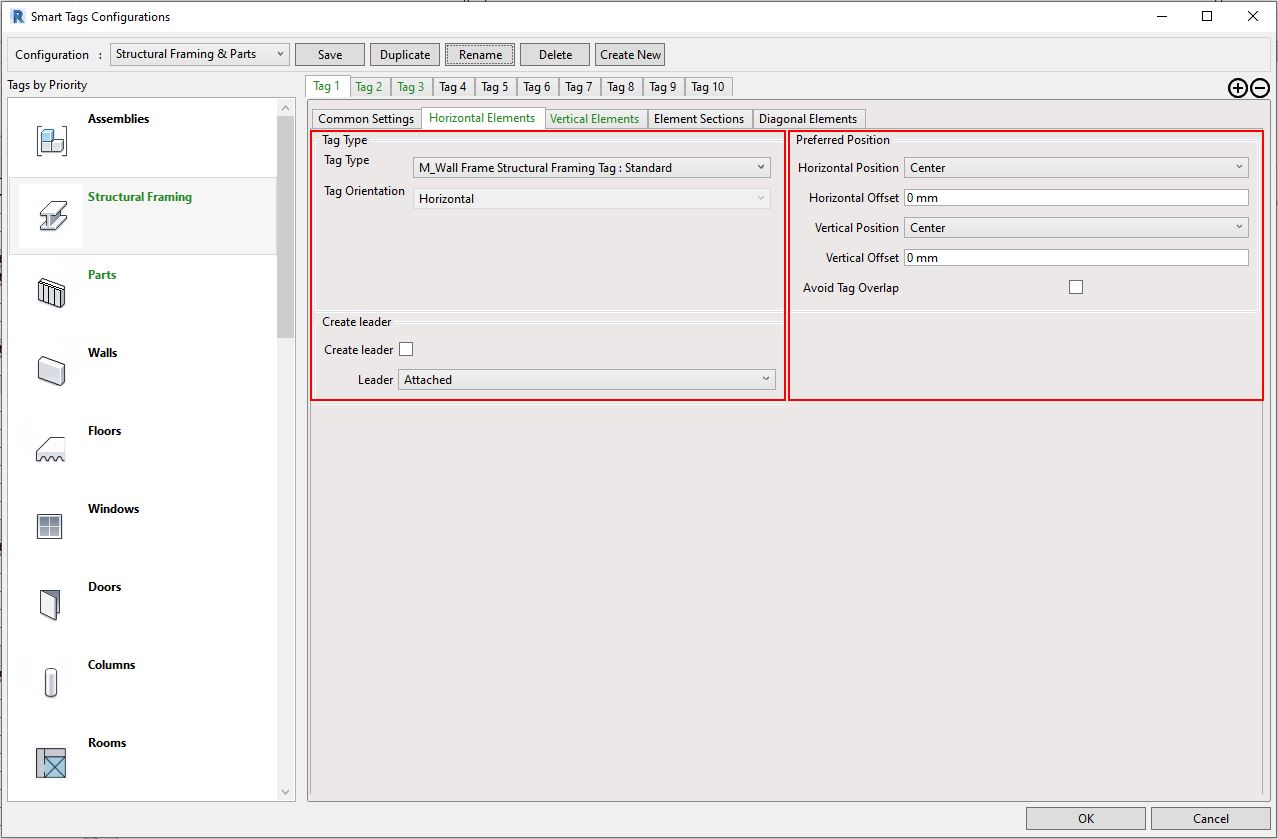
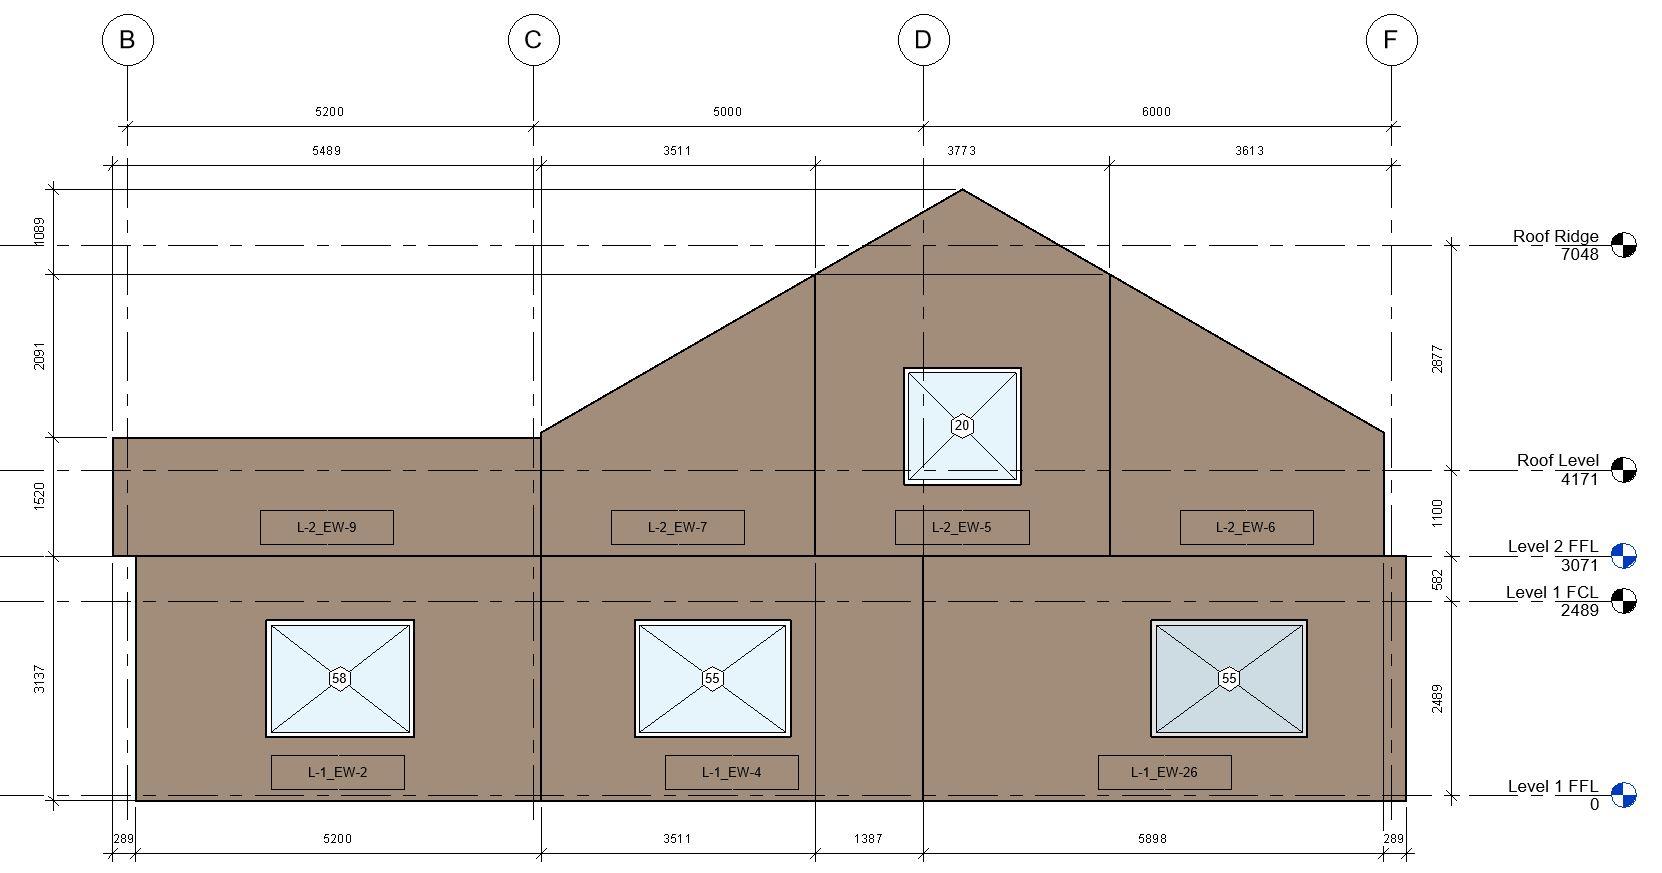
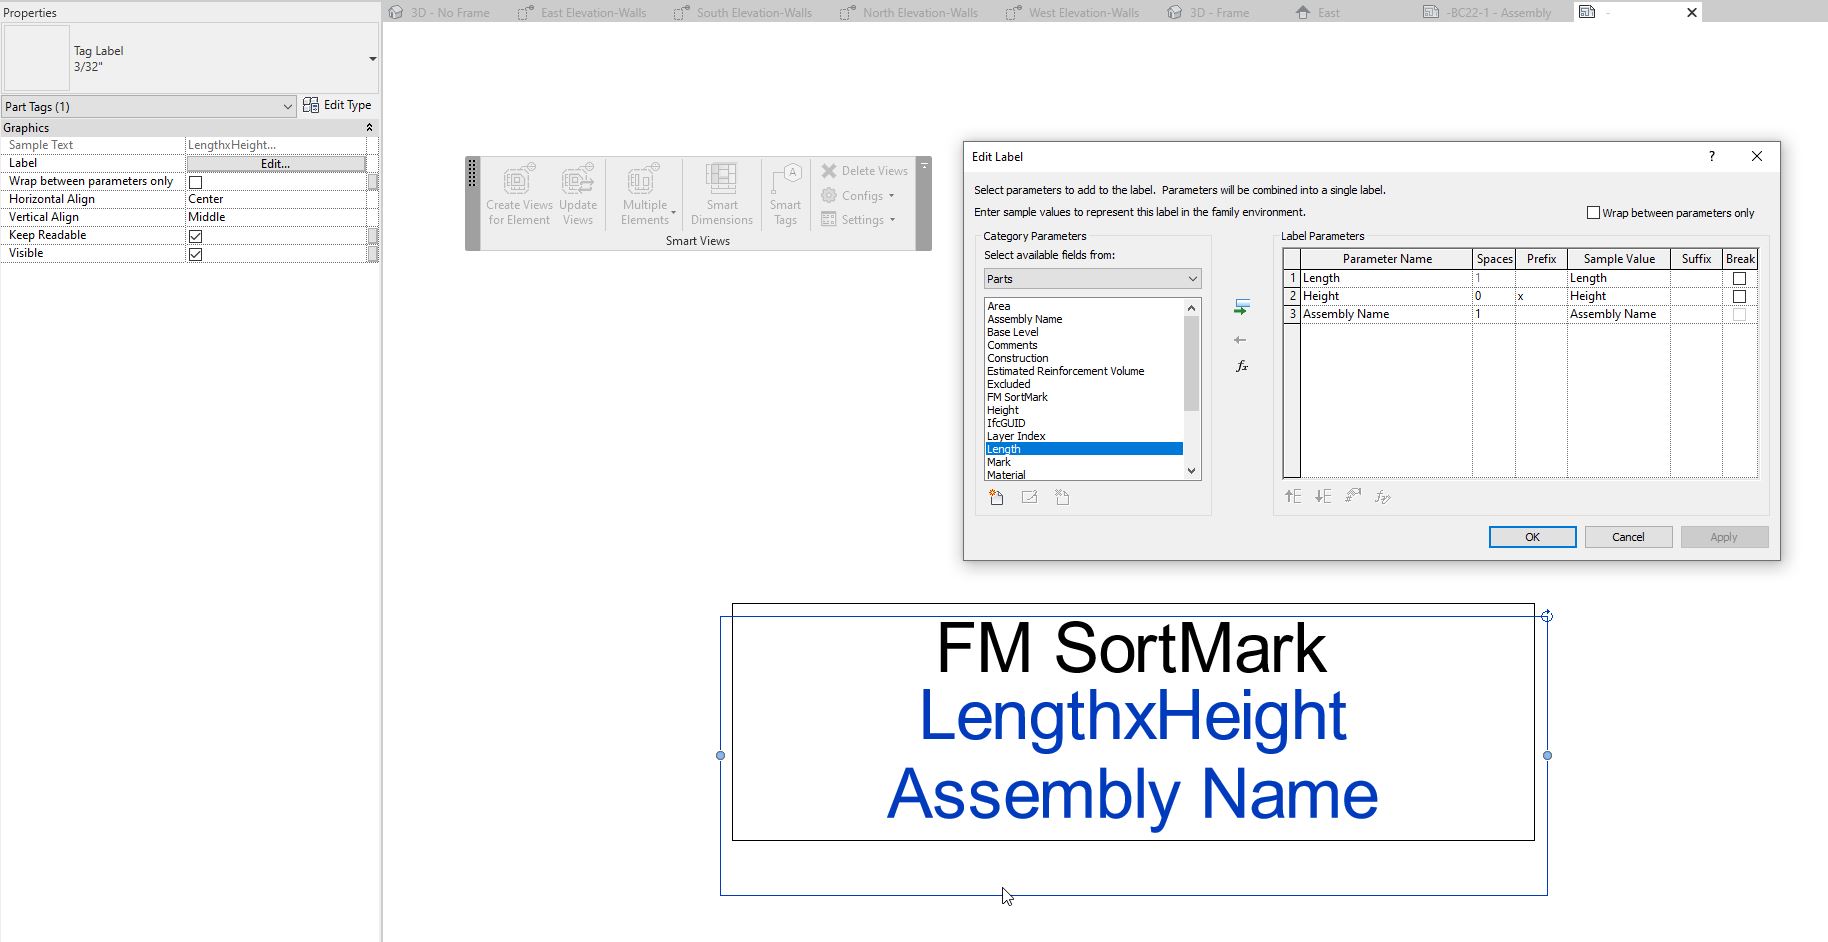
For instance, with Smart Tags each tag configuration can have different family categories activated. In each category, you can set up to 10 different tagging rules based on certain criteria. The main areas of focus are the Tag Types and Preferred Position (see above). In the example below, we are going to tag structural framing and connections. We have tag type, tag position, tag offsets, and leaders set up.
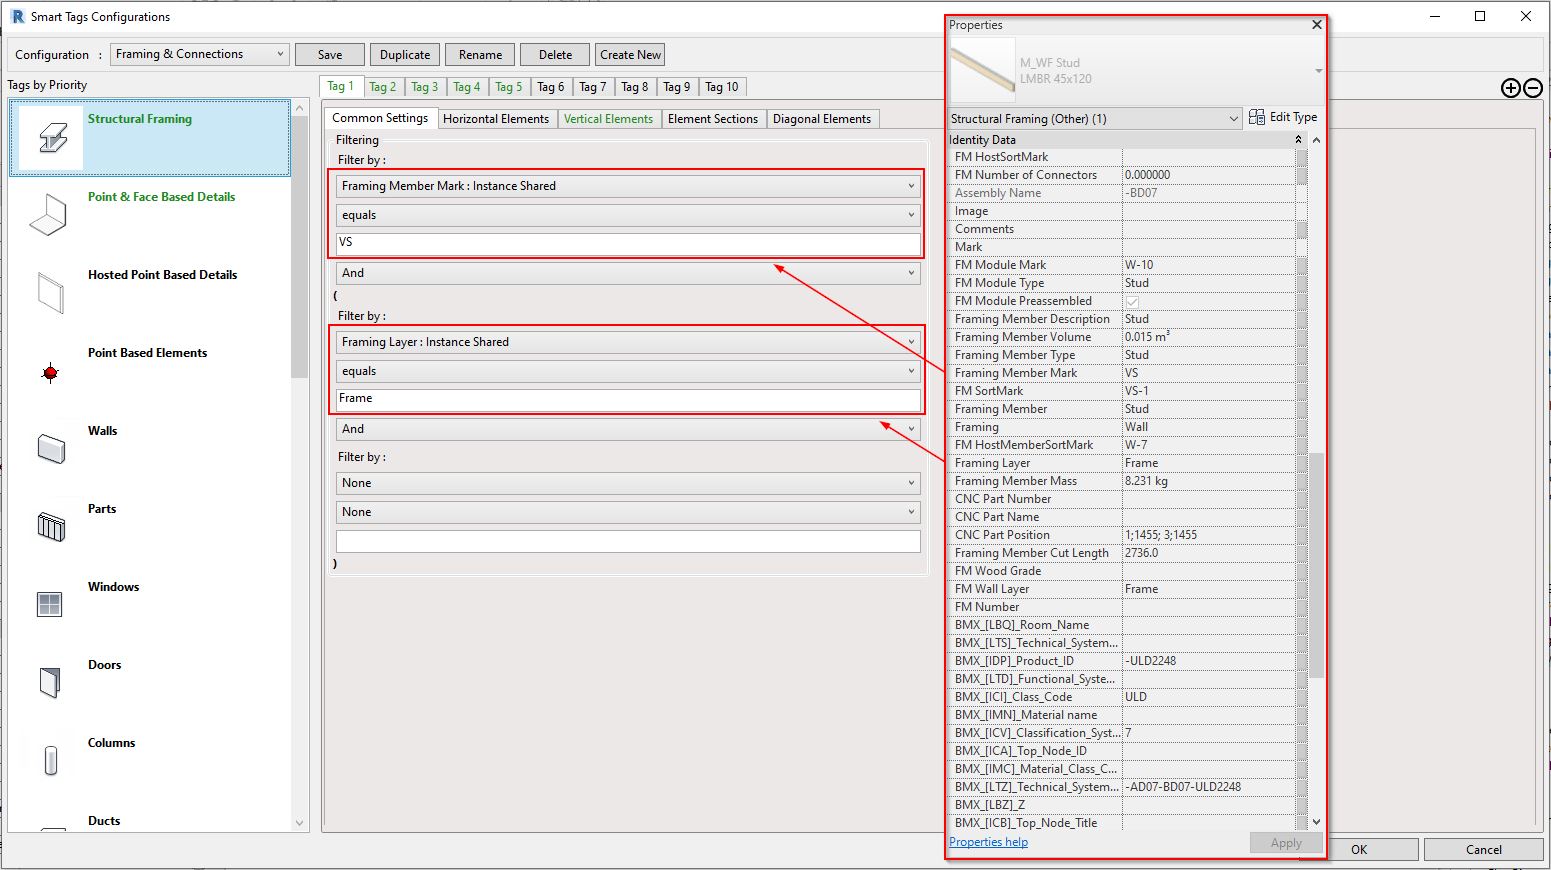
In the common setting we have filtering rules available. With the Tag 1 tab, we want to filter out only vertical studs (VS) that belong to a certain framing layer (Frame). Also, there are more instance and type parameters for filtering elements. This means that tags with the Tag 1 rule will be placed only on vertical studs in the main framing layer (Frame).
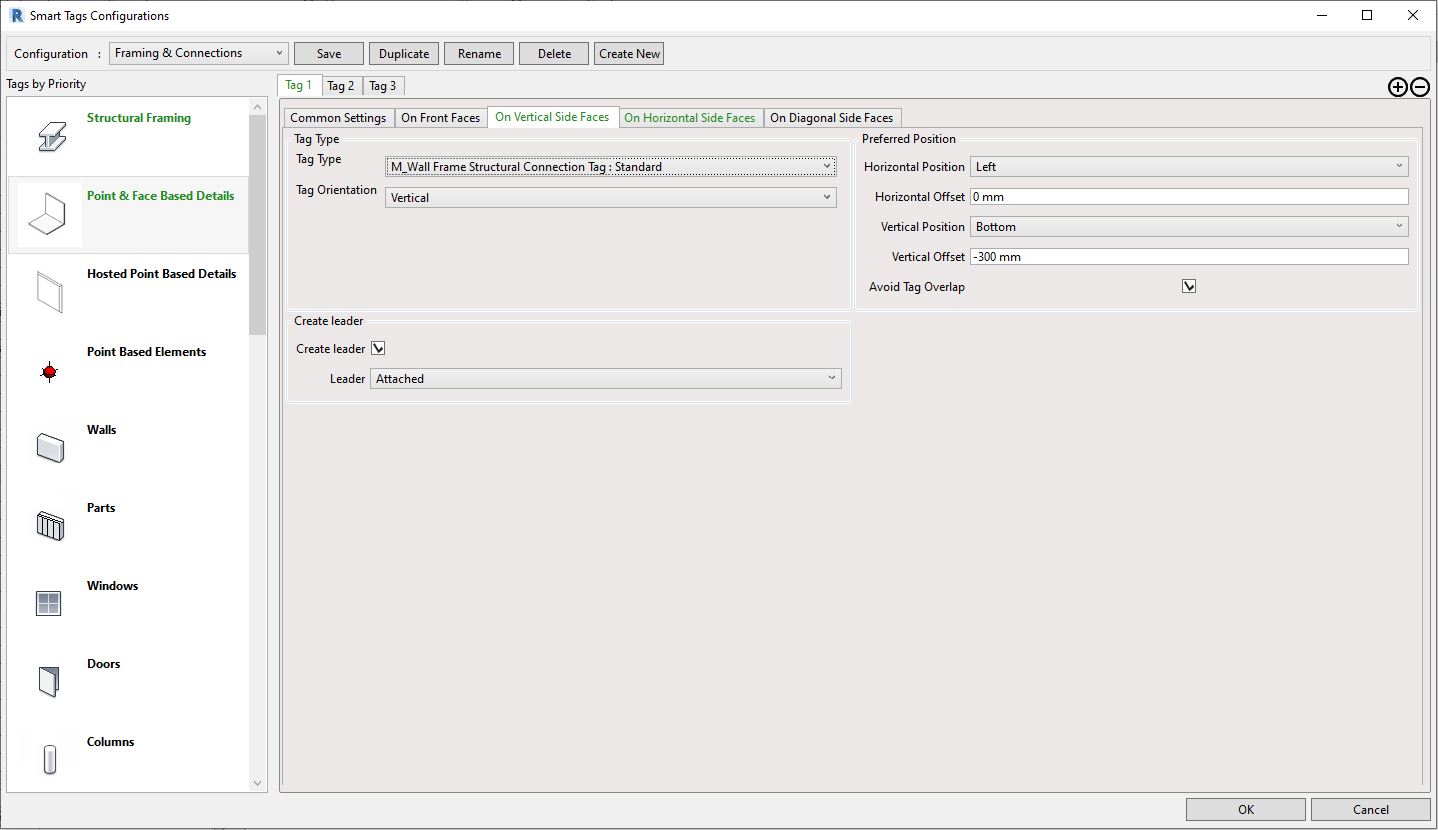
When the Smart Tags configurations are set up, we can go ahead and tag elements in any view or assign the configurations in Drawings configurations so that when we create assemblies with views, the Wood (or Metal) Framing engine will tag elements exactly how we want it. Notice below that we can automatically avoid tag overlaps or have them offset from one another by an offset value.
Remember that once you have the parameter values generated for your elements – framing members, connections, sheathing, paneling – you can adjust or create tags so that they will tag the exact parameter values (type or instance) or tag multiple values.
In the example below we have ceiling boards tagged with a leader and a vertical offset.
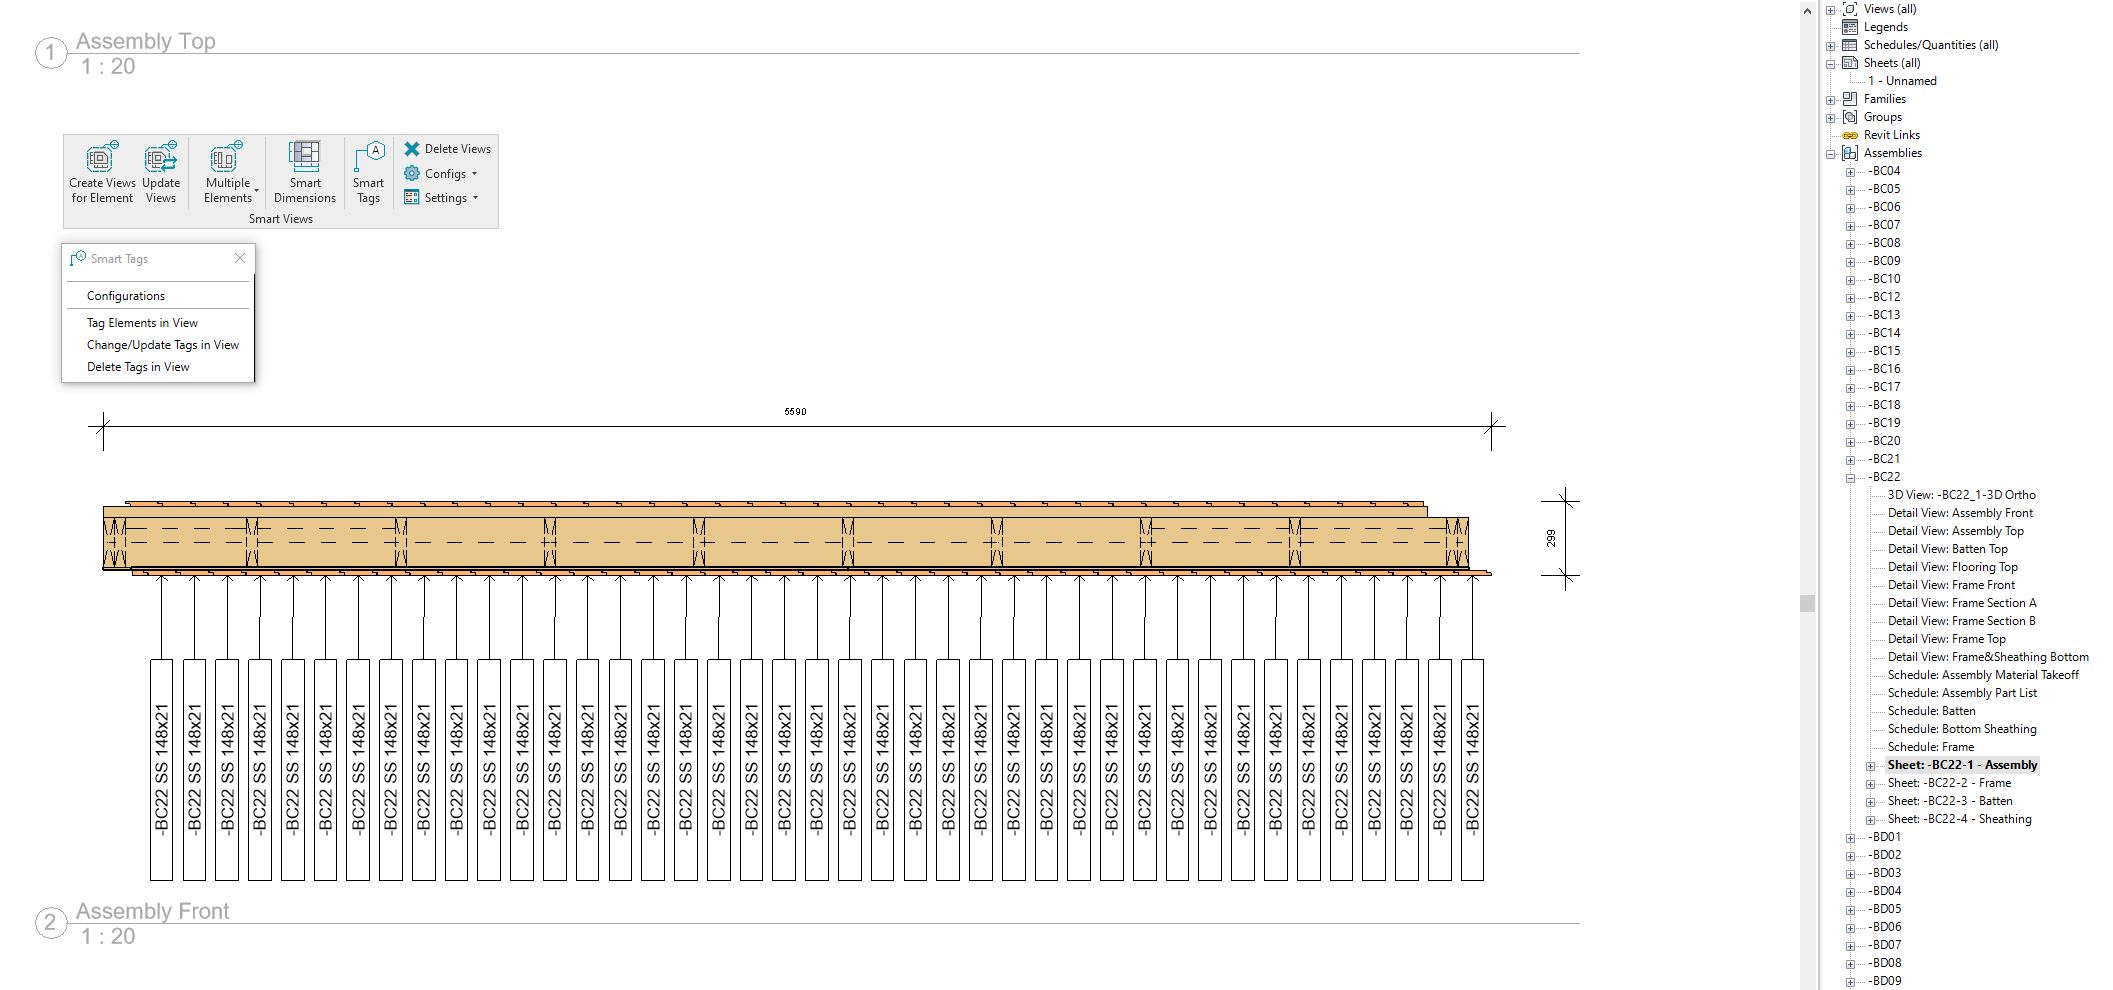
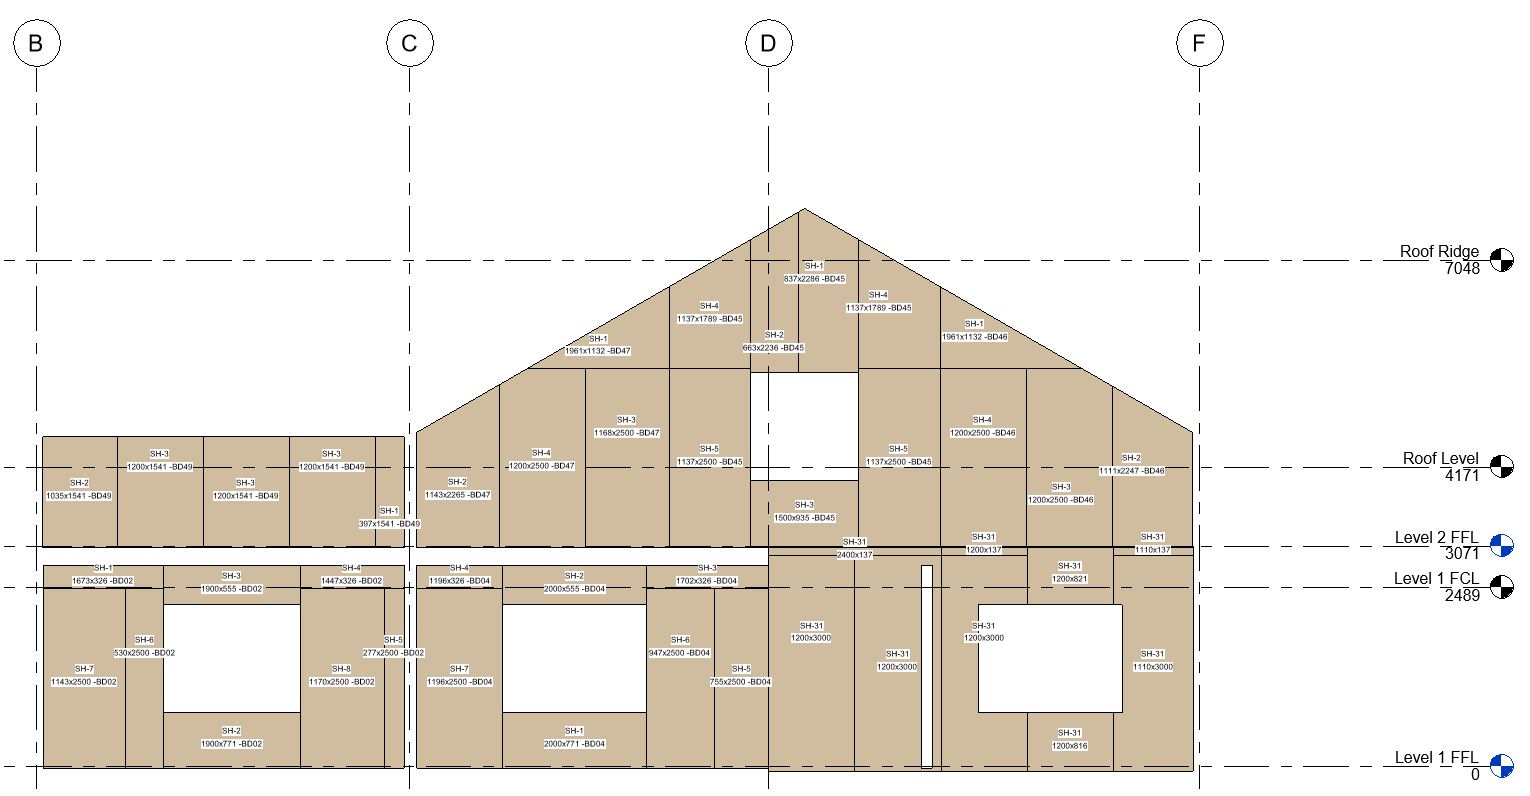
Minimizing or removing tag overlaps is an important part of tagging, especially when it comes to larger scale drawings or tagging lots of small elements. In the example below you can see how the sheathing is tagged with horizontal and vertical positions being centered.
So, that is the new Smart Tags feature in our Wood Framing, Metal Framing, and Smart Views add-ons. @Current users, we hope you find this update useful in your Revit tasks, that it saves you even more time so that you can focus your energy on the real design work.
Not yet a user of our Framing software for Revit? We invite you look into getting a free demonstration and trial so that you can better see how it would meet your needs and fit into your workflow.
Free Demo
We encourage you to get a free demo before taking a trial. That way, you’ll go into your trial period with a better idea of how to use the add-ons and have answers to your preliminary questions.
Free Trial
To start a free trial of Wood Framing, Metal Framing, or Smart Views, download our TOOLS4BIM Dock for your Revit version. Once you have the Dock open in Revit, you can select which of our tools you’d like to take for a test drive.