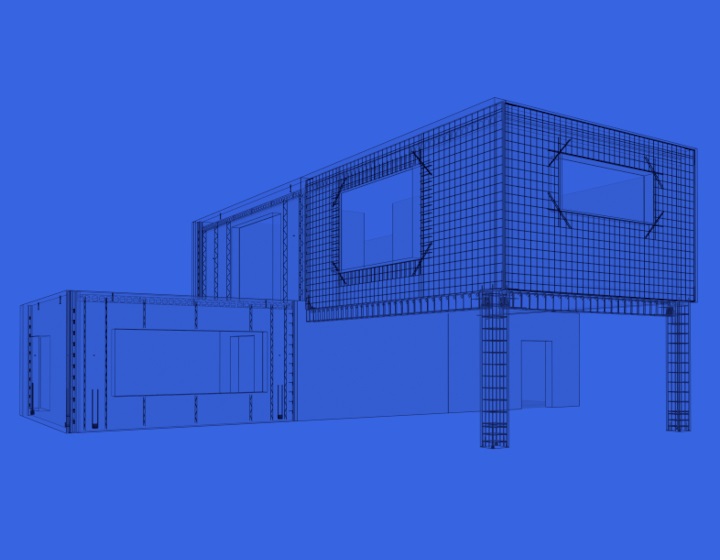
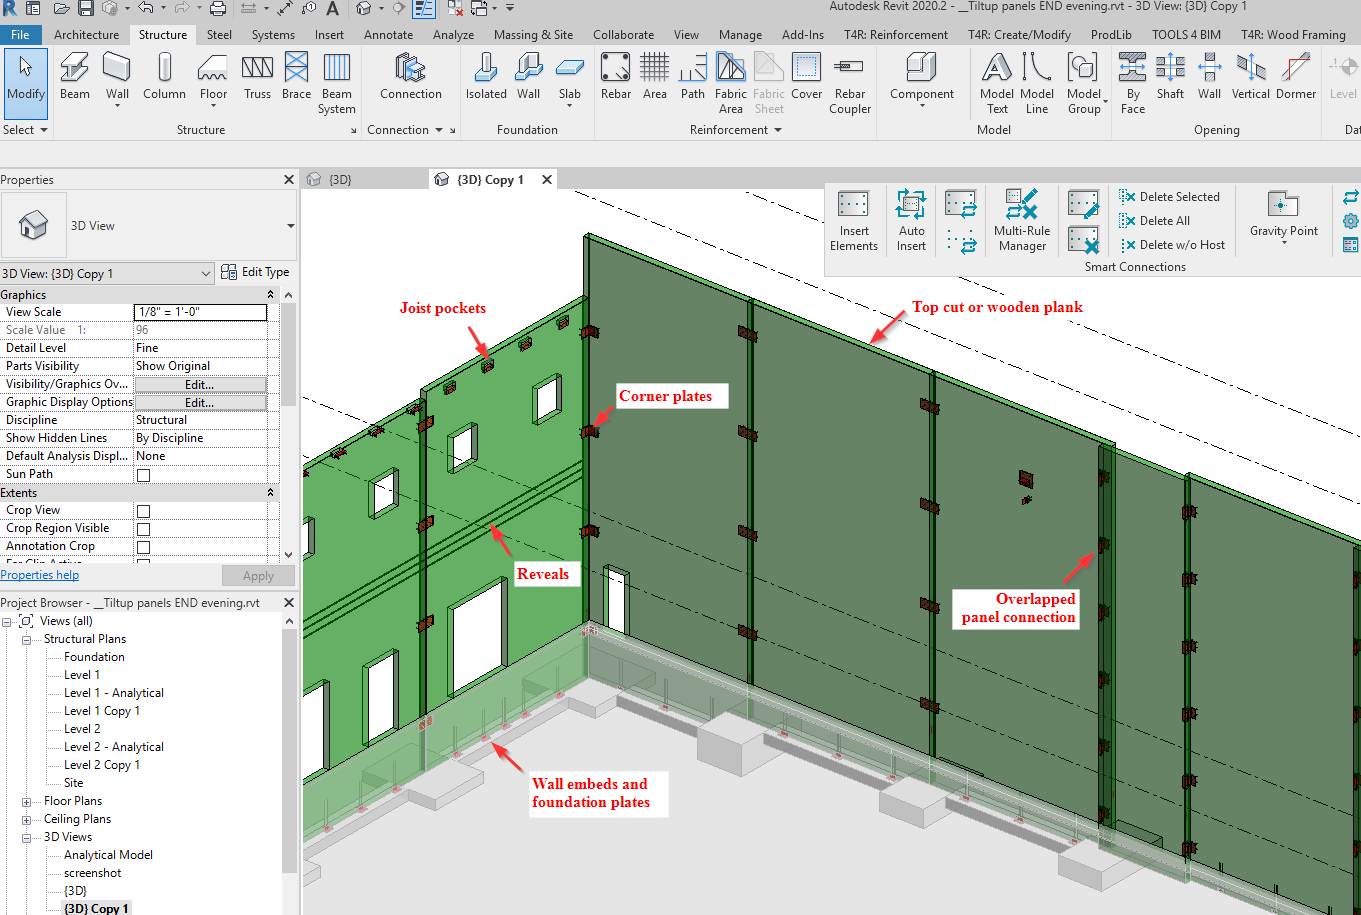
In this post, I’ll show three ways for placing joist pockets in Revit for tilt-up construction projects.
One way to do it is manually in plain Revit. The other two ways make use of our Smart Connections BIM tool that can distribute hardware, details, voids, any sort of element or family in Revit whether you’re designing buildings from precast concrete, wood frames, or metal frames.
Whichever way you go, the first several steps are the same, so let’s start there. (Video below.)
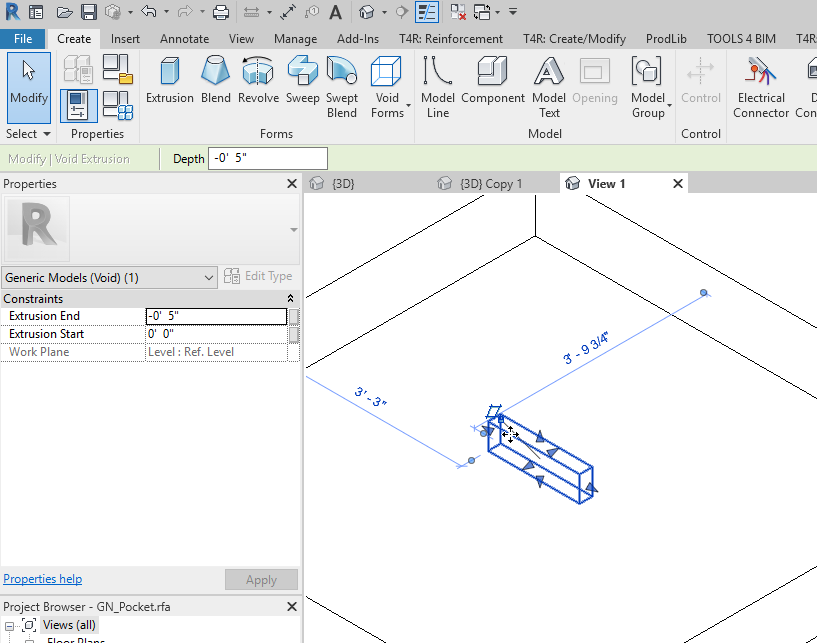
1. Create a pocket family by using a face-based family template.

2. Create a void and cut the host.
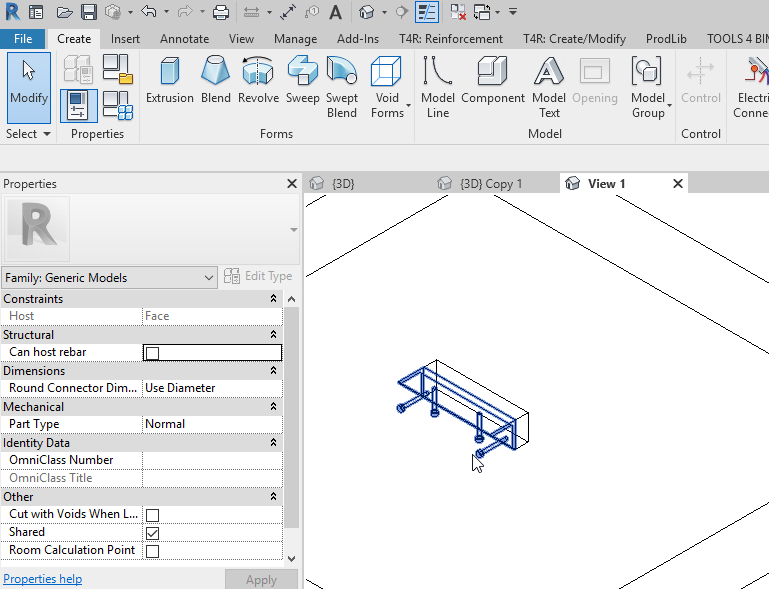
3. Load an embed Revit family and nest it correctly in the void.
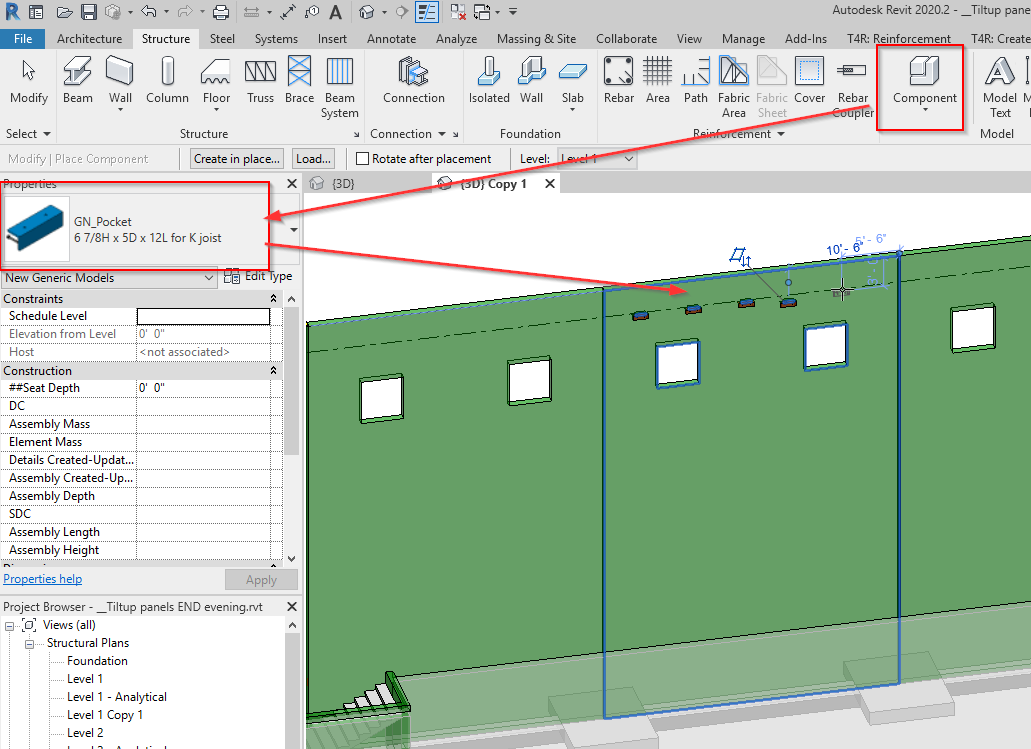
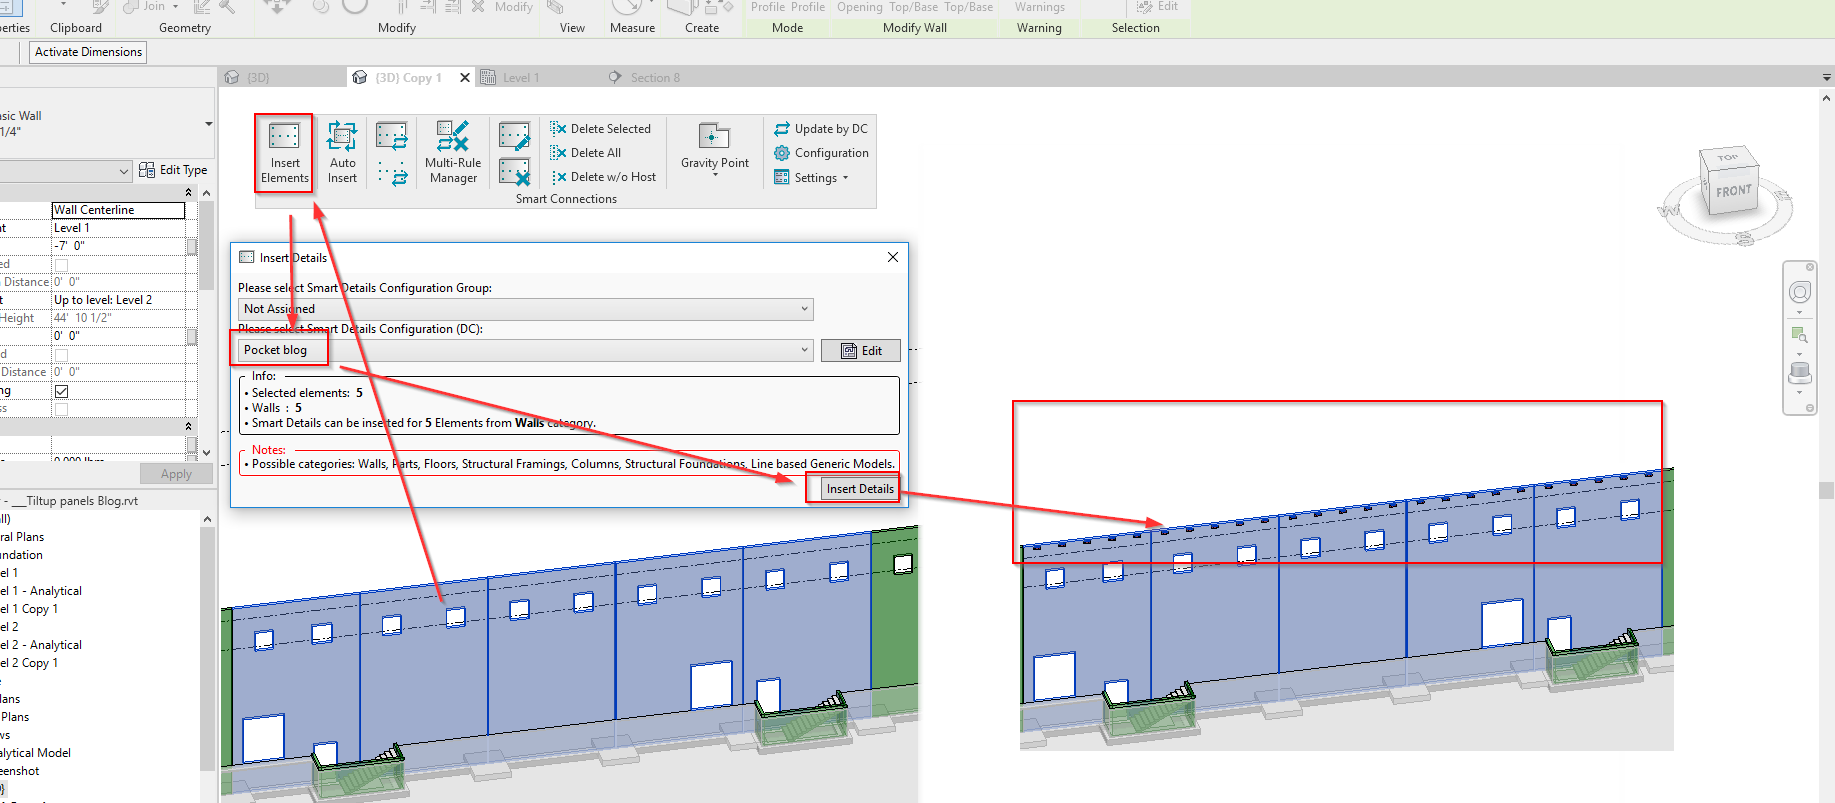
4. Once the family is setup, place it into the Revit project.
Here I’ll show three ways of doing that.
1: Place families manually in plain Revit
Just use plain Revit and place pockets manually on each wall panel. This is a simple but not very efficient way, especially if you have a lot of them in the project.
2: Place families automatically using Smart Connections
Use the Smart Connections tool from our Precast Concrete BIM Solution. It can do tasks like this automatically. Simply open the configurations and define the location where this Family should be placed.
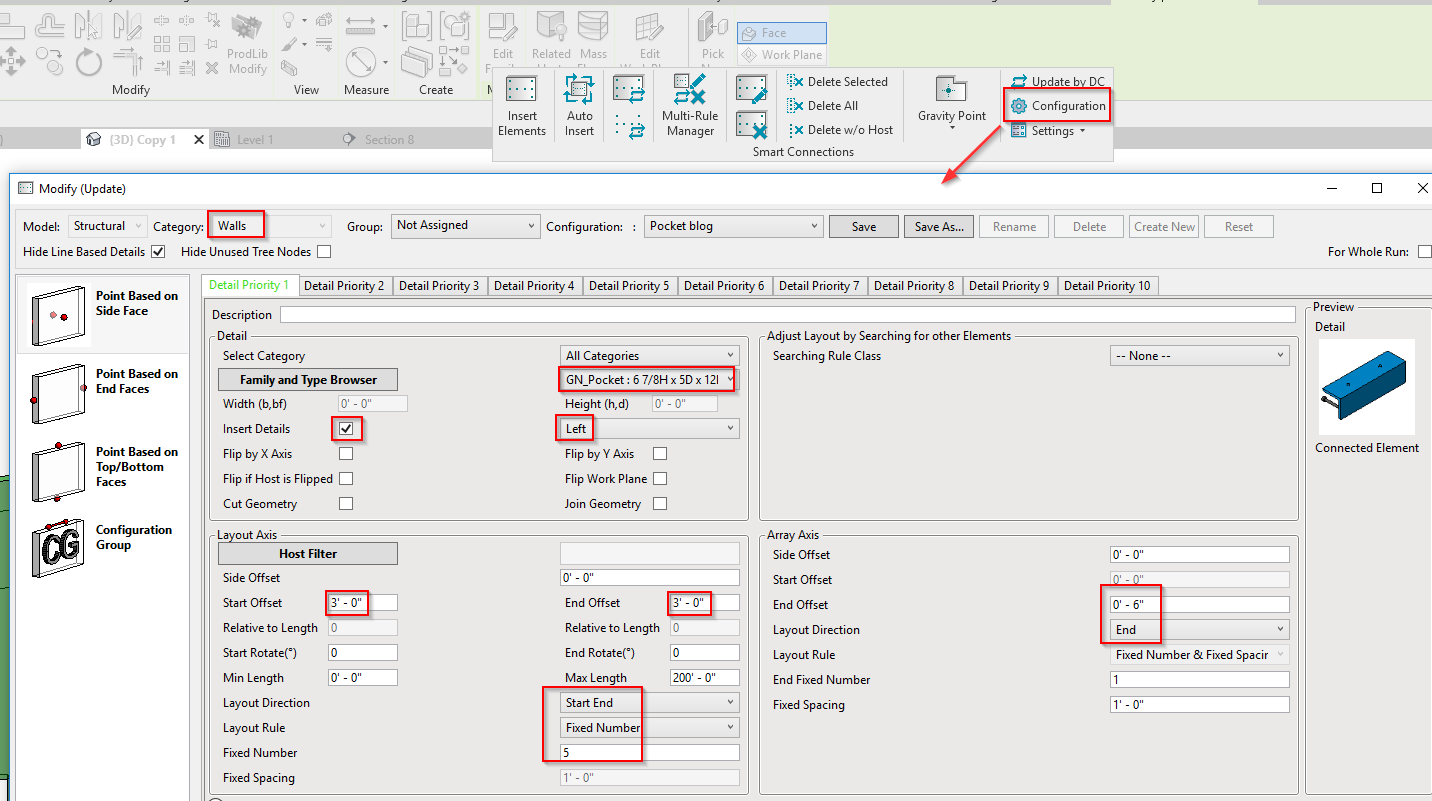
Then select all panels and apply this on all of them at once.
3: Use Smart Connections to track position of joists for placing pockets
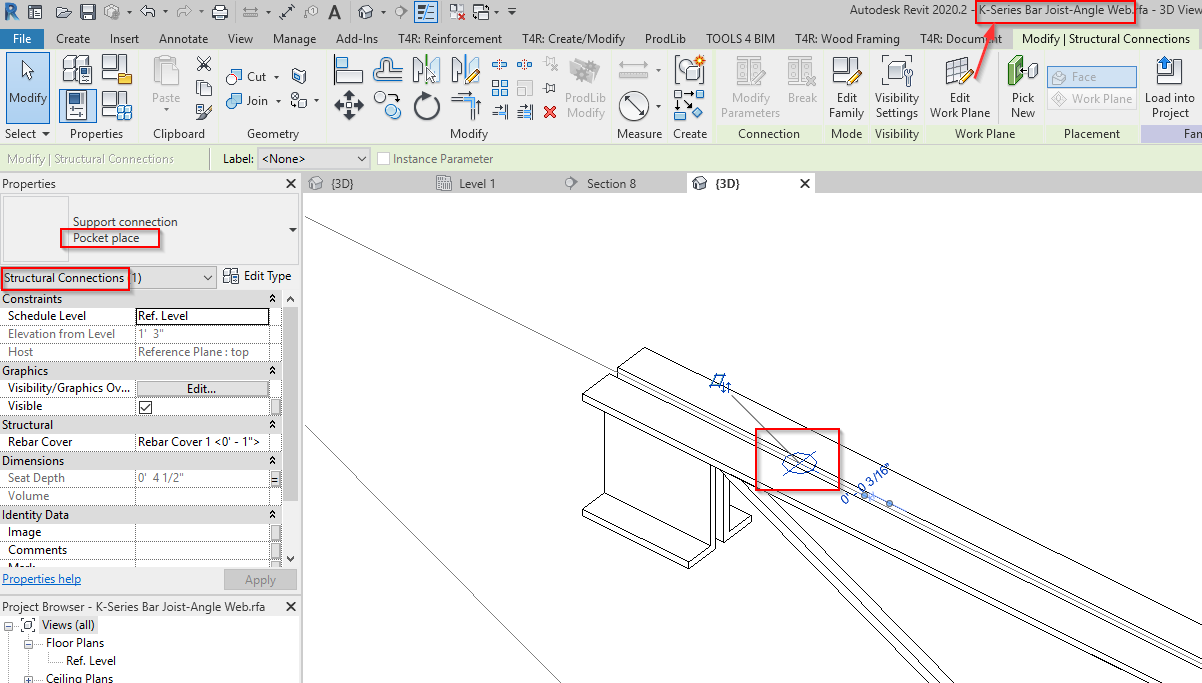
If you have actual joists in your model, use Smart Connections to track their location. What I did in my webinar project is add a nested structural connection family named ‘Pocket place’ into my Joist families, so I could track them with Smart Connections tool.
Once I have them in my model, I modify the configuration so that it would place Pocket families only if I have that Pocket place family near the wall.
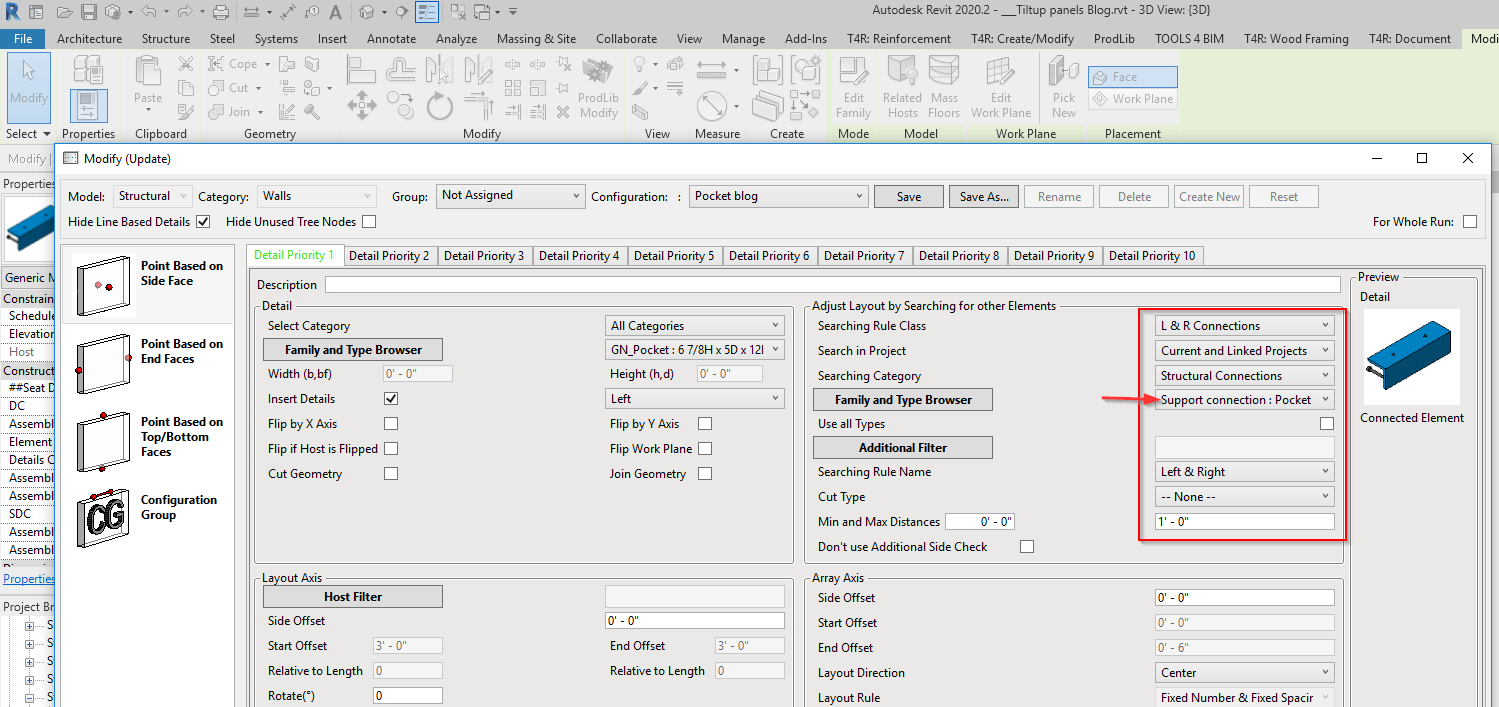
Now Smart Connections would place pocket families anywhere I have a joist end near my walls.

Smart Connections can help you not only with joist placement but with distributing other elements as well, so you could save time with each of them:
Here’s a video of the above workflow:
So that’s how to place pockets for joists in Revit in a tilt-up construction project. We hope current users will find this workflow helpful.