We’ve added two features to our Wood Framing and Metal Framing software for Revit that will help you model wall frames and generate documentation faster.
Let’s get familiar with them, so you can further accelerate your design processes.
Split by invisible lines
This is a simple way to split your paneling according to the main frame studs when you have two overlapping paneling layers in your frame. We’ve incorporated configurations to do that for you.
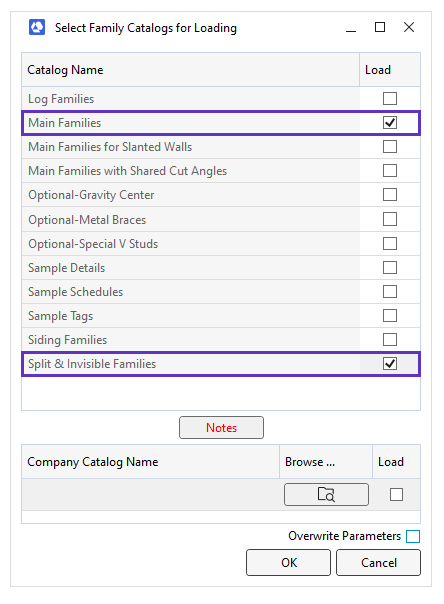
When loading families into your project, tick ‘Main Families’ and ‘Split & Invisible Families’. The latter includes families that split the parts:
Now these families will be automatically used by specific secondary frame configurations that we provide to you.
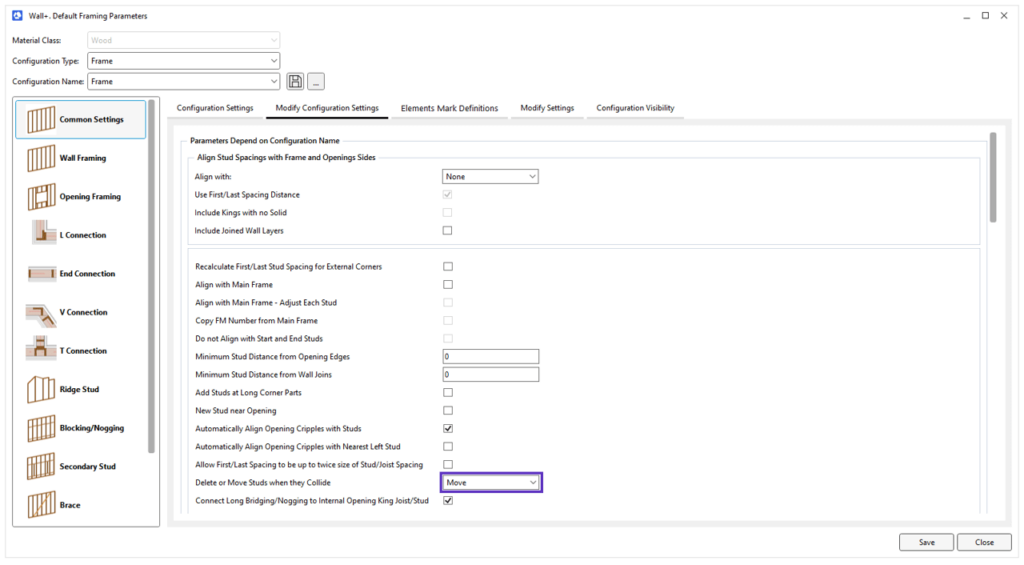
There’s a simple adjustment you need to make in the Main Frame configuration. Here’s how to do it.
Change ‘Delete or Move Studs when they Collide’ from ‘Delete’ to ‘Move’. This step is important because the common stud or a cripple at the openings may be deleted, and the panel board will not be split at that point.
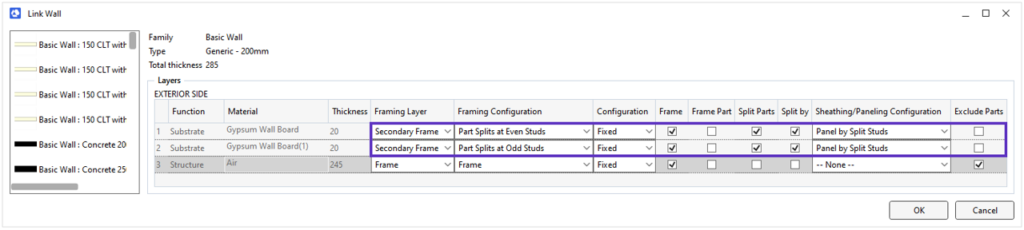
After the families have been loaded and the Main Frame configuration has been altered, all you have to do is link the configurations to your wall type in the Link Wall dialogue:
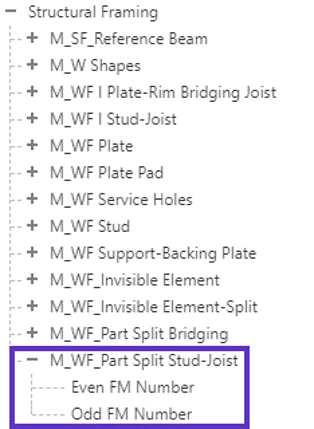
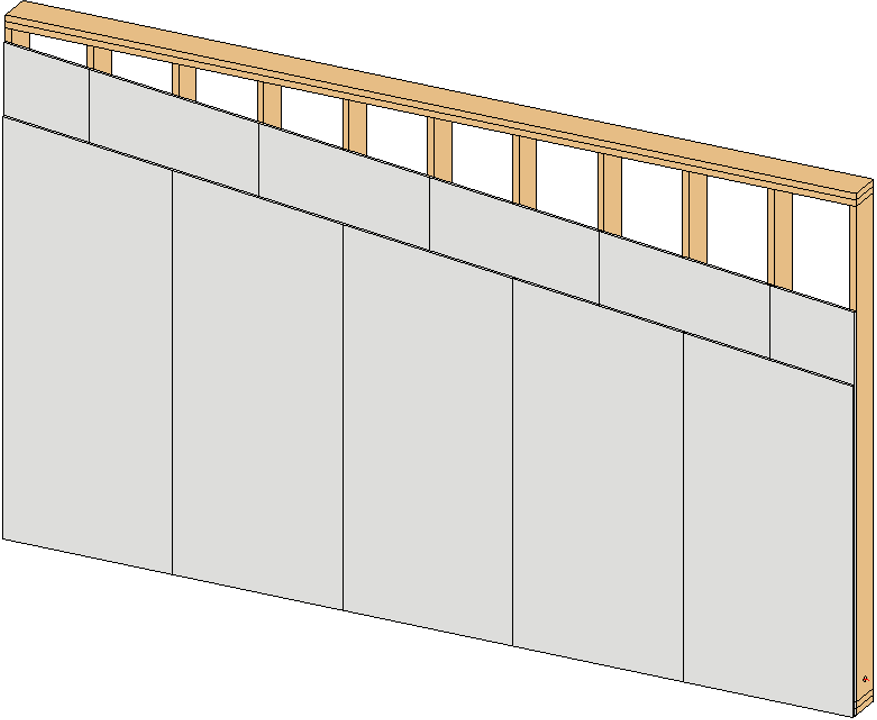
Then, frame the wall with its additional layers, specifically Secondary Frame, where the M_WF_Part Split Stud-Joist families are placed. These families will be aligned with the main frame studs and paneling will be split according to them.
As you can see below, the paneling boards overlap each other, and the splits are aligned with the main frame studs.
Note that you can move, copy, and modify these split elements just like any other framing element on your wall.
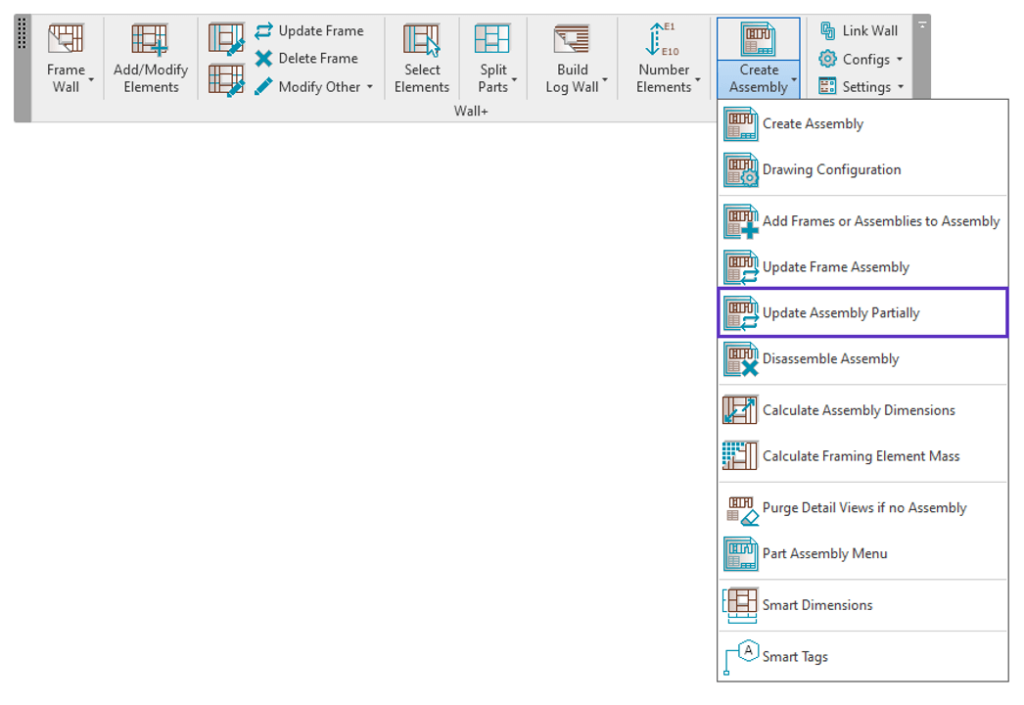
Update Assembly Partially
The new ‘Update Assembly Partially’ feature brings you unparalleled flexibility when updating assemblies, giving you complete control over the elements you wish to update.
Whether it’s annotations, tags, schedules, views, text notes, legends, etc., you can tailor how your assembly updates based on the selected sheet template or configurations.
In the past, you were more limited in updating assemblies because you had to update them by all aspects defined in the Shop Drawing Configuration. With ‘Update Assembly Partially’, you have the freedom to choose the aspects you want to update. That reduces manual work and potential errors that are often caused by unnecessary updates.
This feature truly shines in situations when you’re dealing with multiple assemblies that were made according to different Shop Drawing configurations. It lets you set up distinct rules for each assembly, ensuring precise and tailored partial updates for multiple assemblies at once.
Note: Keep in mind that Generic Annotations, Text Noted, Detail Lines and Secondary Title blocks can be transferred automatically using ‘Transfer Annotations’ in Drawing Config. It must be turned on so that when the Assembly is updated, Annotations will be transferred and/or updated:
Let’s look at how to use Update Assembly Partially.
Update Assembly Views – By Configuration
Update Assembly Partially allows you to choose a variety of different options for how you want to manage your partial update. On the left side of the window below, you can update dimensions and/or tags by the changes made in their configurations, for the Assembly Views you select.
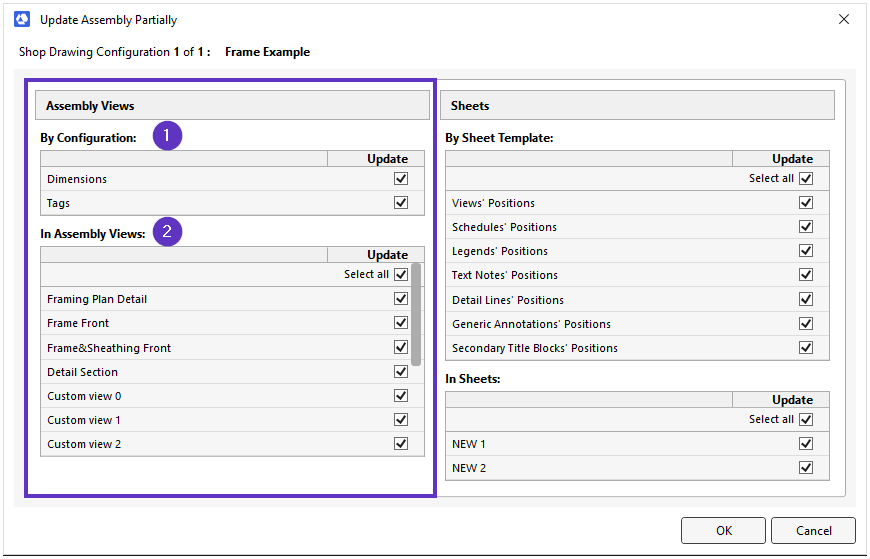
- By Configuration: Here you can select the annotations, dimensions and/or tags that should be updated in Assembly views.
- In Assembly Views: Here you can select the Assembly Views in which annotations (selected above) should be updated by the changes made in their configurations.
For example, if you modify your Dimensioning configuration and you want to update specific Assembly views according to only those changes, then the true value of ‘Update Assembly Partially’ really shines.
Update Sheets – By Sheet Template
Now let’s look at the right side of the Update Assembly Partially window. This is where you can select which positions should be updated by the Sheet Template that you’re using.
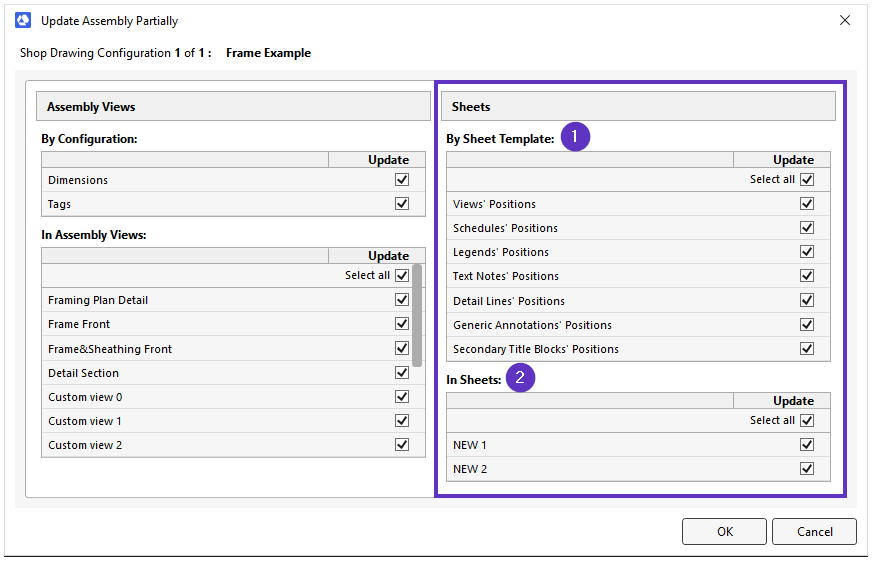
- By Sheet Template: Here you can select the positions of Views, Schedules, Legends, etc. on the sheet that you’d like to update. If you don’t mark a certain position, then that position will not be updated.
- In Sheets: Here you can specify the Sheets in which you want the Positions selected in ‘By Sheet Template’ to be updated.
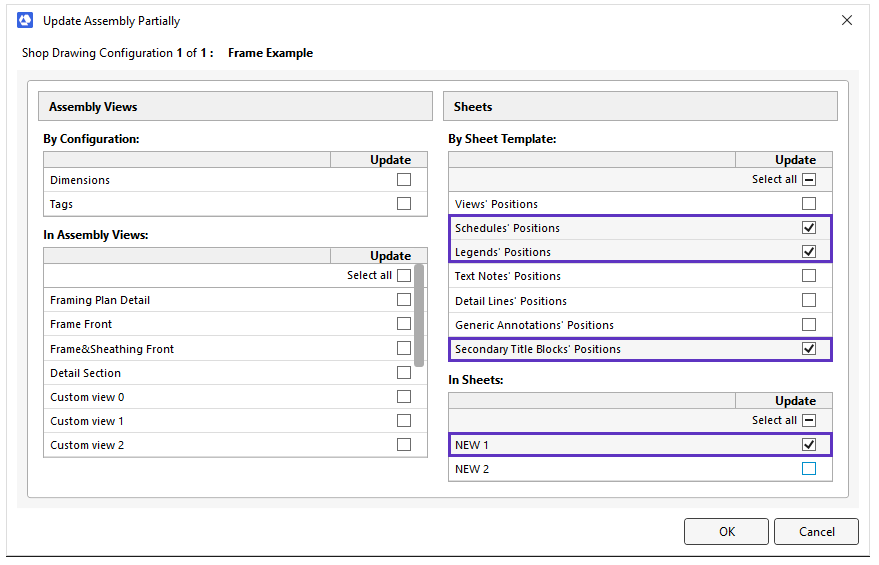
Example
Let’s say you create multiple assemblies using a certain Sheet Template. Later, you modify the Sheet Template. You’d like to update all the assemblies you’ve already created so that they follow the modified Sheet Template, BUT you want certain positions to remain as they are.
This is where Update Assembly Partially comes in handy. You don’t have to update all aspects of your existing assembly sheets according to the modified Sheet Template. You can select only those specific positions that you want to update; the rest will remain as they are (according to the original Sheet Template).
In this case, let’s say you only want to update the positions of Schedules, Legends and Secondary Title Blocks so that they match the modified Sheet Template, and only in Sheet “NEW 1”. You’d input the following:
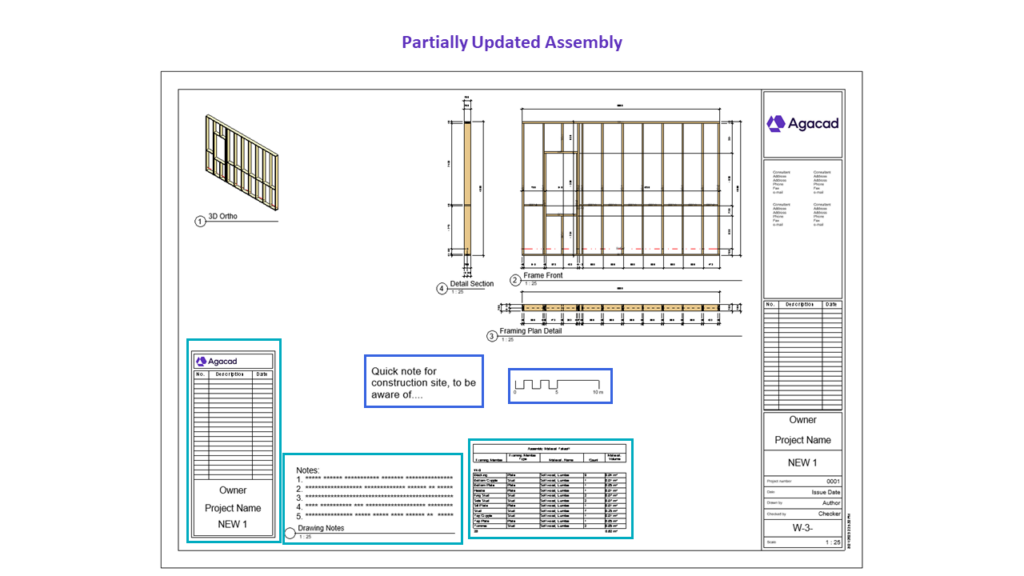
As a result of running Update Assembly Partially in this case, only the positions of Schedules, Legends and Secondary Title Blocks are updated while those of Text Notes and Generic Annotation elements are unaffected (they remain in their original positions, as in the original sheet template):


How to get the software update
To take advantage of the latest updates mentioned above so that you can create timber-framed or LGS-framed building projects even faster, remember to update Agacad Wood Framing or Agacad Metal Framing software via the Agacad Dock.
You can always find the Dock in the Revit ribbon.