Documentation in Revit is relatively easy and intuitive. Switching between views, creating new views, visibility settings, filters, annotation tools – you have everything you need right there in Revit.
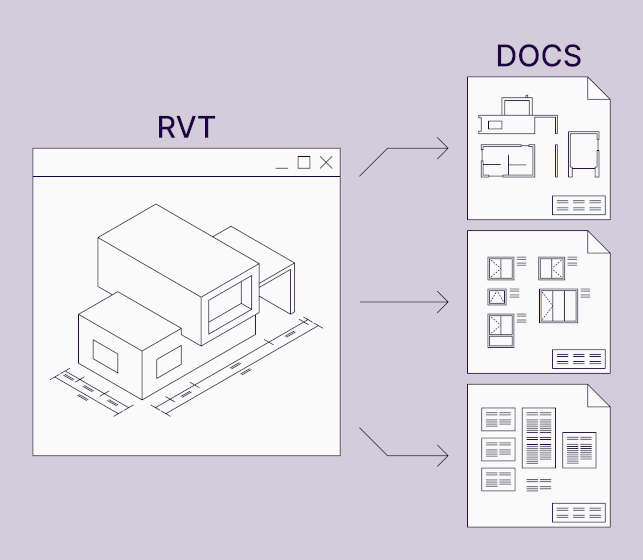
When it comes to presenting your model elements on sheets, there are two ways to go about it: model views and assembly views.
Model views are sections, elevations, detail views, callouts, floor plans, etc. where all model elements are visible. Unless, of course, elements are filtered, hidden, or Category is switched off.
The other way is Assembly views. For those, you create assemblies from selected elements, then you can make views of the assemblies, and only isolated assembly elements will be visible.
In this post, I’m going to look at the ups and downs of using assembly views. And show a couple of solutions to eliminate some manual work in Revit.
Pros of Revit Assembly Views
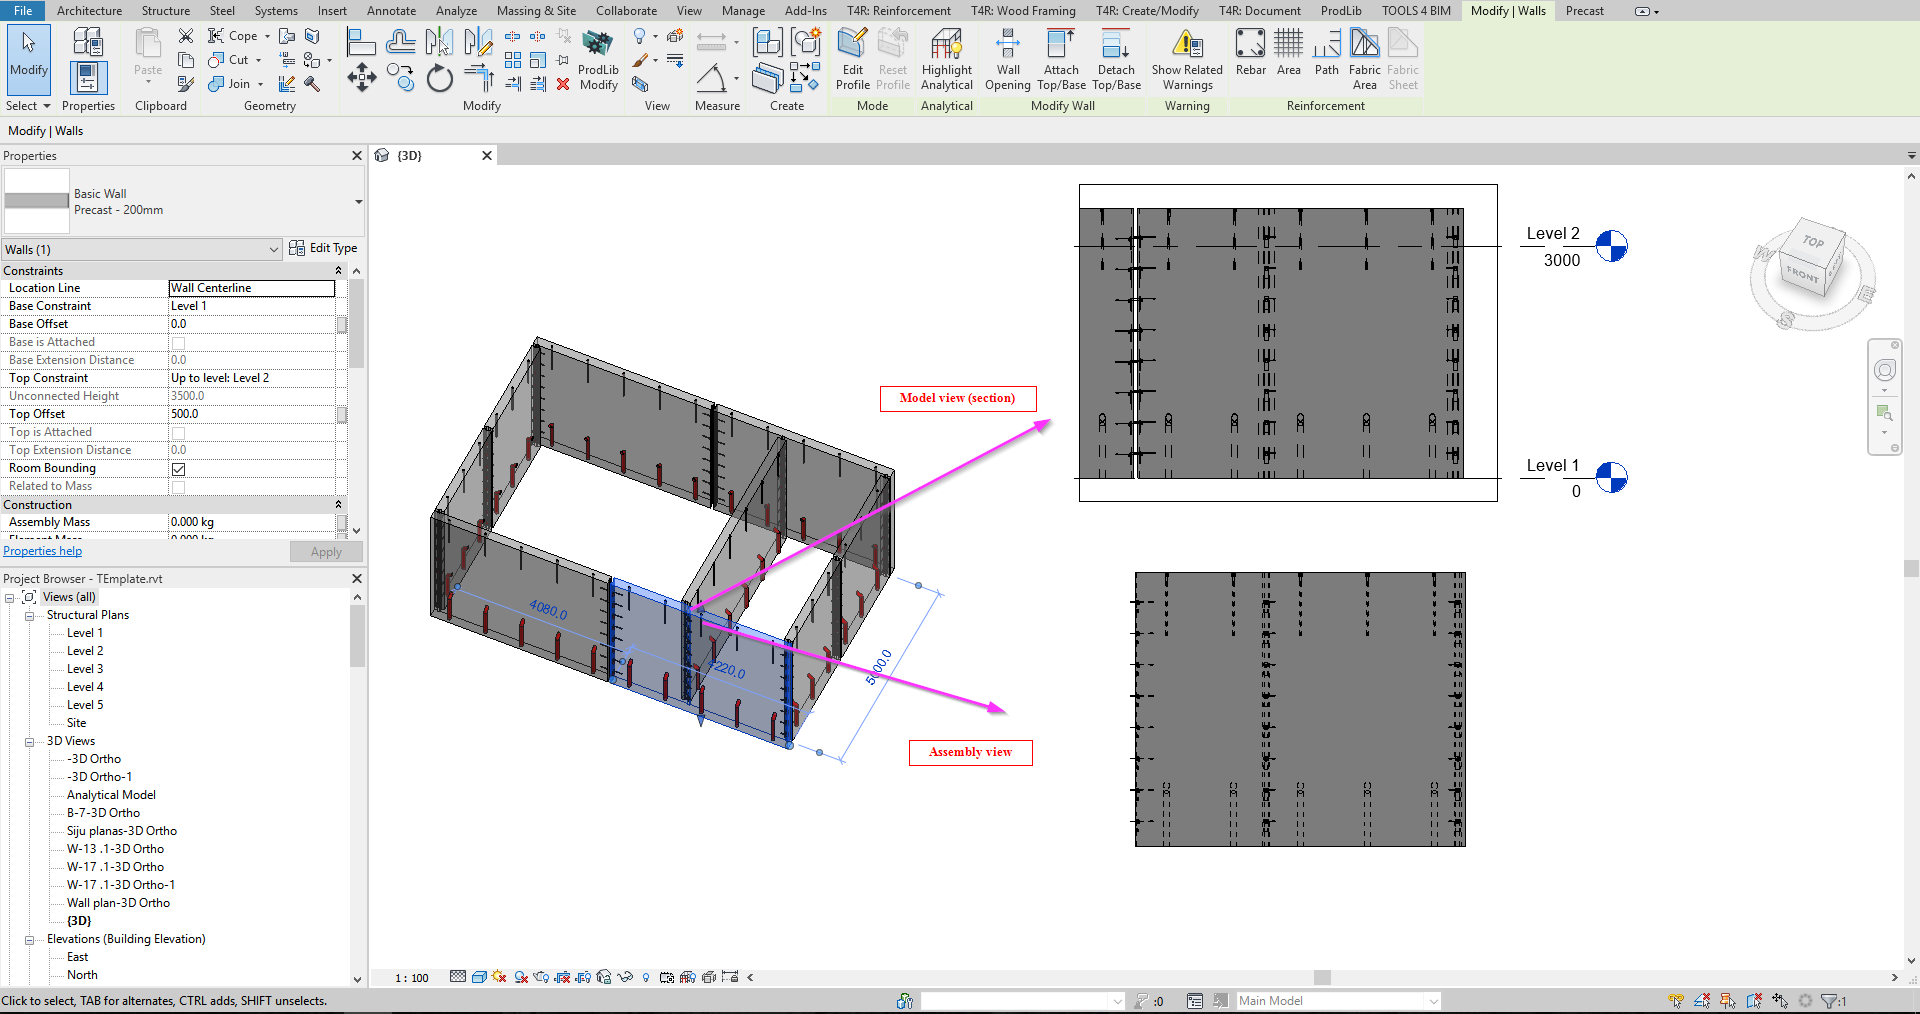
Assemblies have many advantages. Views, schedules, sheets are isolated from the model. They help keep things organized in the Revit project browser. It’s easy to create assembly views from any direction of an assembled unit. Revit will recognize if assemblies are the same and properly keep their naming.
Cons of Revit Assembly Views
You see elements as they are in the model, although in many cases, it’s necessary to deliver drawings the way they have to be assembled in the factory. For this reason, you have to rotate the assembly origin quite often, and if you need to do that for lots of assemblies, it takes a lot of time.
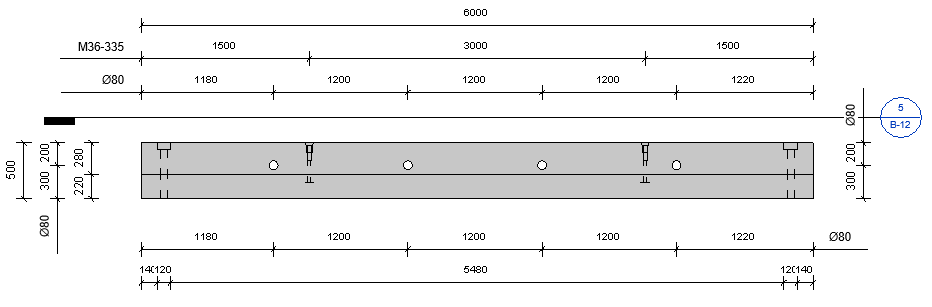
Selecting all necessary parts of an assembly – connections, reinforcement, framing elements, or what have you – might be a time-consuming and annoying thing to do, navigating in different views, avoiding overlapping, trying to select hidden elements, etc.
Talk about a surprise, headache, and total disaster for all former AutoCAD® users. Imagine: you have created an assembly, plus all the views, dimensions, notes, and schedules and have placed everything on the sheet. Boom, ready for production! Now in your project, you have an almost identical element. Let’s say it’s just a single connection plate that has been moved a few units down.
What would you do in AutoCAD?
That’s right, copy everything, move that one plate, and you’re done.
Well, guess what happens in Revit. If an assembly is different, you have to create views and dimensions and notes and do all the previous work from scratch. Not so fun, huh?
Change one assembly, and you will have a new assembly type. Which, if you think about it, is correct in one way since it might be a totally new piece of production unit. But a mounting problem is looming if you want to make the same change to all same-type assemblies that you have in your Revit project.
For example, add a connection family to 20 assemblies. You will have to edit each assembly and add that new element. Again, possible to do, but a lot of manual work.
Tip: Solve all these issues automatically by using AGACAD’s Smart Assemblies tool. It will correct the orientation of views, rotate the assembly origin [VIDEO], collect all hosted elements, create views with dimensions, and place them on sheets. It also has a dynamic update feature, allowing you to make a change to all same-type assemblies.

Let’s see, what else do you need to be aware of when using Revit assembly views…
Oh yes, you can’t create assemblies of an element that is already part of an assembly. And if you need to create separate views and drawings of individual assembly pieces, it will really annoy guys who need to create individual drawings of studs, plates, and other wood/metal framing elements; drawings of rebar cages; or drawings for embeds of precast elements.
Also, with assembly views, you can’t see surrounding elements, so it isn’t very useful for cast-in-place modeling or for on-site wood/metal framing projects.
Tip: To solve these challenges, you can use AGACAD’s Smart Views tool to create defined direction views in the model automatically instead of assembly views.
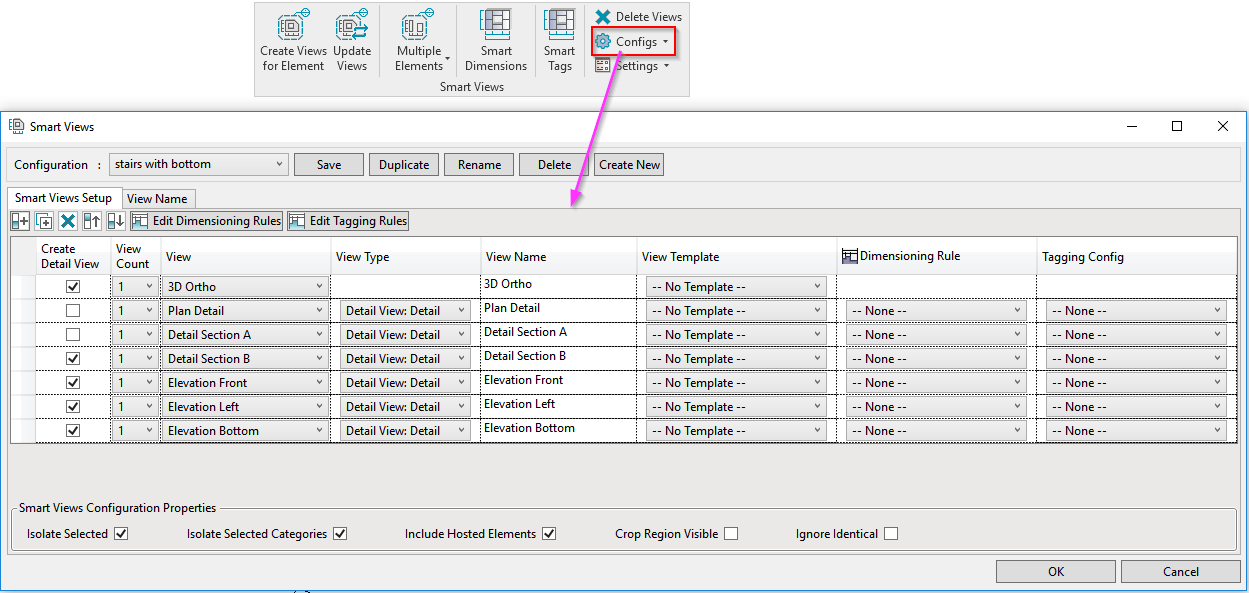

Both our Smart Assemblies and Smart Views solutions can create views, place dimensions, and tag elements. They can isolate elements, crop views, apply view templates, and orient views based on the position of elements in the model.
UPDATE August 16, 2023: Smart Assemblies and Smart Views have been discontinued as products, but their functionality is contained in Agacad Smart Documentation.