Certain buzzwords used in AEC offices, production facilities, and on site are supposed to hype up your cognitive problem-solving gears. Instead, they make you want to roll your eyes and go do something useful upon hearing them.
One such word is efficiency – a word so overused that the only purpose it has left is to show how serious you are about whatever it is you want to make efficient. Still, though, let’s try to recapture its objective meaning. Because, let’s face it, efficient is one thing AEC professionals can agree on that the design process should be.
What do we really mean when we talk about “efficiency at the drawing board” or “efficiency on the construction site”? From experience and having spoken with a fair number of architects, engineers, builders, manufacturers, and developers, the consensus is that efficiency is about reducing time spent modeling, scheduling, or inputting information and using it for solving problems instead.
Because a staff’s brainpower can be put to better use than filling in schedules. The people of an AEC outfit are capable of solving design, logistical, technical, and interdisciplinary coordination issues, so that’s what we want to free them up to do.
In this blog post I’m going to go through the key focus areas when it comes to managing BIM processes and Revit models and getting the most out of them.
Defining, developing and implementing standards and conventions compliant with BIM mandate
Offices of any size should keep up with the bare minimum of general housekeeping: define and develop company-specific standards and drawing conventions. These should become a pool of information available to everyone involved in project delivery and administration and should ideally be kept on the intranet or accessible on the LAN server. A first step towards efficient (there’s that word again) practice is to have common knowledge of how projects are run and what information levels should be maintained at a given project phase.
Attention should be paid to adopting existing or developing new BIM standards. If standards have been used loosely or there were very little common practice rules, the company should hire or consult with BIM professionals and implement things like project folder structure, modelling methodology, etc. (See Tables 1 & 2). It is also important to comply with existing BIM mandates relevant to your country. The guidelines in AEC (UK) BIM Protocol, for example, are laid out clearly and are quite useful when it comes to organizing your work effectively.
Table 1
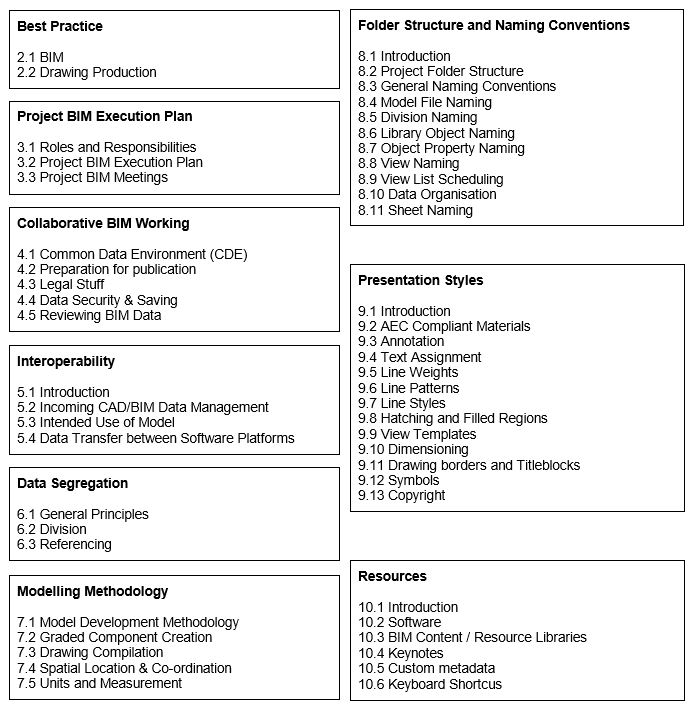
Source: AEC(UK)BIMProtocol-v2.0.docx
Table 2
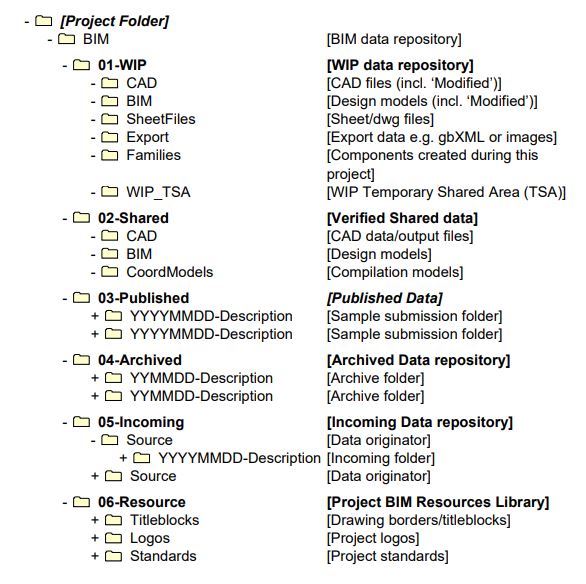
*Remember not to use spaces in folder names, as this can potentially interfere with file management tools and collaboration across the internet.
Purpose and setup of Revit template files
One of the best ways to save on time is to create a set of template files. Revit allows users to create custom Project Templates with data loaded in them, so you can include things like:
- Project name and number, client name
- Line styles and weights, material fill patterns, project units, and other project settings
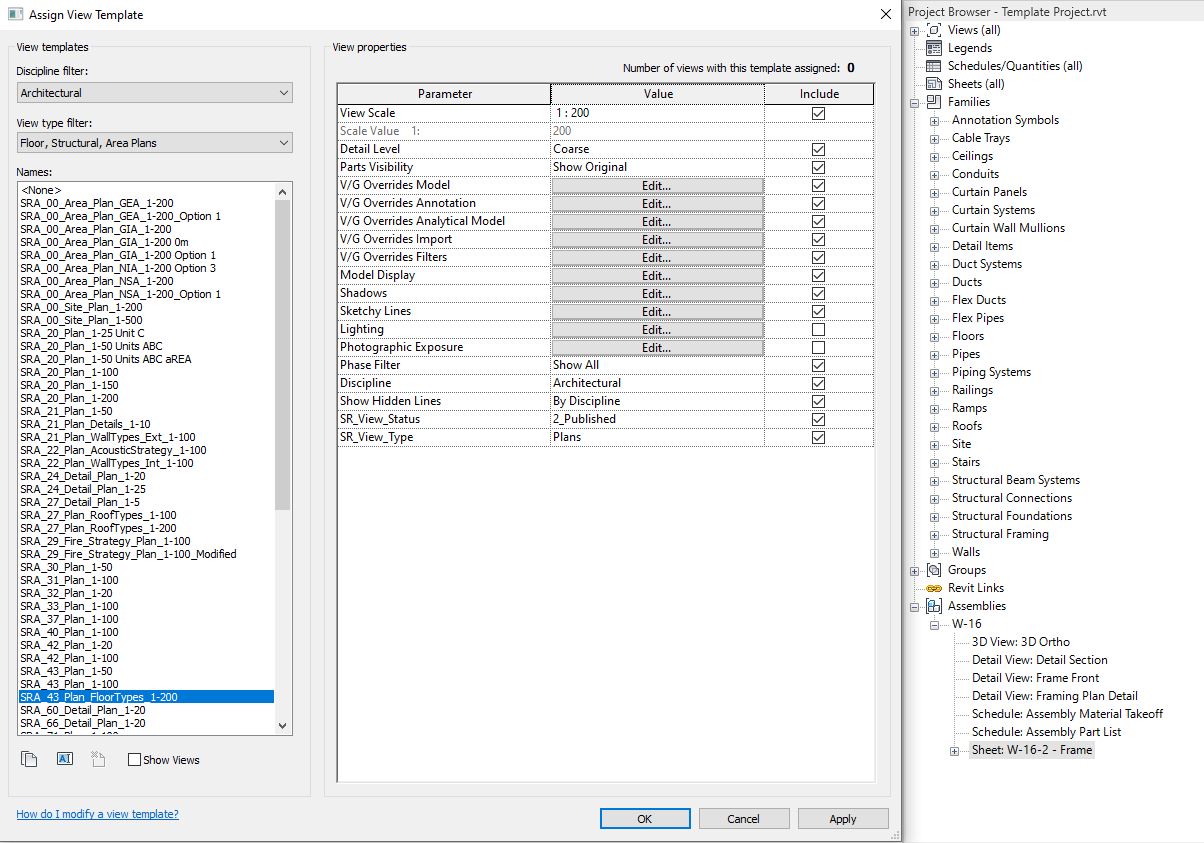
- View templates
- Families (both system and loaded)
- Plan views, levels, schedules, legends, sheets, etc. relating to project views
- Visibility and graphics settings
- Print settings
- Project and shared parameters
Use the default or define custom Project Templates to enforce office standards, so that every time you begin a new project from the template, you will already have some key information consistently in place.

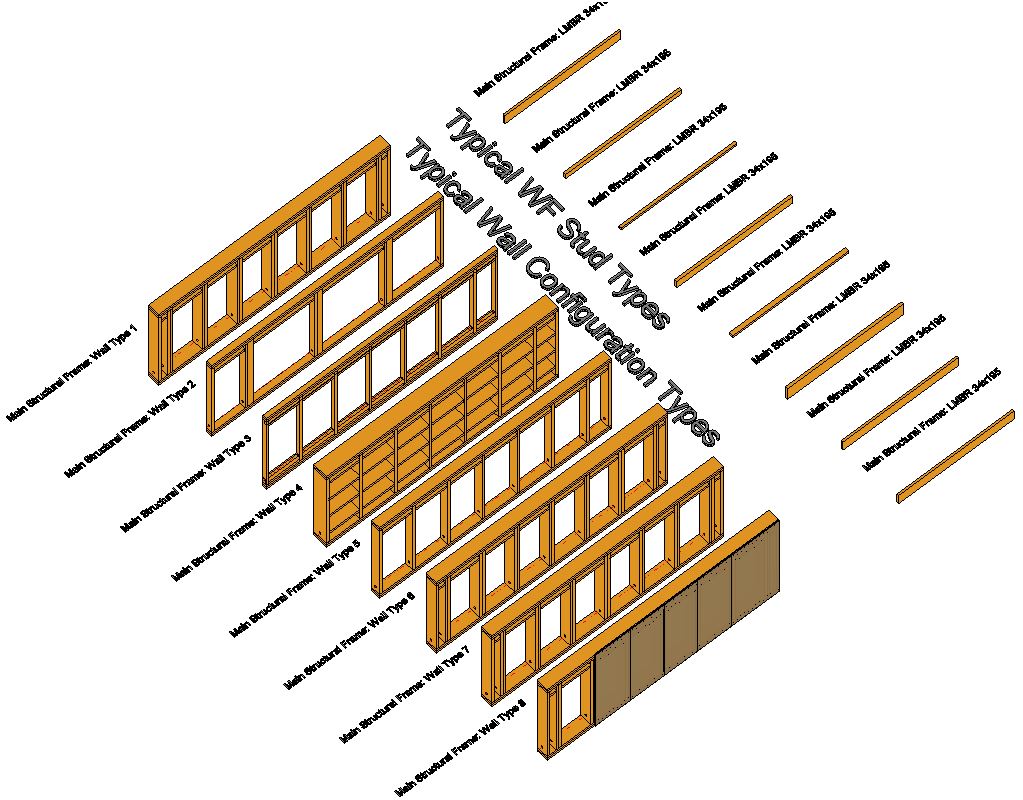
One of the most useful features of Agacad’s Wood Framing and Metal Framing software for Revit is the ability to use Template Projects, allowing you to have a repository of BIM data, things like wall, floor, and roof types with resolved buildups and naming as well as truss types and all kinds of fixing and connection details.
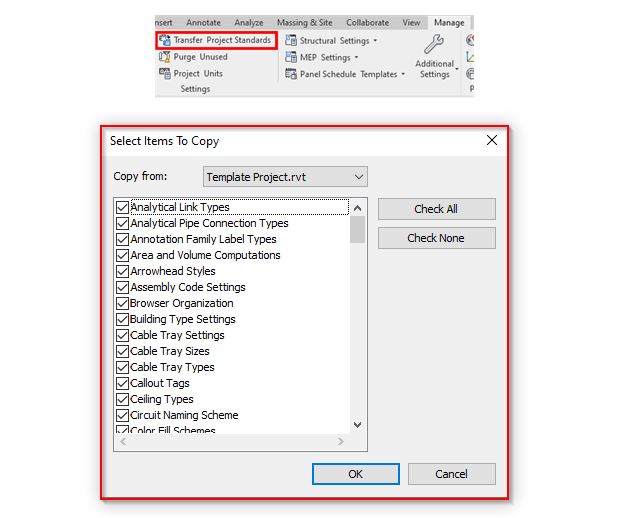
Additionally, you can work out configurations and how elements will be framed in actual projects, set up Sheet Templates and reuse the layouts in new projects without having to set them up from scratch, and Transfer Project Standards from the Template Project to a current project. The latter comes in handy if the Project Template from which the new project originated doesn’t contain some project standards (wall types, view templates, etc.).
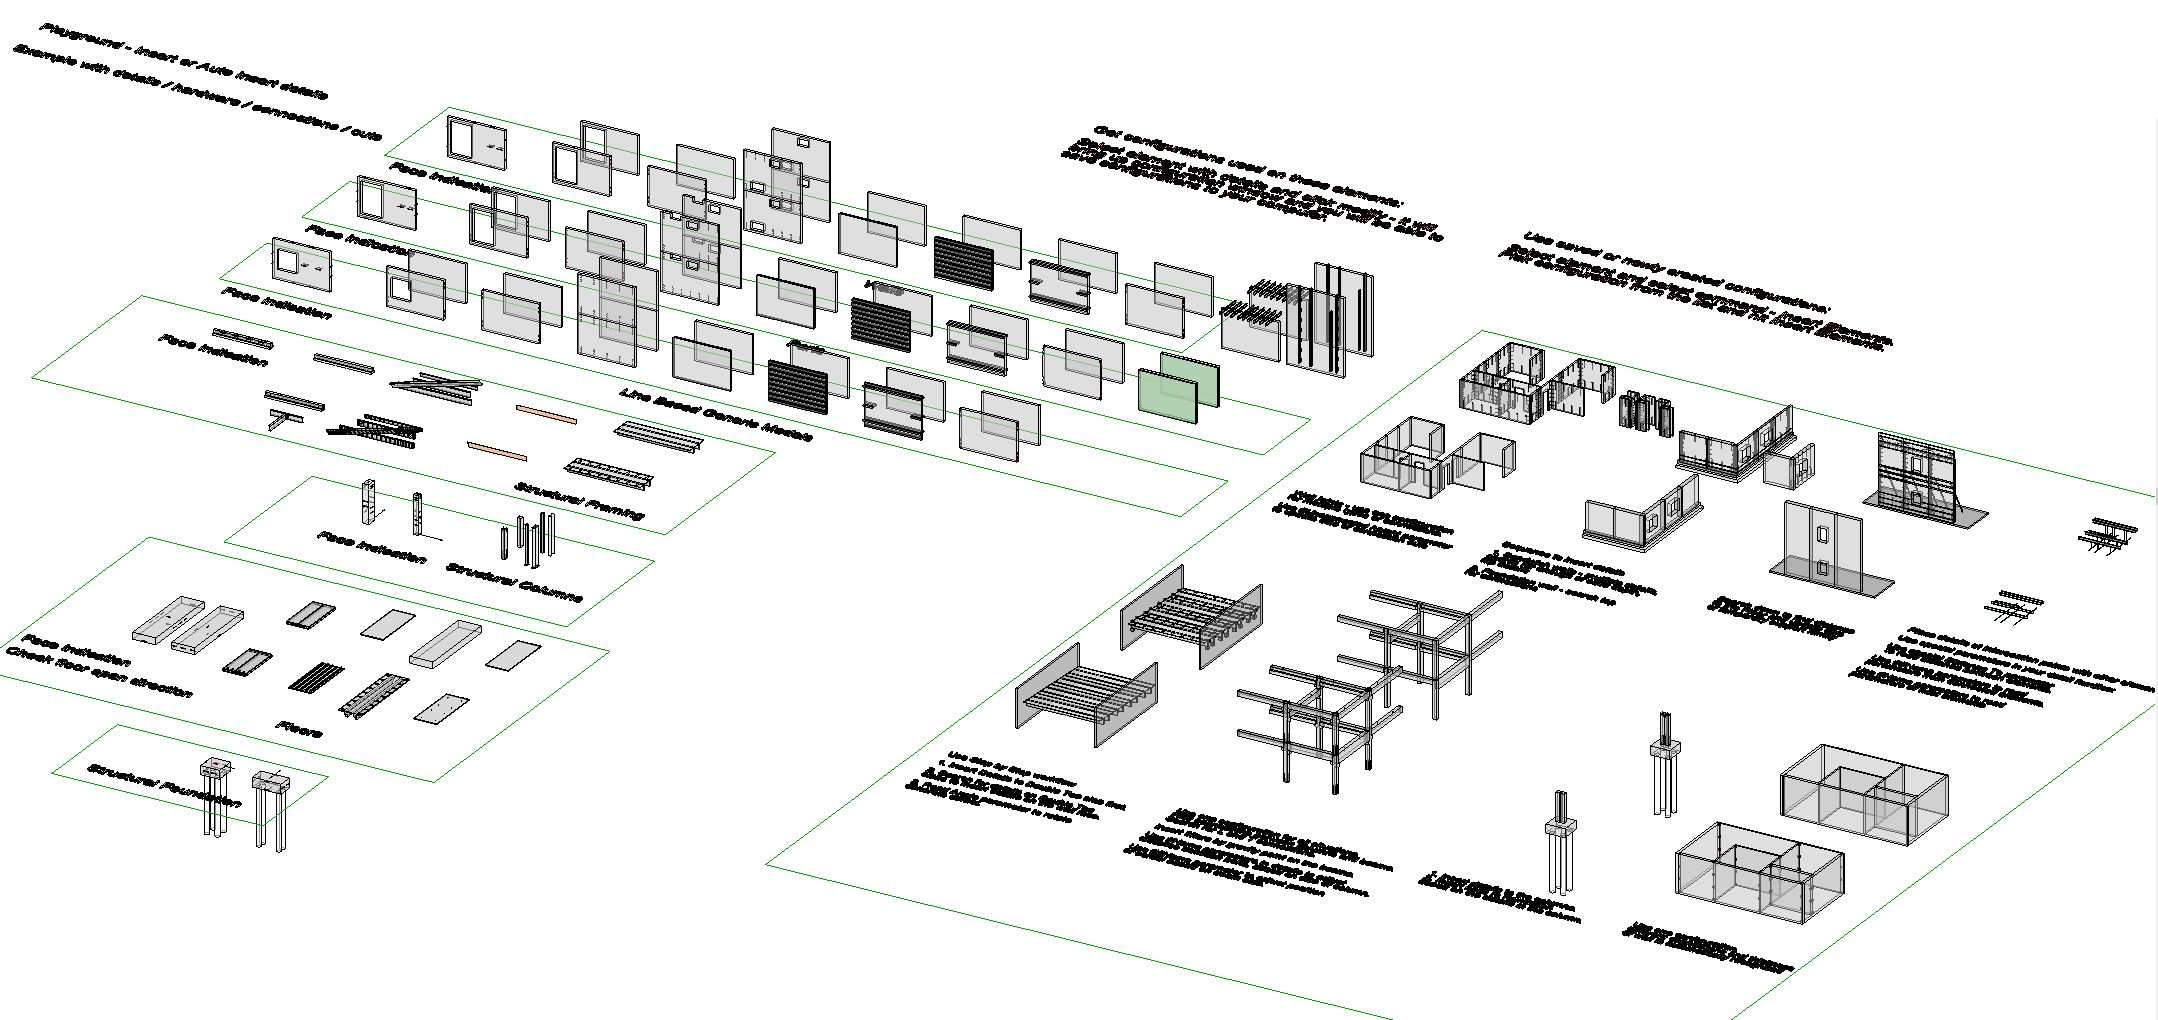
See Agacad technical documentation for more detail on how to setup a Template Project.
The aim of templates is to avoid doing things ad hoc – be it project browser organization or tagging families in views – and never re-using them again. Templates increase overall efficiency (there’s that word again) by re-using BIM data and workflows that were created once to serve the collective effort. Information like this should exist in a common data environment, such as a server, and should be available to everyone in the company.
Starting a new Revit project and feeding data from template file
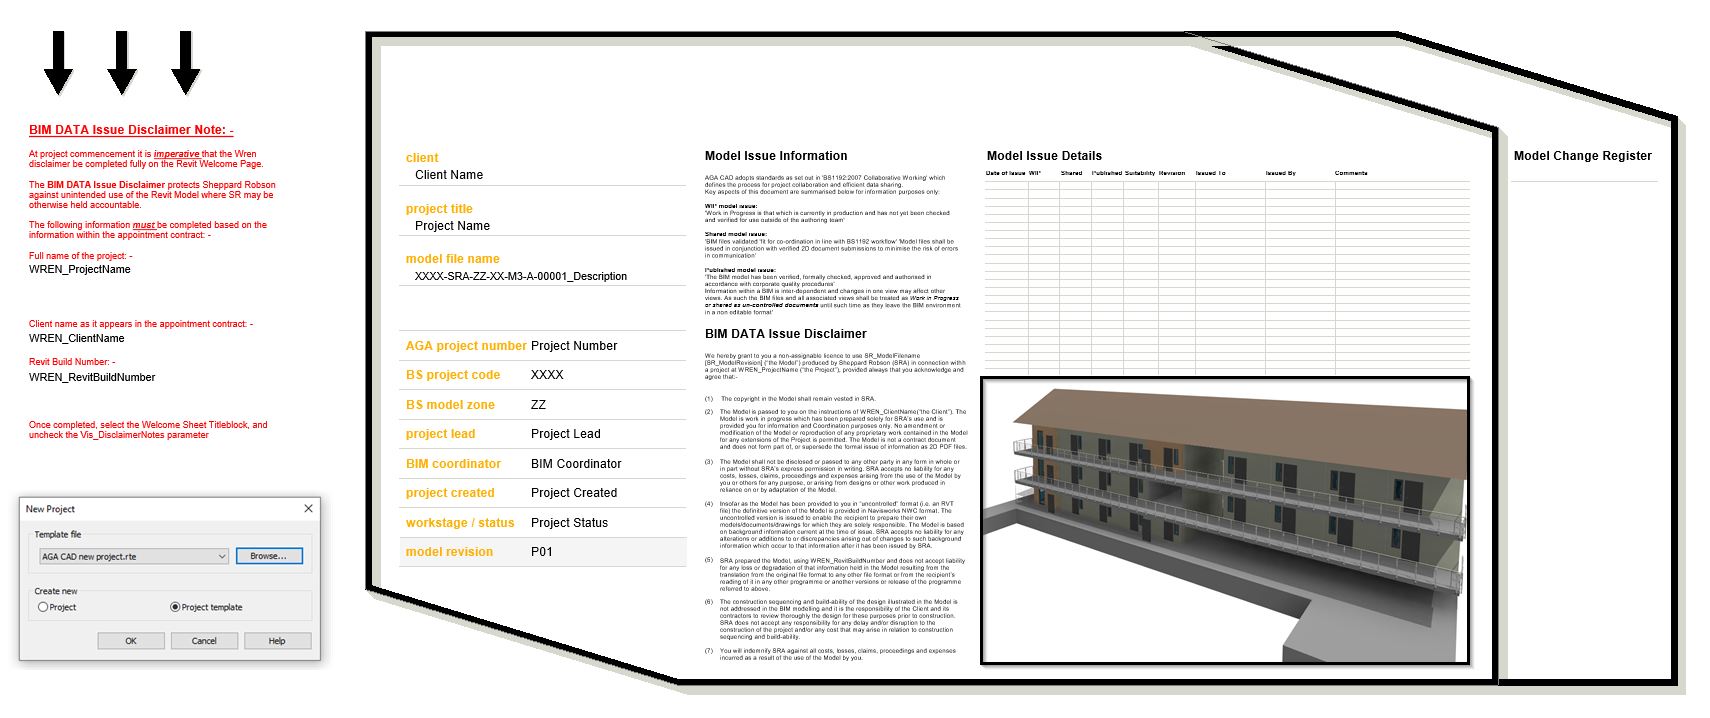
Starting a new project doesn’t have to be a daunting task. If the standards and procedures are in place and template files are set up, then new projects can accelerate a lot faster and with little hassle. Splash screens (e.g. below) should be part of the project template. The project team only needs to adhere to rules and fill in information, for example, when models are shared with contractors or consultants. Appropriate disclaimers for sharing BIM data should also be common practice.
How can you transfer Revit project standards to new projects using Agacad Framing software?
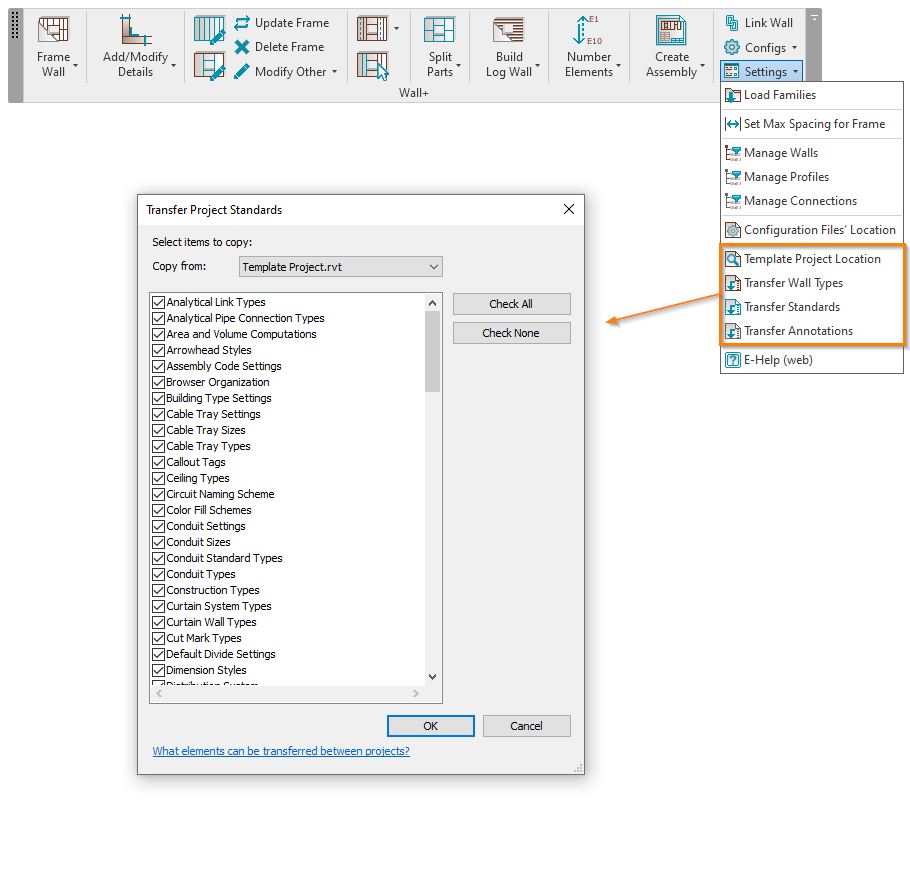
- Define the Template Project location.
- With the current (new) project open, navigate to the Settings dropdown menu and select the relevant command:
- To transfer only annotation categories, select Transfer Annotations.
- To transfer only wall types, select Transfer Wall Types. The same goes for floor or roof types, in which cases the command is, respectively, Transfer Floor Types or Transfer Roof Types.
- To transfer more than just annotations or wall/floor/roof types, i.e. all or some available categories (standards), use the Transfer Standards command. This is a great way to feed existing BIM standards to any new project.
Storing central Revit model and configurations in LAN/WAN (cloud server)
Considering how advanced online file sharing has become – heck, it’s possible to access files from anywhere in the world – it would be foolish not to take advantage of it. Renting a server (e.g. Panzura) or using online platforms for file storage and administration (e.g. Microsoft SharePoint) is a great way to manage your Revit models (rvt, rfe, nwc, ifc, etc.) and other files related to company standards.
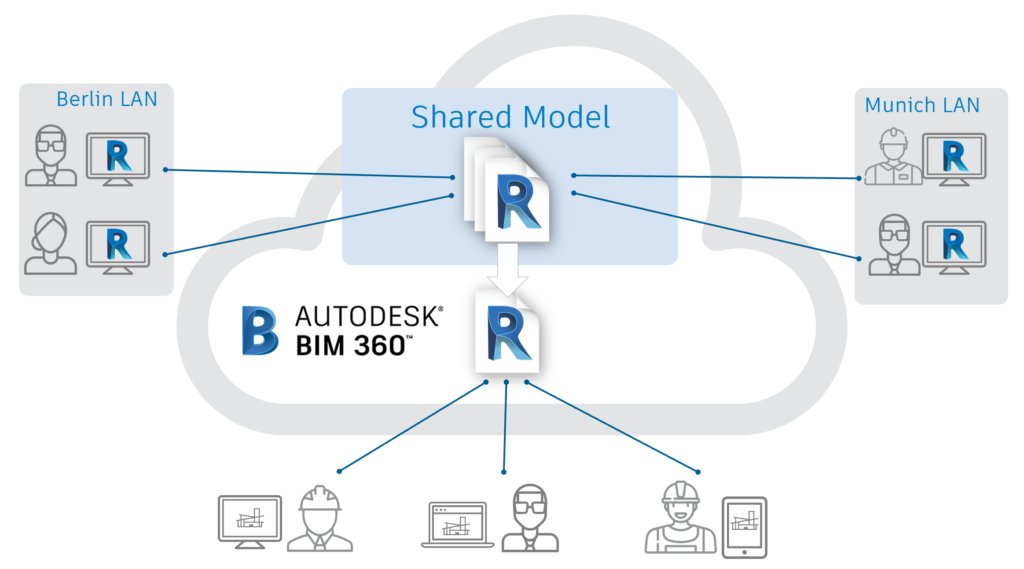
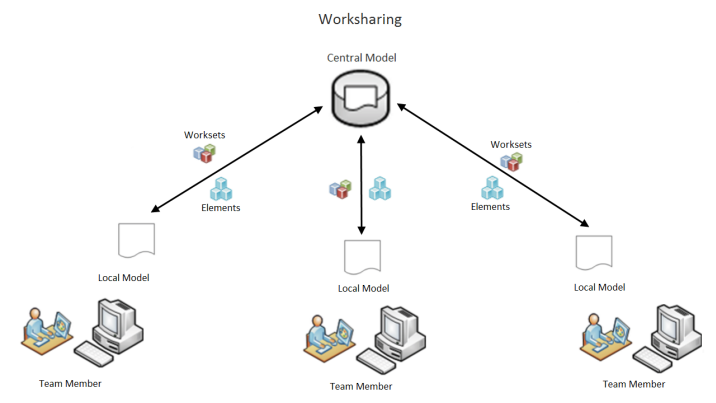
Information stored on a wide access network (WAN) can be accessed by anyone who has the required permission. You may want to store your central file in the cloud server and give access permission to anyone collaborating in the project. Collaborators create local files and synchronize changes to the central file that’s common to everyone. Changes will be permanently saved to the central file, though the Revit model must be collaborative to use this functionality.
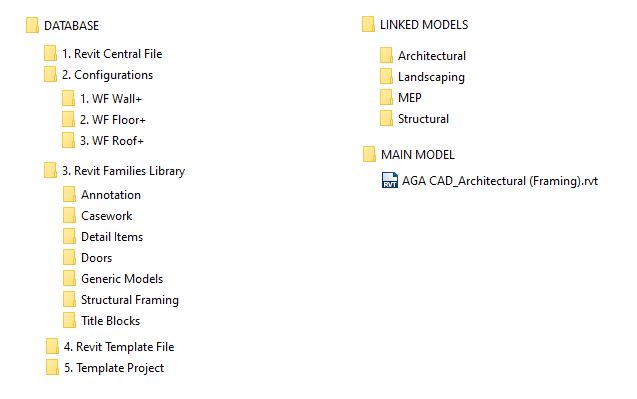
All this can also take place on a local access network (LAN) and work exactly the same way, just that it would be local to where the server is, typically somewhere in the office. The content of files and folders stored on the server might resemble the folder structure as seen below.
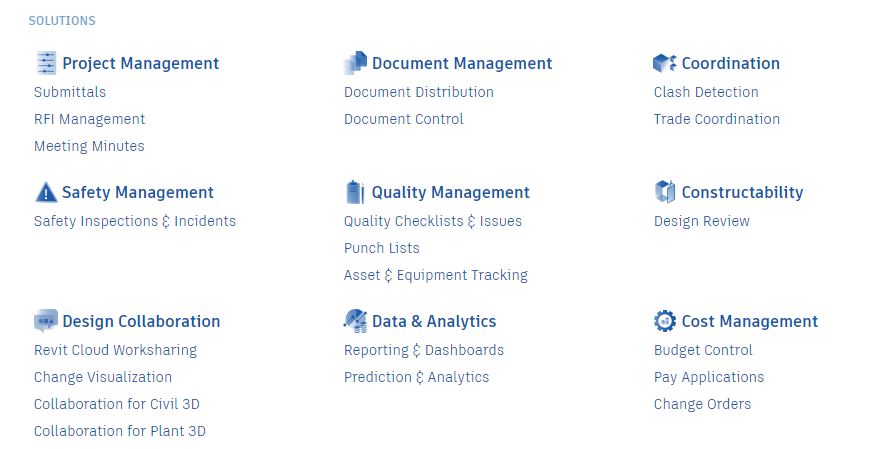
Another great way of establishing a CDE (common data environment) for design, documentation, and collaborations tasks is BIM360, a.k.a. Autodesk Construction Cloud. It’s a construction management platform with powerful features. The web-based software lets users oversee the entire scope of the project: document management, design collaboration, and model coordination are the main areas of functionality. Both central and template models can be uploaded to BIM360 as shared among the project team or consultants. Files and folders of company standards can also be stored away in the cloud and be accessed by the team when needed.
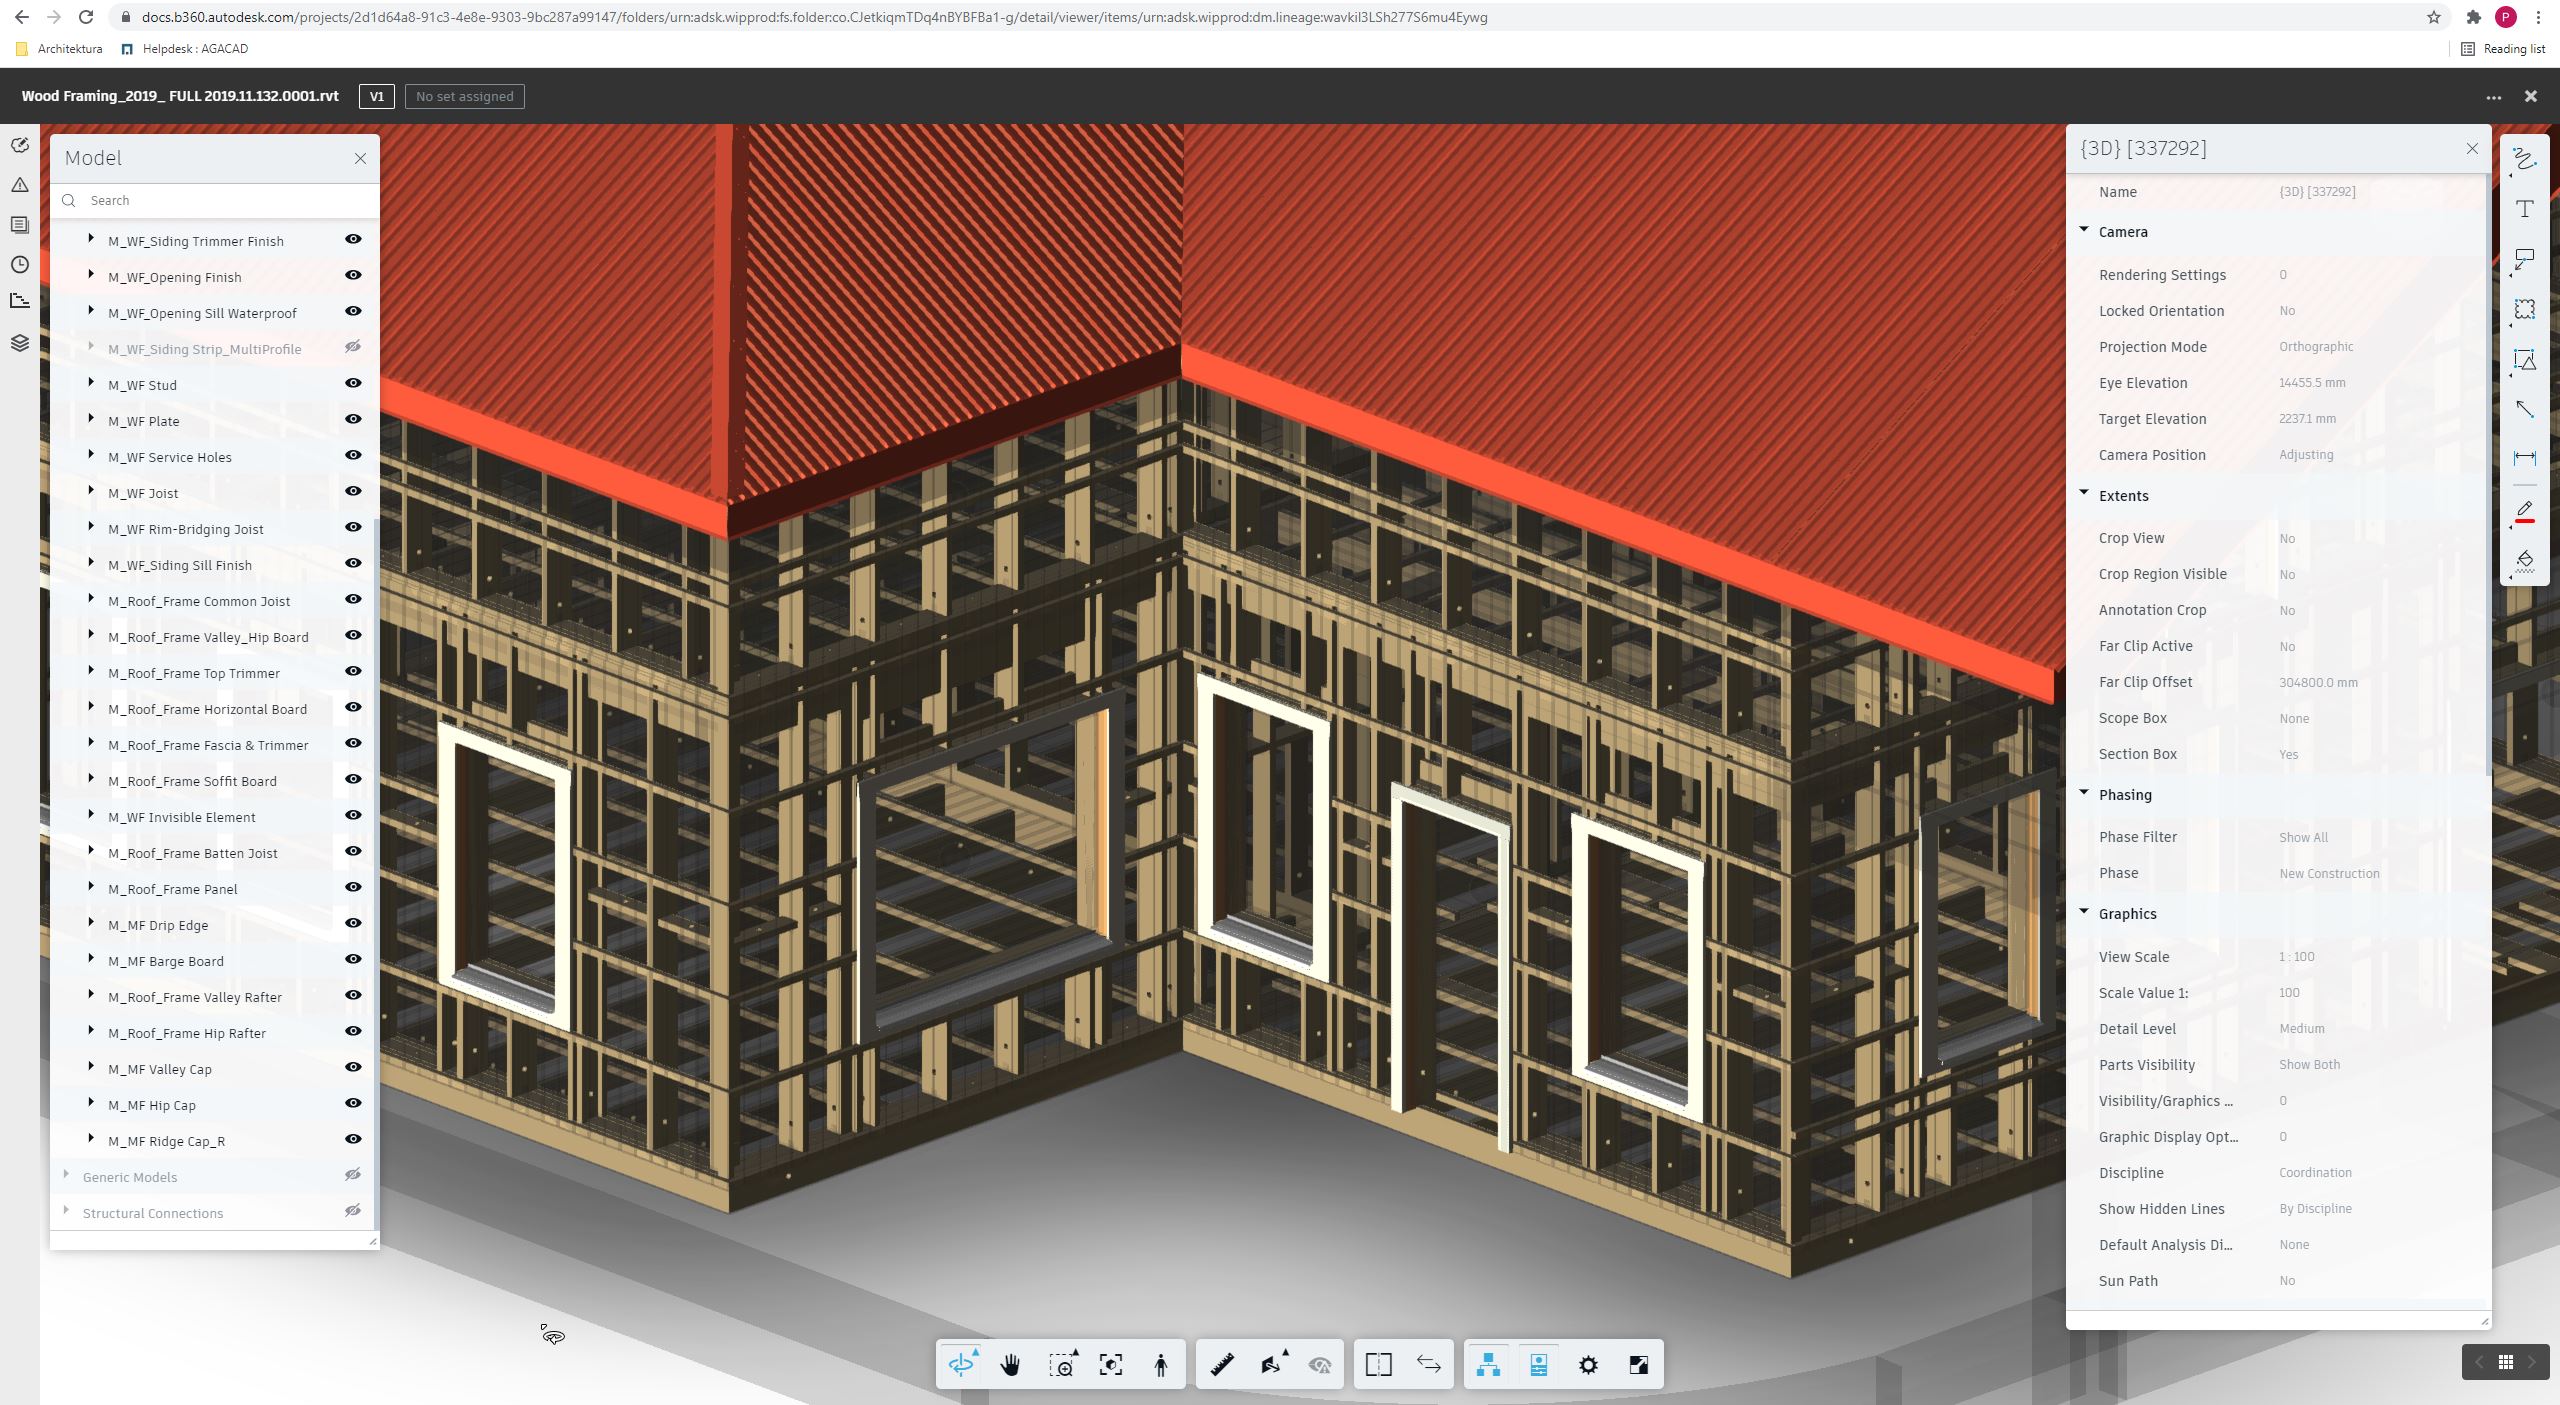
The advantage of BIM360 is that, to inspect the model or perform some design coordination tasks, the user doesn’t need to have Revit installed on the workstation. That means BIM360 users on laptops, tablets, or even phones can view, inspect, and markup a model on the web as well as access drawings or schedules.
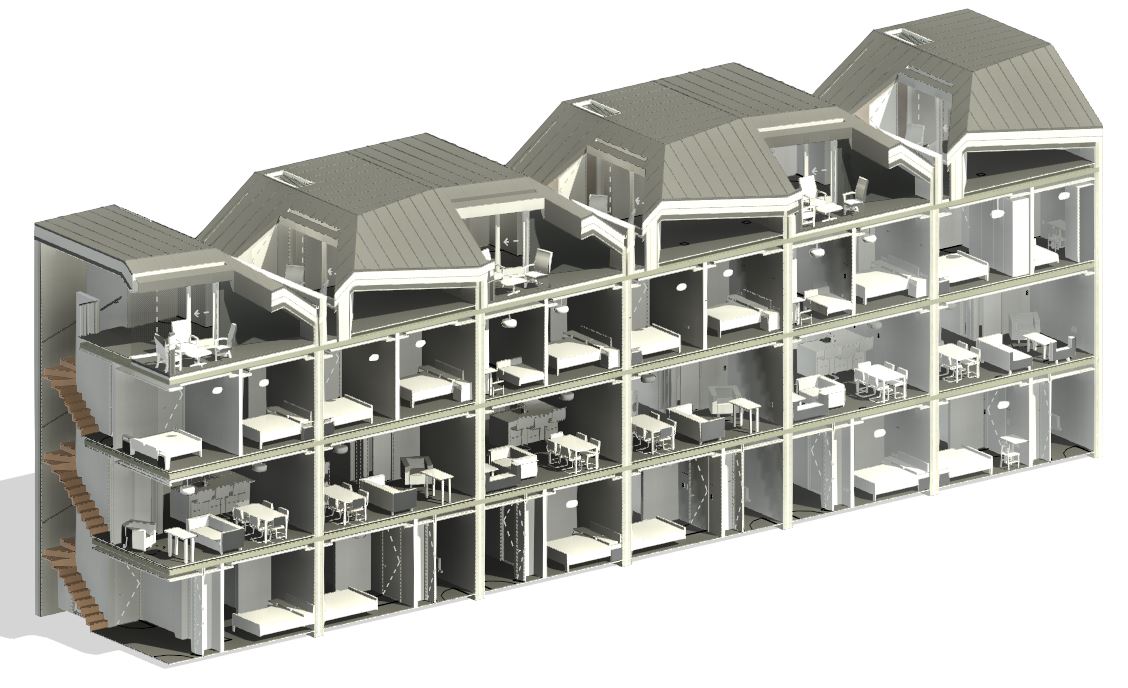
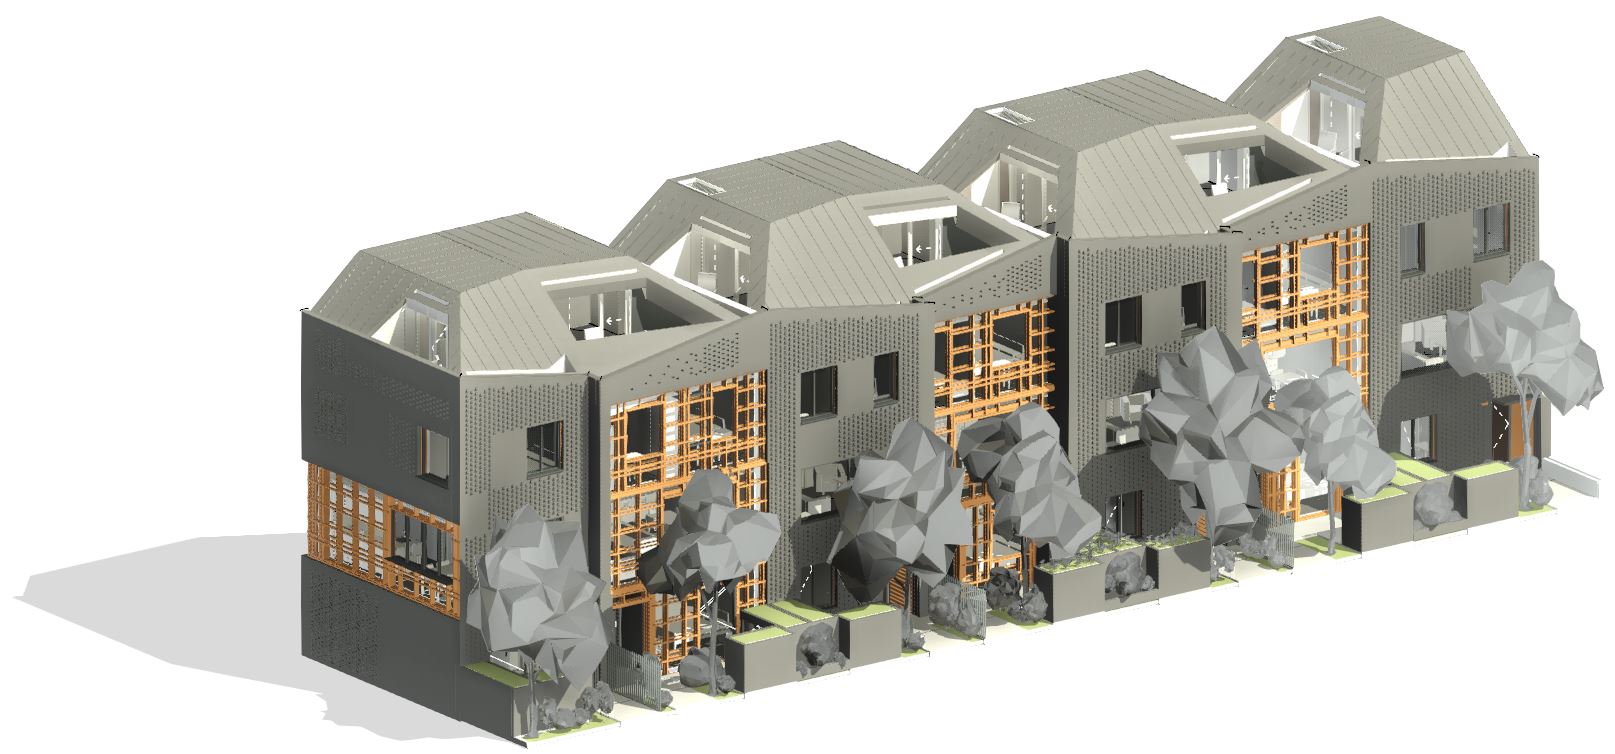
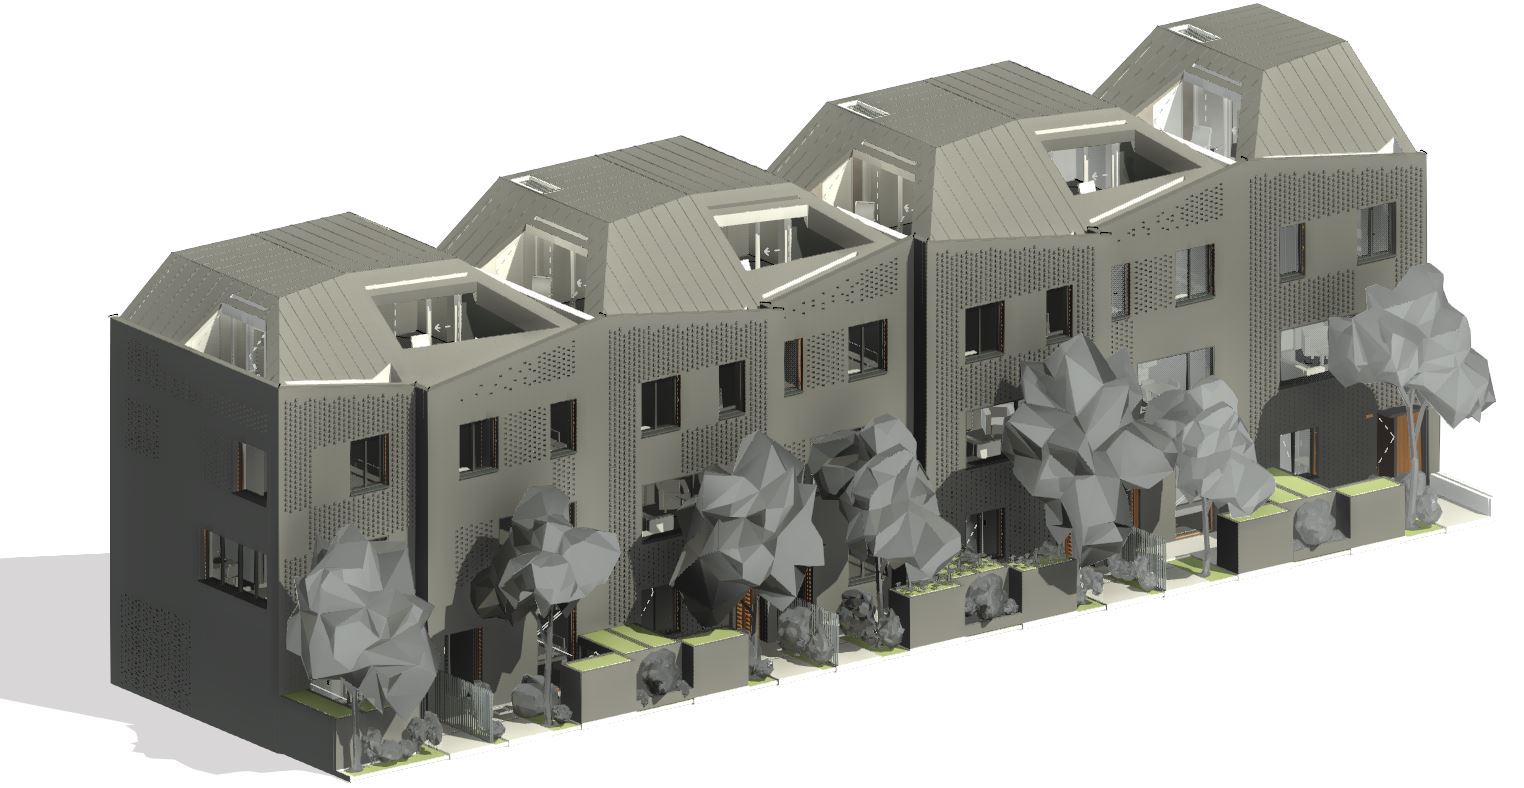
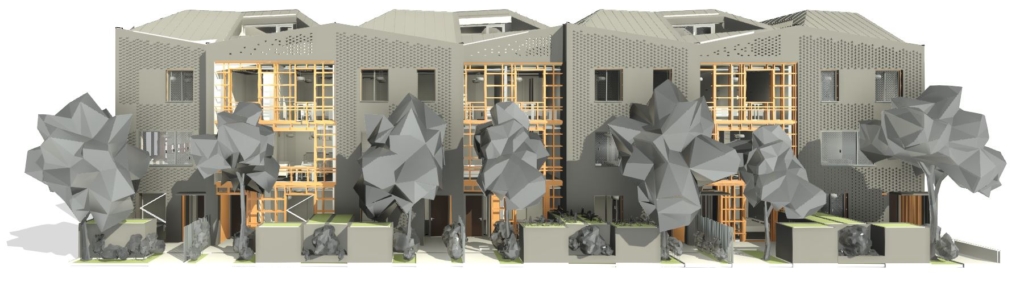
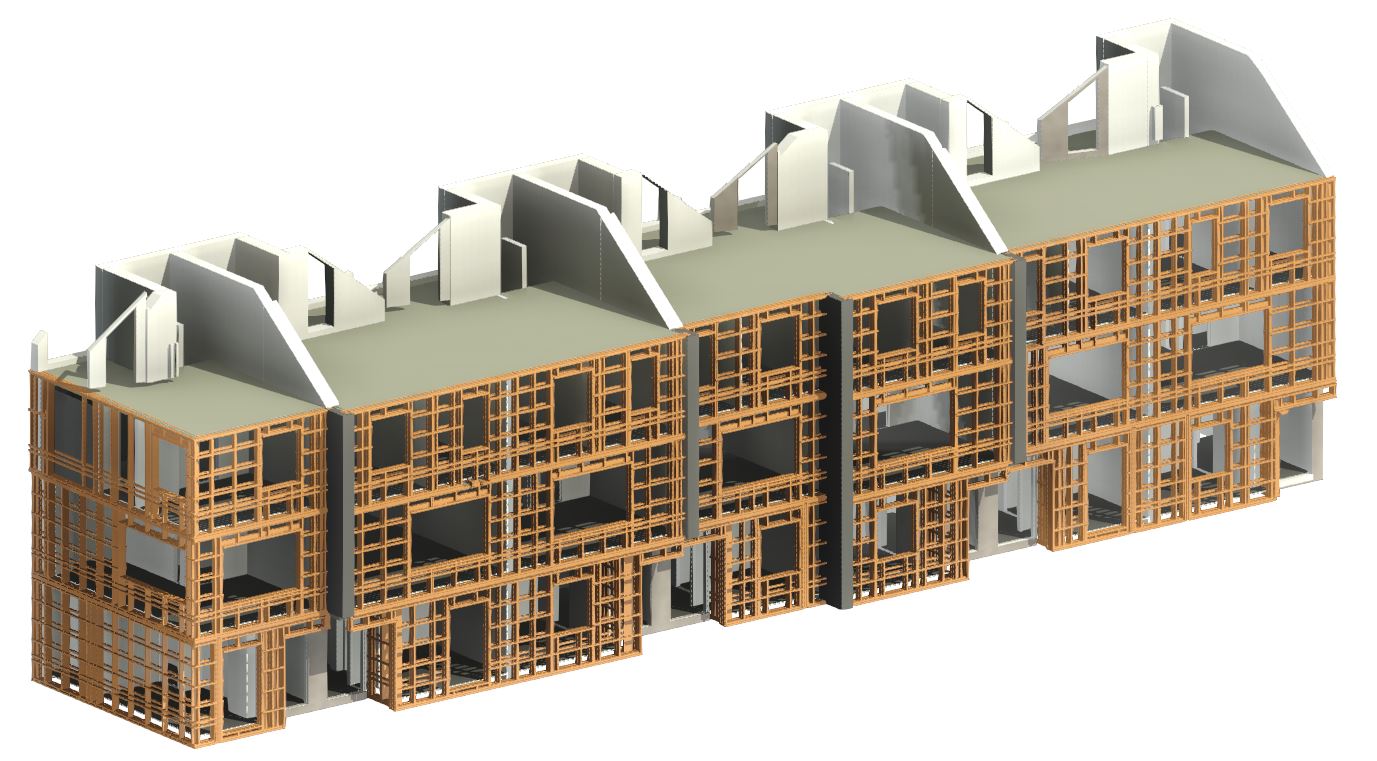
Fully framed models can be inspected and scheduled in BIM360:


Working with linked Revit models (copy monitor)
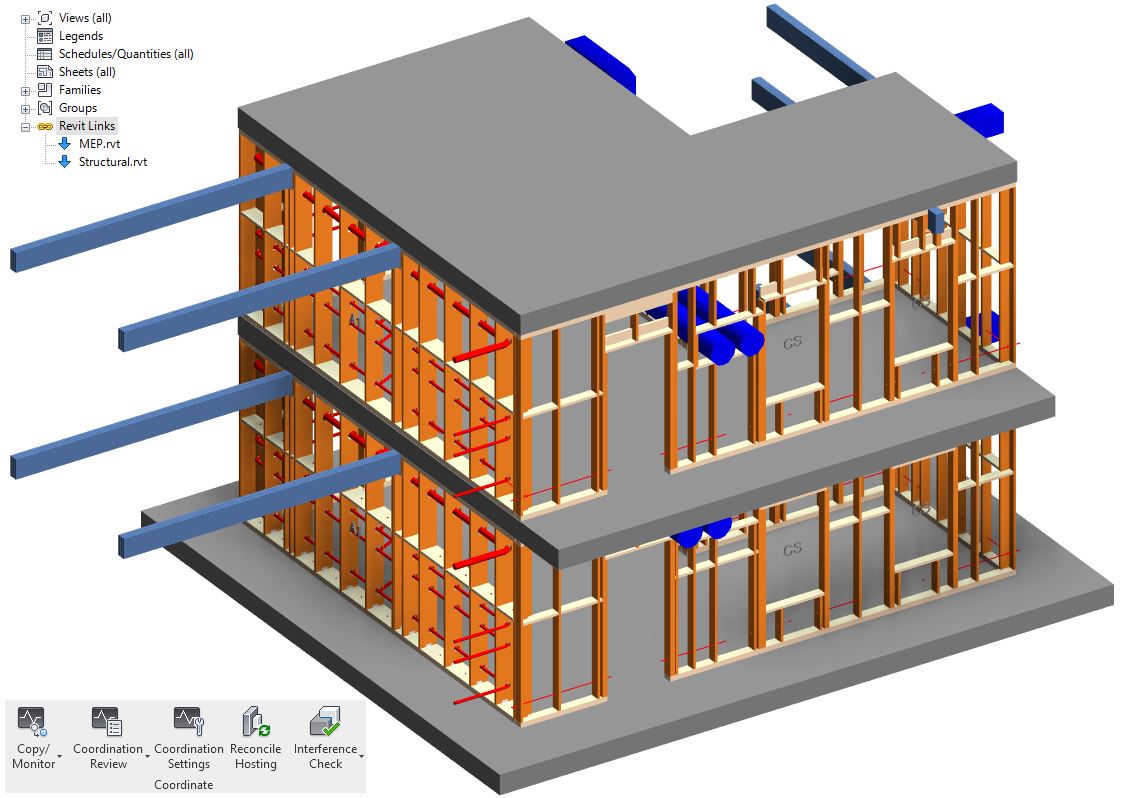
Working with Revit links is a great way to separate AEC disciplines and perform interdisciplinary coordination between design teams. It does, however, require exchanging BIM models regularly. Once the links are loaded and graphics/visibility options are set, it is convenient to explore how different systems would work together and foresee potential issues or clashes between elements.
To be able to do this, a central Revit model must be established. Then the user can link-in models of other disciplines. When using our Wood/Metal Framing software, we recommend that wall, roof, and floor elements are ‘live’ in the current model to be able to produce structural framing, insulation, sheathing, cladding, etc. To do that, one can use Revit Copy Monitor and copy/paste or bring in elements from a linked model to the current one. Then the AGACAD software user can utilize existing Wall+, Roof+, and Floor+ functionality to generate framing and documentation. Working with linked models is a great way to work efficiently between remote offices, separate design teams, or separate disciplines.
Enabling collaborative environment: synthesizing worksets, Wood/Metal Framing
A great way to enhance interdisciplinary coordination and overall efficiency (there’s that word, again) is to classify elements based on category, building component, or discipline.
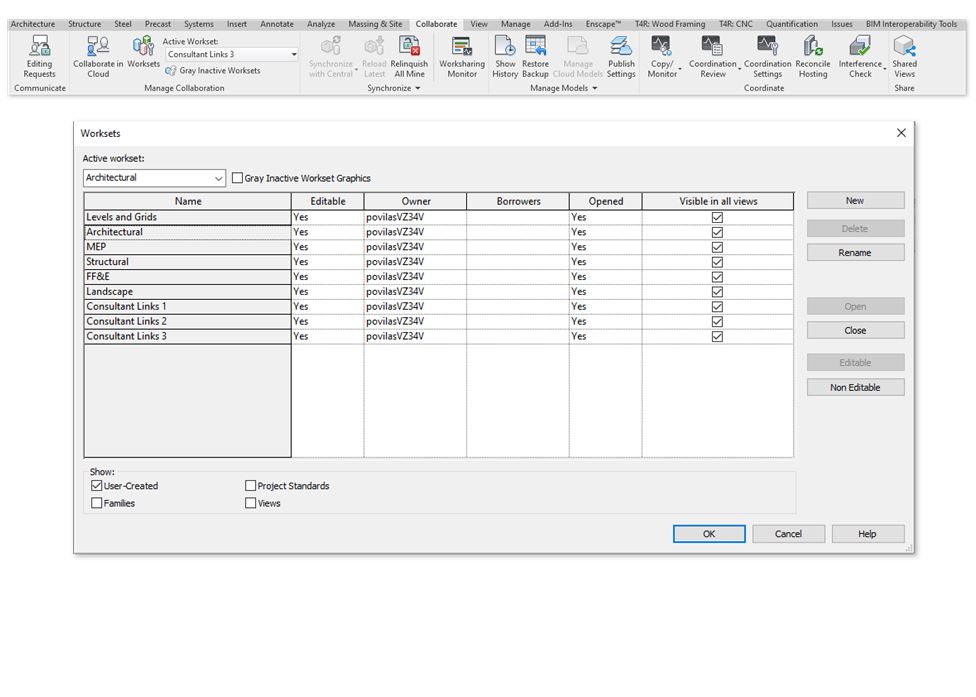
One way to make models more central is to enable worksets. Instructions on how to setup, name, and use worksets should be part of the individual company’s set of rules or standards.
Worksets are a way of subdividing your model by grouping elements based on a particular function or area within your model rather than by categories. Subdivisions of a model can be horizontal or vertical. As one of the collaboration tools within Revit, worksets can improve performance, data handling, and sharing. Utilize worksets for greater visibility, control, and faster performance. Turn off worksets that aren’t required for the modelling task at hand. Revit already has one way of managing object visibility and classification. It’s done by categories – Visibility/Graphics Overrides window. Worksets can also be used for linking other models to your central file and gaining more control over the link.
With the advent of BIM and the push towards transforming the AEC industry to address changes in how we design and build, the collaborative nature of projects has become the keystone of success. The advancement of architectural and engineering software has allowed practitioners to share building models (digital twins) to an extent where multiple teams are able to work and collaborate on a single model. And bringing the power of AGACAD to bear on in-built Revit functionality makes collaborating even smarter and more efficient. By using Revit central/local files, worksets, configuration files, standards, and templates, you can set a solid foundation for any type or size of project.
A company’s staff is often its most valuable asset. Why waste such an asset by having employees do manual, time-consuming, dull BIM tasks? Not to mention that it’s totally unnecessary in this day and age. There are great benefits to be had in developing company-specific standards and procedures when it comes to BIM.
The flip-side of the coin is that the staff should always have both eyes on the ball and feel competent following the workflows in place. If all this is followed through properly, companies can expect to reap major time-savings.