There is a very helpful capability in Smart Hangers, an application for Autodesk® Revit®, to calculate Hanger Elevation from Level. That is if you have a Duct/Pipe/etc. inserted in Level 1 with the height of 3000mm, hanger would inherit this parameter and you can easily transfer it to your created parameter automatically. That can be used for very informative tagging.
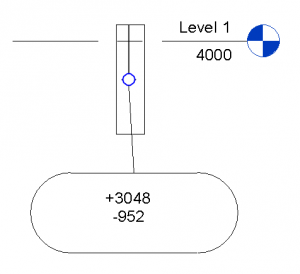
So this is how I used it in 8 easy steps. I don’t know exactly how your organization does the tagging, but this is an example of what you can do:
So what I did was:
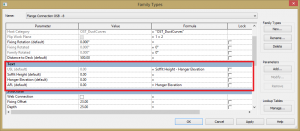
1. I opened up the hanger family created four parameters, two Shared AFL (Common, Length, Instance) and USL (Common, Length, Instance) and two family parameters Hanger Elevation (Common, Length, Instance and Soffit Height (Common, Length, Instance).
2. Then I made simple calculations in formulas, like this:
3. Then, I loaded this family to project and loaded Structural Connection tag with shared AFL and USL parameters as Labels.
4. I distributed the hangers, and
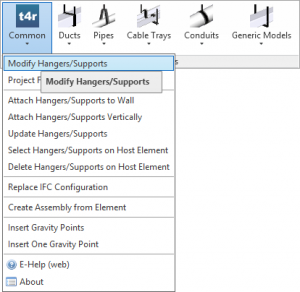
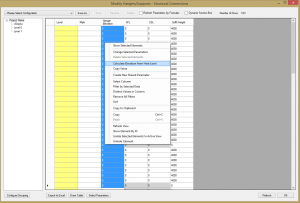
5. Opened up Modify Hangers/Supports in Smart Hangers:
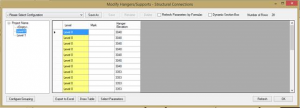
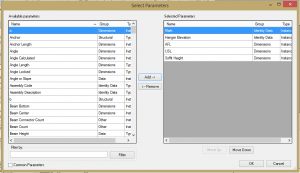
6. Under Select Parameters I inserted my created parameters,
7. Then I pressed OK and then I selected the column Hanger Elevation and used Calculate Elevation from Host Level function.
To insert Soffit Height do almost the same, but use the Change Selected Parameters function to enter the soffit height that you have over the particular hangers.
8. Family will automatically calculate the required parameters, and all that is left is to tag your hangers.
You can do the same with all your hangers and it is only one time work that will save lots of time for you.
For more information or question that you might encounter contact us at support@aga-cad.com.

