We’re excited to announce a new feature of our Smart Browser software for Revit that will take your library organizational capabilities to the next level.
As creators, we understand the importance of conveniently navigating through your libraries, especially when working on intricate projects. That’s why we’ve integrated a powerful tagging system, enabling you to quickly categorize, find and load sets of elements directly into your project.
The new tagging system is both intuitive and versatile. Once you tag your elements in a library, these tags are saved directly within the library file. This ensures your categorizations remain exclusive to the library where they were created, preserving the uniqueness and purpose of each collection.
Whether you’re grouping elements based on a project, theme or any other categorization method, tags become your ultimate ally in curating custom sets.
Applying/removing tags in Revit family libraries
We have added a single window through which you can add, remove and overall control tags in their libraries. To work with tags, open the library view in Smart Browser, and on the left, search for the new tag icon:
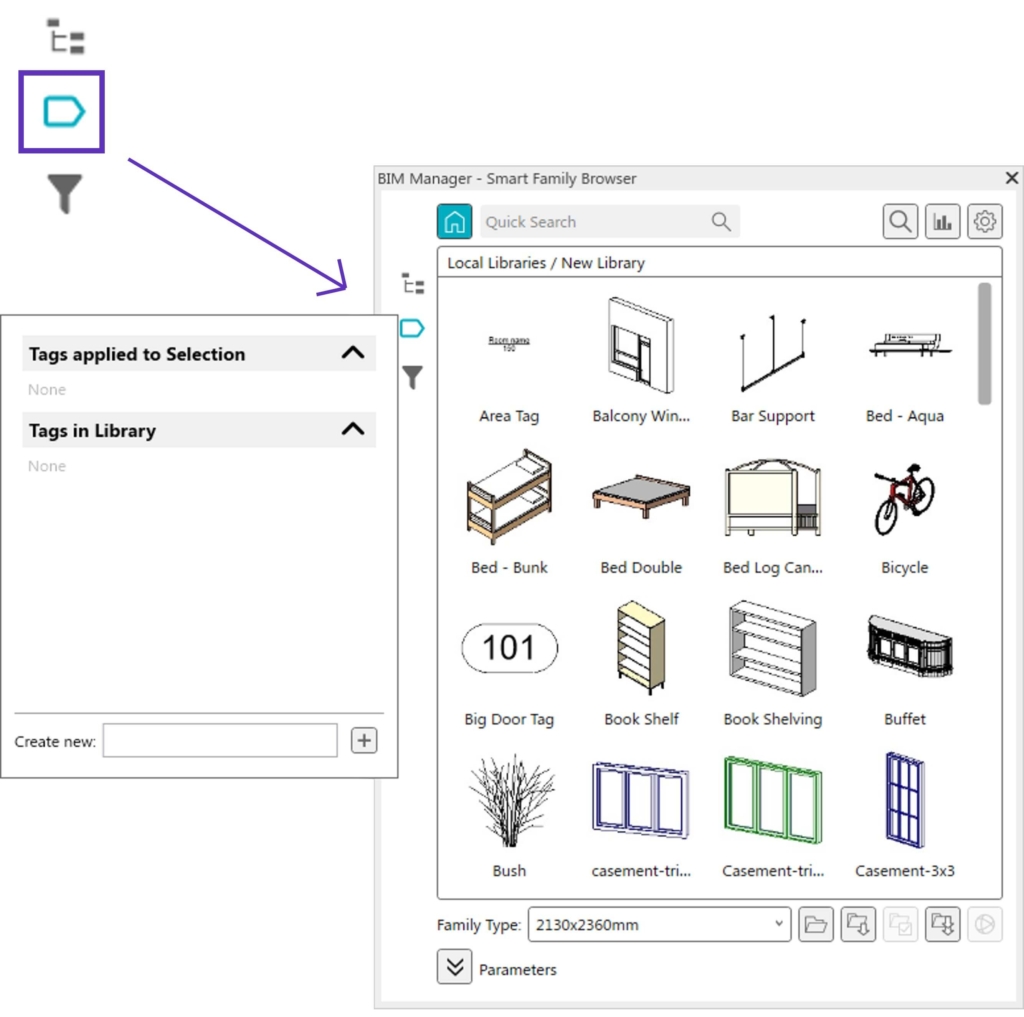
There are two separate groups: ‘Tags applied to Selection’ and ‘Tags in Library’.
In the first group, you will see all the tags applied to the currently selected element or elements.
In the second group, you will see all the tags used in the current library.
To create a tag, select one (or multiple) families in the library and write a tag name in the ‘Create new’ field. A tag can be added by clicking on the ‘+’ button or by hitting ‘Enter’.
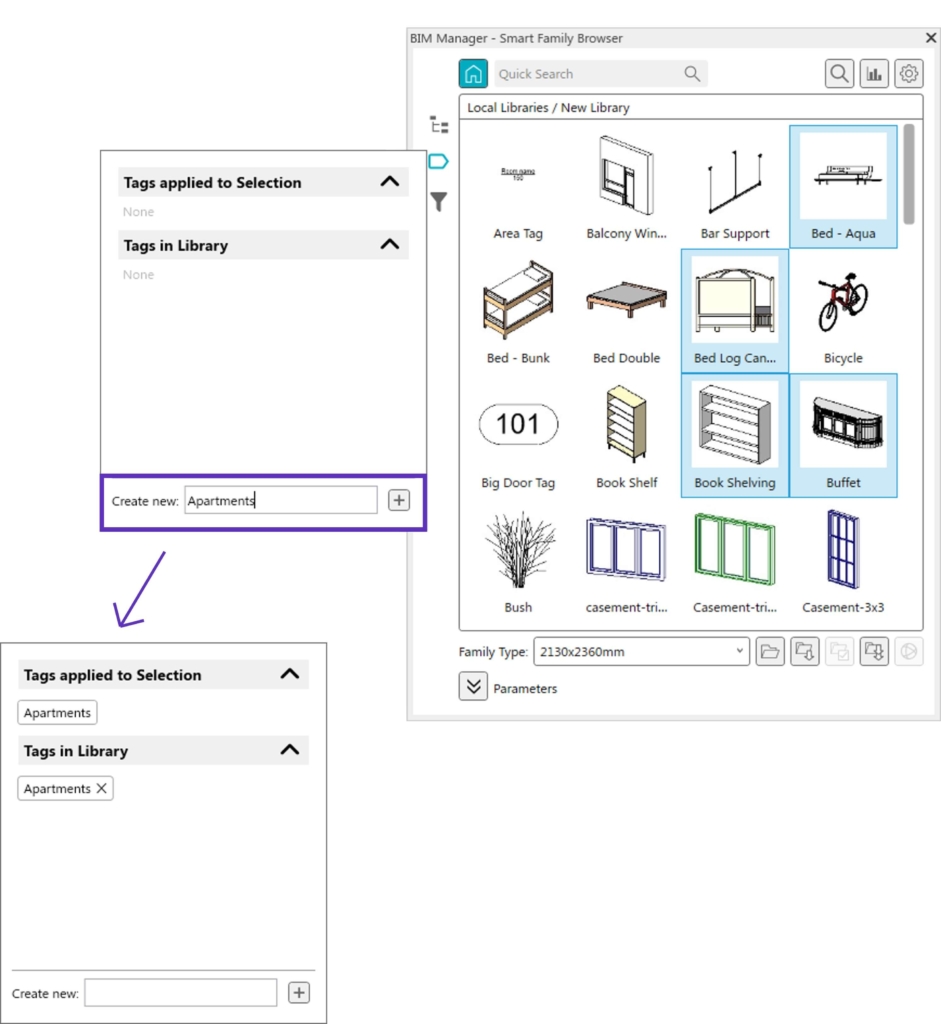
After creating the first tag, it will be applied to the selected elements and registered in the library document. Whenever the same tag has to be used on other elements, simply select new elements and click an existing tag in the ‘Tags in Library’ list:
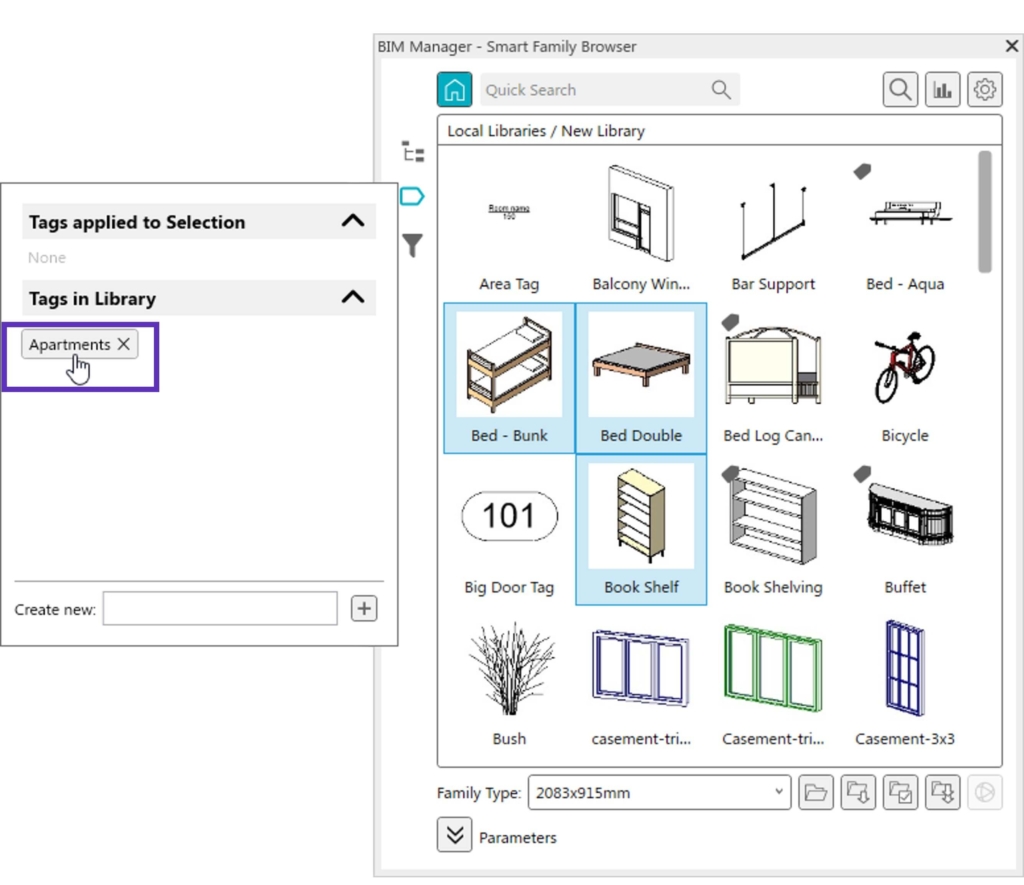
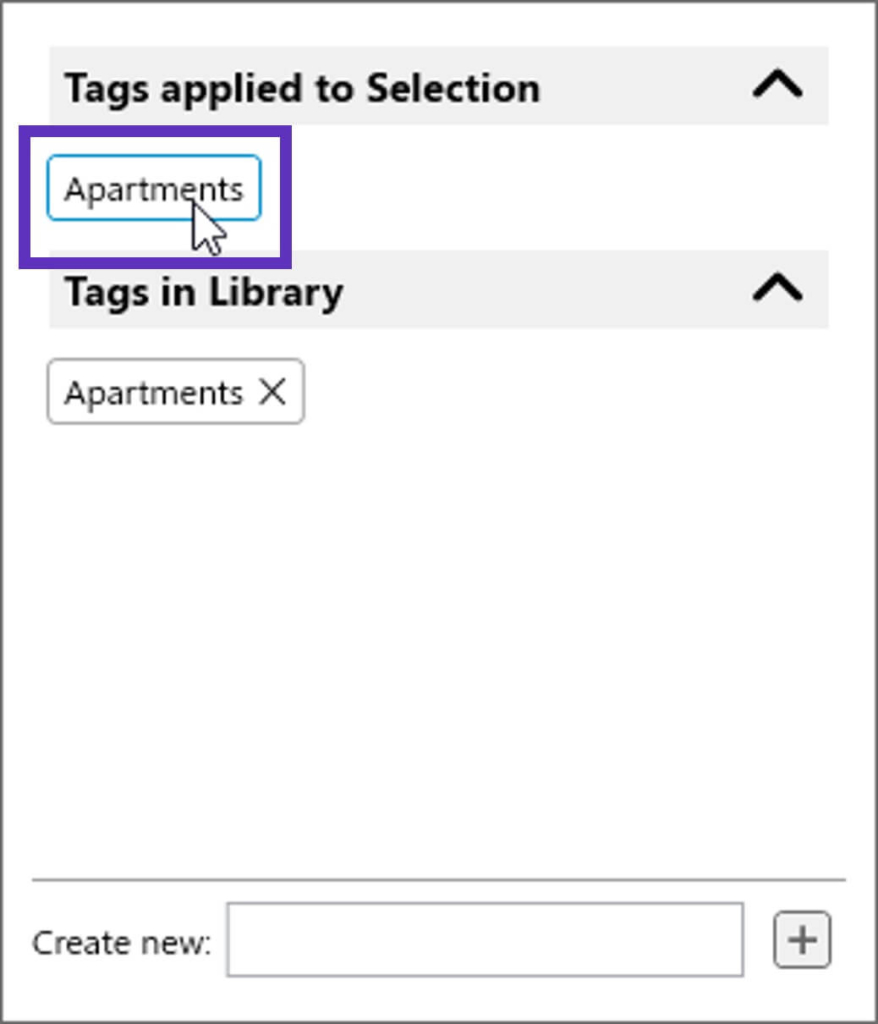
To remove a tag from a family, select the family and click the tag in the ‘Tags applied to Selection’ list. This will remove tags from the elements but will keep the tag name registered in the library file.
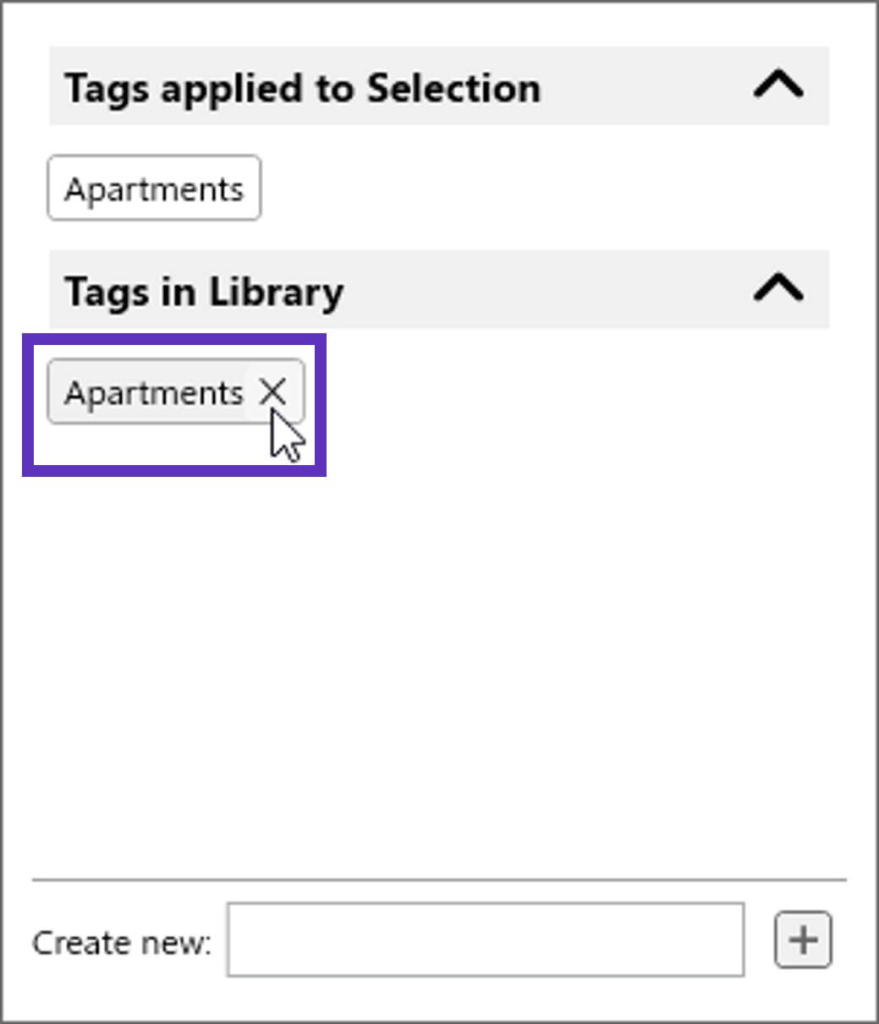
To remove a tag from the library altogether, click the ‘x’ by the tag in the ‘Tags in Library’ list. This action will also remove the selected tag from any families that had it.
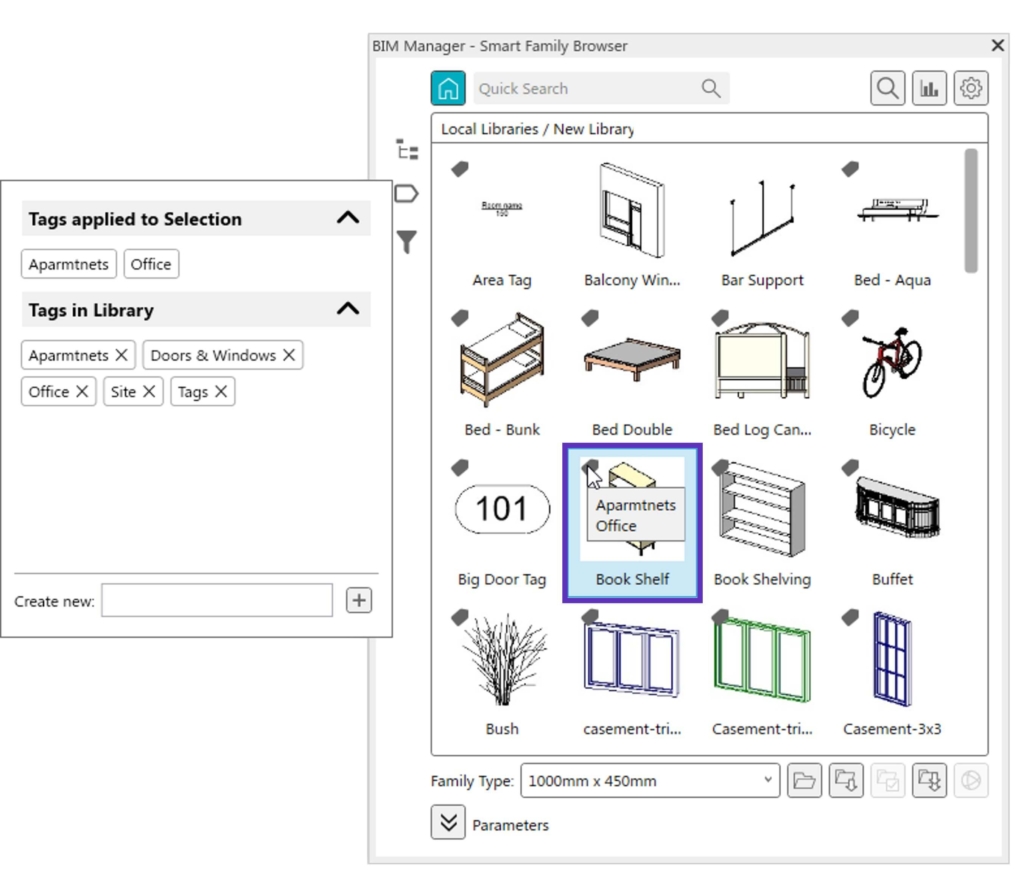
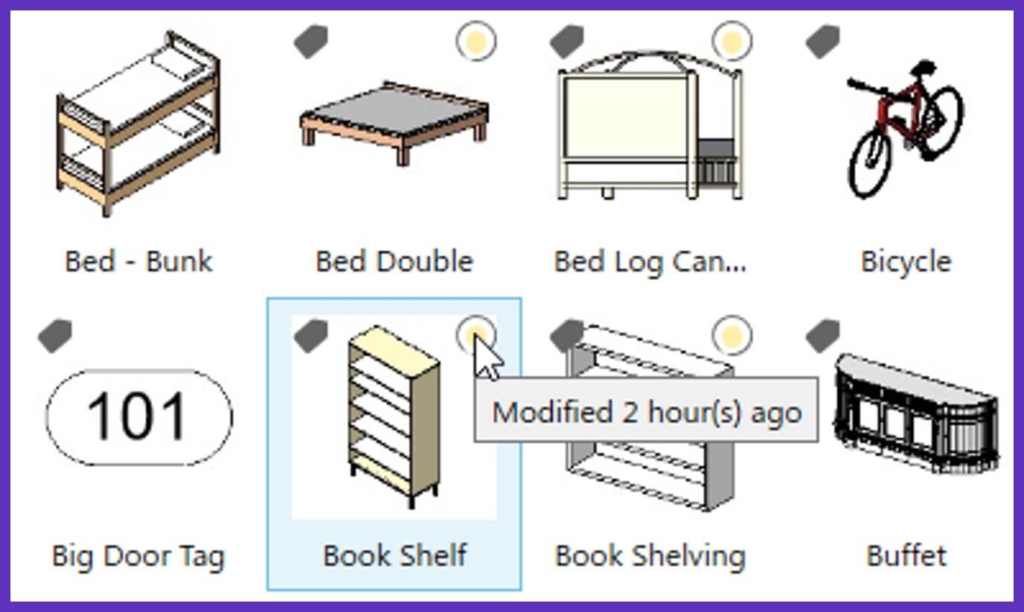
Once the tag window is closed, the tag icons will appear on all the families that were tagged. And upon hovering over those icons, every tag applied to the selected family will show up in the list.
Filtering Revit elements with tags
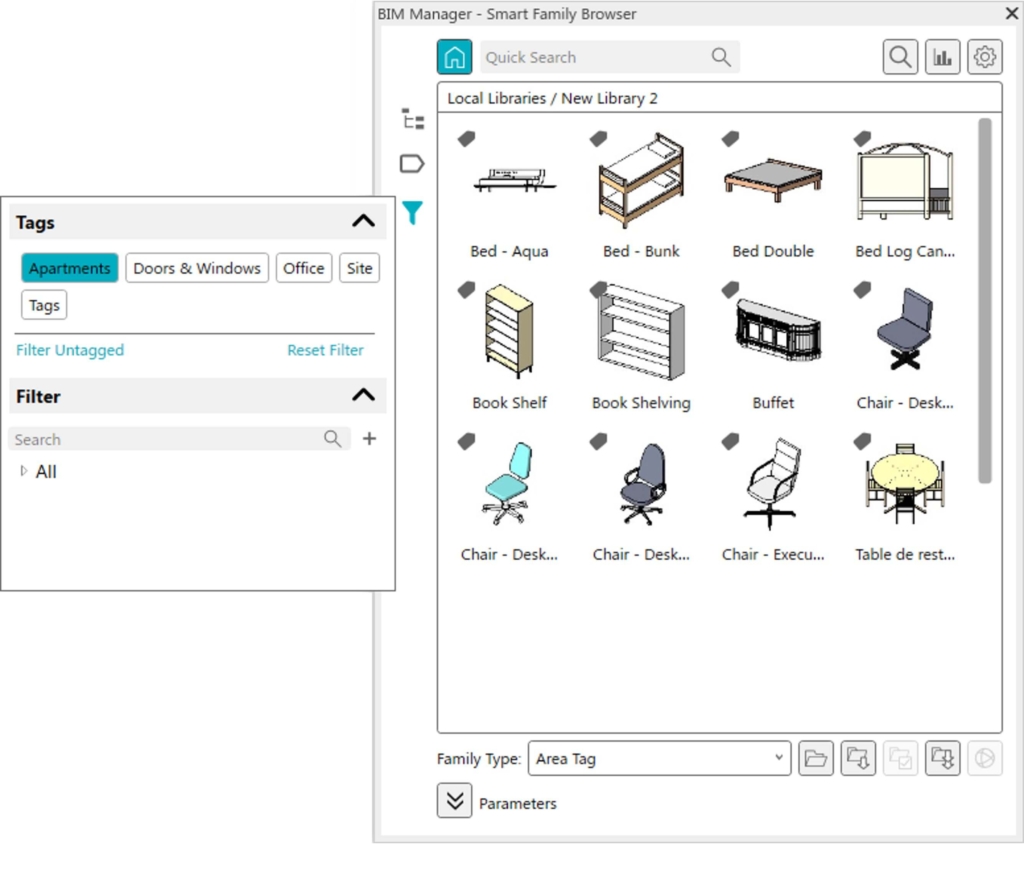
After tags are applied to families, all users of that library will be able to filter by those tags. To do that, click the ‘Filter’ button and select a tag by which to filter. Users can filter by tags and by regular user-set filters at the same time.
Additional changes to Smart Browser
This year we introduced two additional icons to help you see at a glance whether an element is ‘Newly added’ or ‘Recently updated’. Simply hover the mouse over the icon to see when the update was done. This will make it easier to keep track of changes made in the library. Icons are kept on elements for 15 days.
How to get the software update
To take advantage of the latest updates mentioned above, update Agacad Smart Browser on your computer via the Agacad Dock.
You can always find the Dock in the Revit ribbon.
Important note: We’re pleased to announce that this update is now available for Revit versions 2024–2021. After integrating tags, we kindly advise against updating the library using previous versions of Smart Browser to ensure optimal performance and consistency.
As we continue to evolve and improve Smart Browser, our primary focus is on making your Revit experience as efficient and user-friendly as possible. The new tagging feature is a testament to that commitment. By streamlining your element library management, we hope to save you valuable time and effort, allowing you to focus on the creative aspects of your project.
Thank you for being a part of our community. We always value your feedback, so please don’t hesitate to share your thoughts on the new tagging system or any other features you’d like to see in the future. Just click the Contact Us button below and write us. Together, we aim to enhance and redefine the Revit design experience, ensuring you have the right tools at your fingertips to bring your visions to life.


