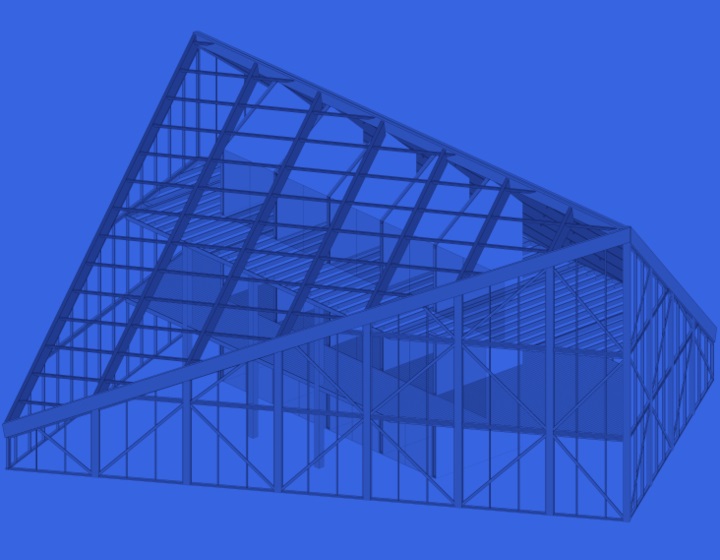
In addition to automating complex Wood and Metal Truss systems, the latest versions of Agacad’s roof framing software are more user-friendly and flexible, thanks to additional options for creating and freely modifying various roof truss layouts and individual truss structures.
It’s also possible now to create truss systems for roofs with different hip ends and side pitches, and more truss overhang framing variations are available.
Let’s look through the latest updates one-by-one.
Generate and modify 3D grids created by one roof line
Build full truss systems at once with the configurable 3D grid, skipping the limited and time-consuming standard process of inserting Revit truss families.
Also, we’ve made working with 3D grids much easier. Whereas in the past we had to select multiple symbolic model lines in order to generate the 3D grid, now if the Roof is created by the ‘Pick Walls’ command, we can generate a grid by selecting only the roof and one symbolic line.


Here’s a step by step of how to do it.
First, click ‘Insert Truss System Grid by one Roof Line’, then select the Roof, the symbolic line, and choose a System Grid Type:


All pitches, overhangs, setback, and other values are adjusted automatically, so you don’t have to calculate anything.
In the past, after generating the grid, you could only modify it by using the function ‘Modify Truss System Grid’. Now, simply change the ‘Instance parameters’.
In this case, I removed the ‘Set Main Roof’ tick mark so that I could insert the Valley Set Grid for this system later. In this example, I’ve added 3 plies for the Girder:

Finally, select the grid and generate the Valley set Grid:

I used the same ‘Insert Truss System Grid by one Roof Line’ function to generate other grids in this roof. For gable ends, I kept the ‘Set Main Roof’ tick mark on and generated the ‘Last Common Truss’ so that I could later automatically array trusses throughout the roof:

That’s it! All 3D grids have been created:

Generate trusses by 3D grids and auto-array throughout the roof
After automatically generating trusses on the 3D grids, you can automatically array them throughout the roof.

In this example, after selecting a truss, using ‘Copy/Array/AutoArray Roof/Floor Truss’, and selecting ‘Auto Array’, the software automatically calculates that 5 trusses need to be arrayed to the left of the selected truss (to the ‘Last Common Truss’ generated before):
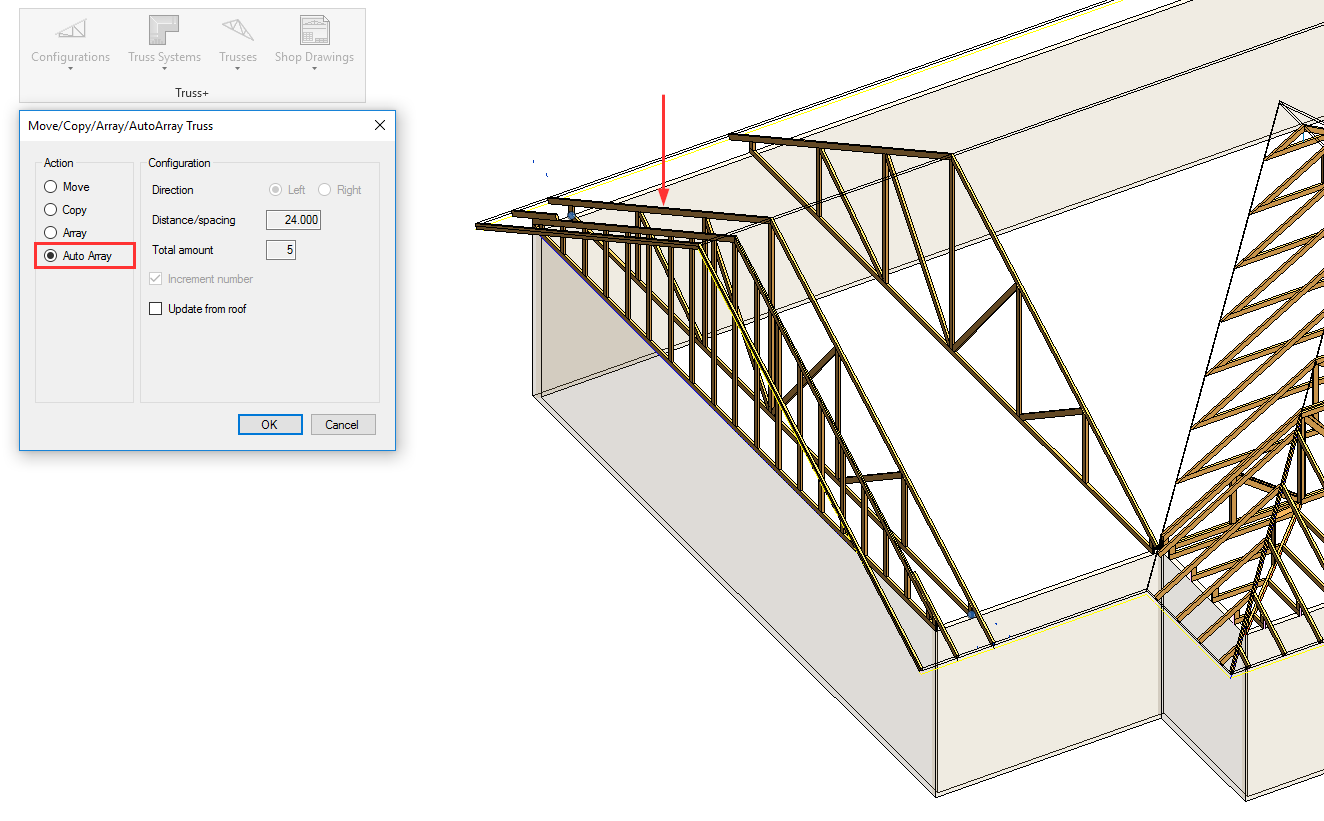
Finally, after auto-arraying trusses for both sides of the roof, you can automatically array them in the middle by selecting two trusses and ‘AutoCopy’ the 2 trusses in the middle:

Result:

Complex truss roof framing
With the new update, it’s possible to combine the old method, which lets you ‘Insert Truss System Grid by Roof Lines’ and the new method by which you can ‘Insert Truss System Grid by one Roof Line’. Particularly complex truss systems can be created for different situations:

Another example:

Trusses generated:

Create uniquely shaped, parametric truss families even for multiple roofs
Create uniquely shaped, parametric truss families based on model lines and even multiple roofs for immediate use in your projects using the Truss Builder. (In the past, you could create them only for one continuous roof modeled in Revit.)
Our framing software has a built-in Truss Builder that allows you to draw a custom truss design and use it in a different project.
After drawing the Model Line at the correct level, select it and use ‘Create Roof Truss Type from Model Lines’:

The Truss Builder window will open, with a scheme created based on the Model Line (Bottom Chord) and the shape of Revit Roof (Top Chord), and you can sketch a custom web:

Result:
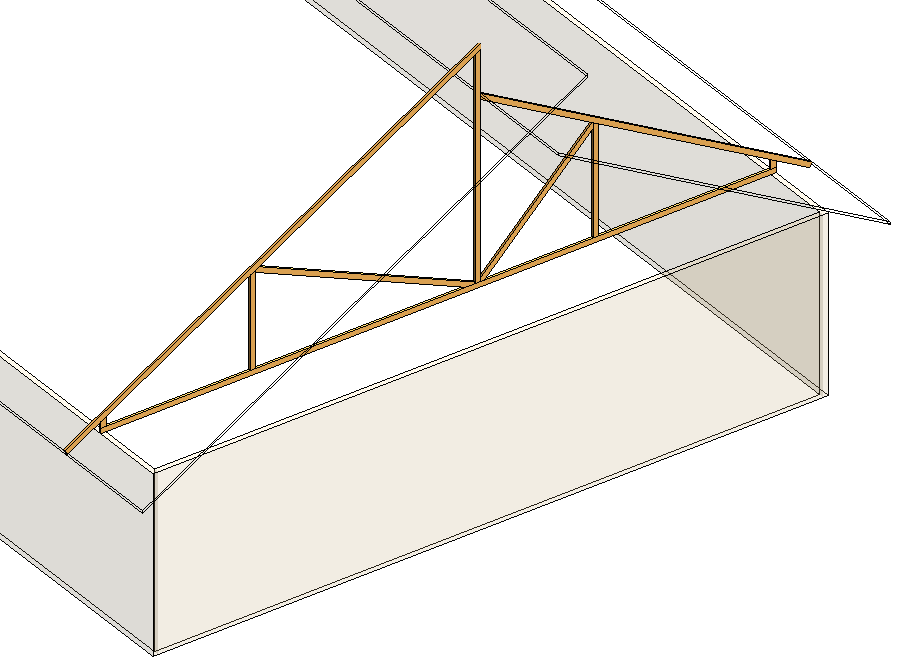
Modify trusses using the Truss Builder
Use the Truss Builder not only for creating trusses but also for modifying them. Automatically generated trusses can be pushed to the Truss Builder, and from there, you can design the desired web.
Just select a Truss and use ‘Modify Roof Truss Type’:

The Truss Builder window will open, with a scheme already created based on the Top and Bottom Chords of the selected Truss. You can then sketch a custom web:
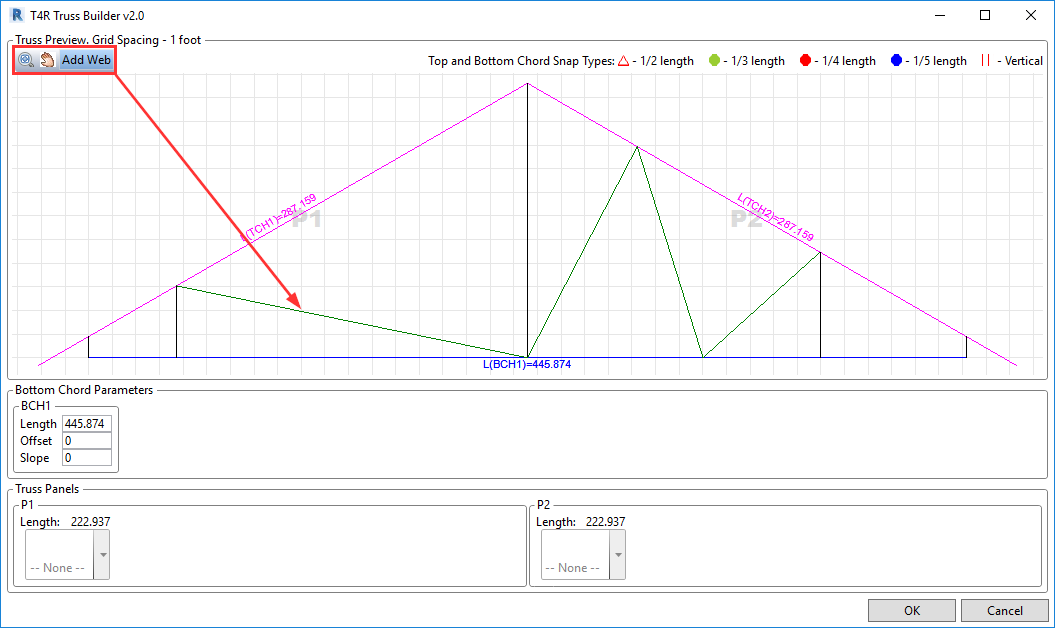
Result:

Terminal truss roof
Our software can automatically convert a Step-Down Truss System to a Terminal System, based on the span:

Replacing trusses
It is now really quick and easy to replace a truss that has already been generated in your roof. Here’s how.
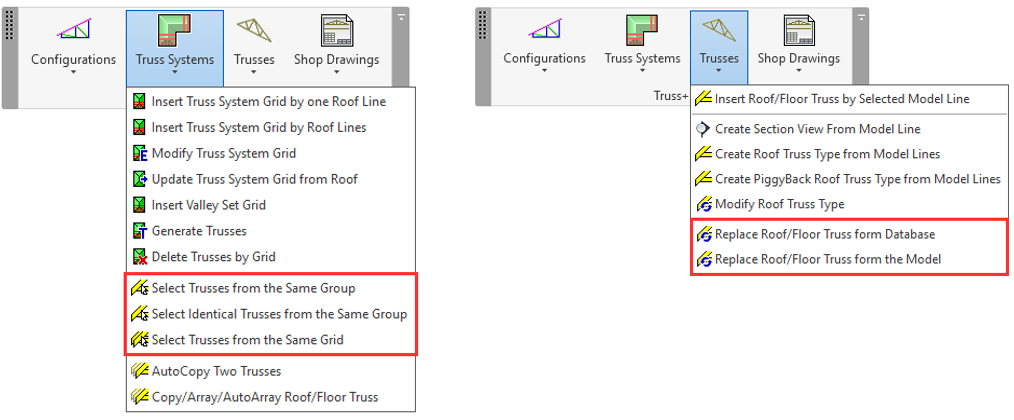
Select a truss or select identical trusses from the same group or select trusses from the same grid. Then, replace them automatically by choosing the needed truss from the database or model:
Overhang framing
In the latest version of our framing software, you have more truss overhang framing variations to choose from.


