QR codes and barcodes surround us in everyday life – when shopping in the grocery store, receiving packages at home, or giving a blood test sample at the doctor’s office. Their purpose is to transfer data about an item, so you can track, check, or use it down the road in other processes. Such codes are used in a variety of situations in the AEC industry too, and precast is no exception.
A few months ago we announced that our Sort Mark Revit add-on lets you generate QR/barcodes with any information from the model. Sort Mark creates QR or barcodes as images and assigns them to each element, to the selected Image type parameter.
Sort Mark is an included tool in AGACAD’s Precast Concrete design software, so that means that our Precast users can make codes in a jiffy too. Here’s how! Written instructions follow the video below.
Select category or elements
First of all, select any Category or number of elements in your Revit model, and then, select a parameter to which the QR/barcode images to be generated should be added:
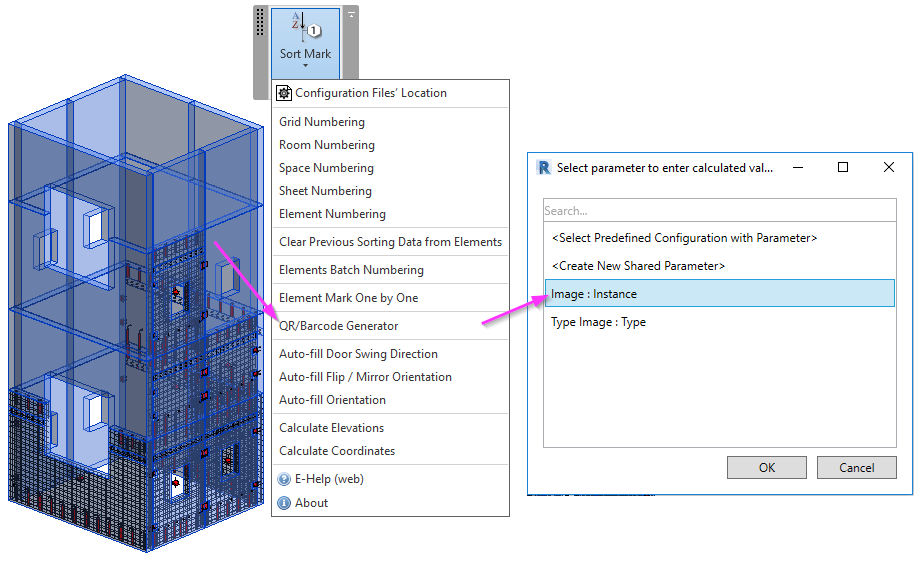
Select parameters to be encoded
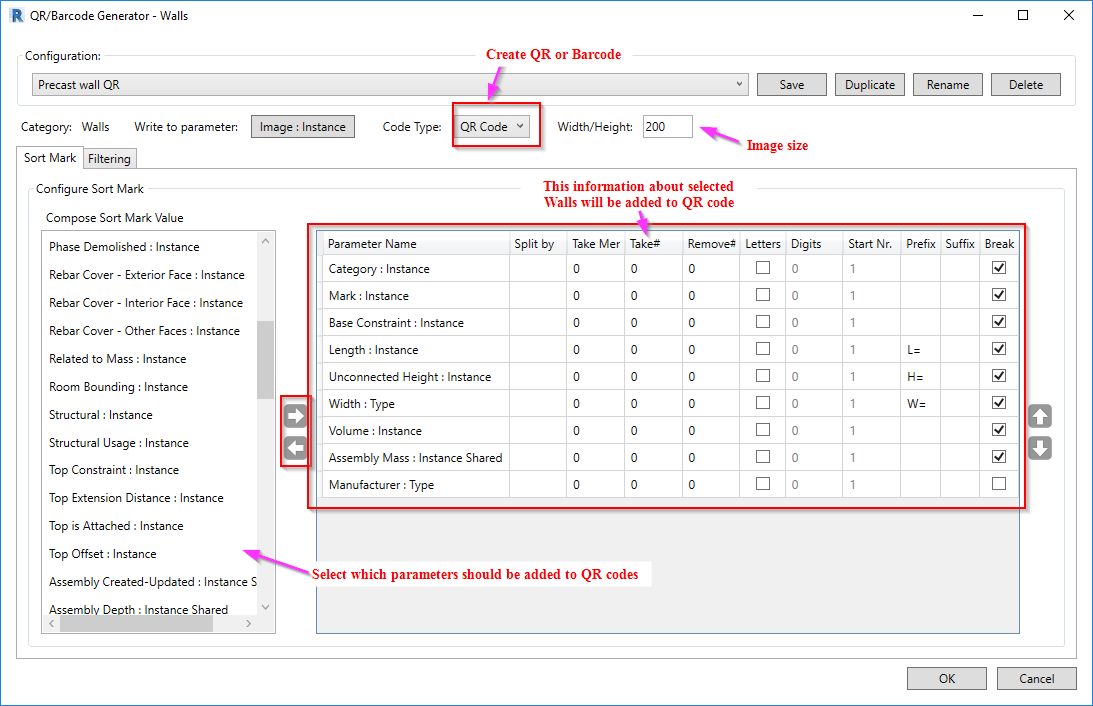
In the QR/barcode configurator, select which parameters should be added to QR or barcodes. This is also where you specify if you want to make barcodes or QR codes.
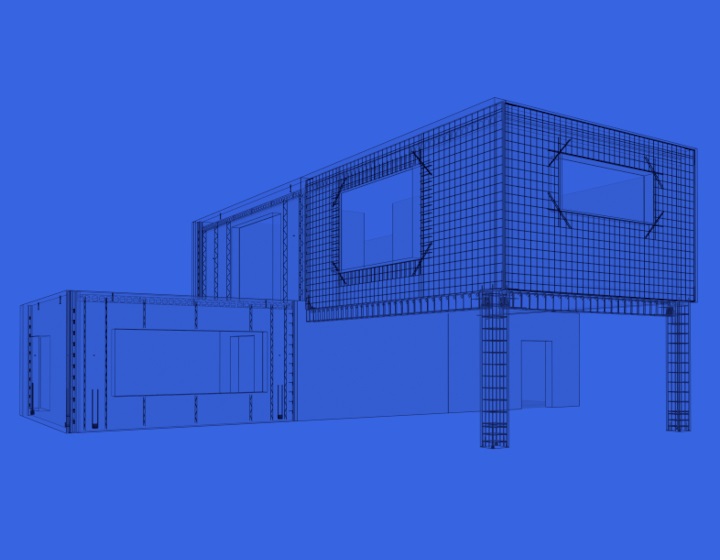
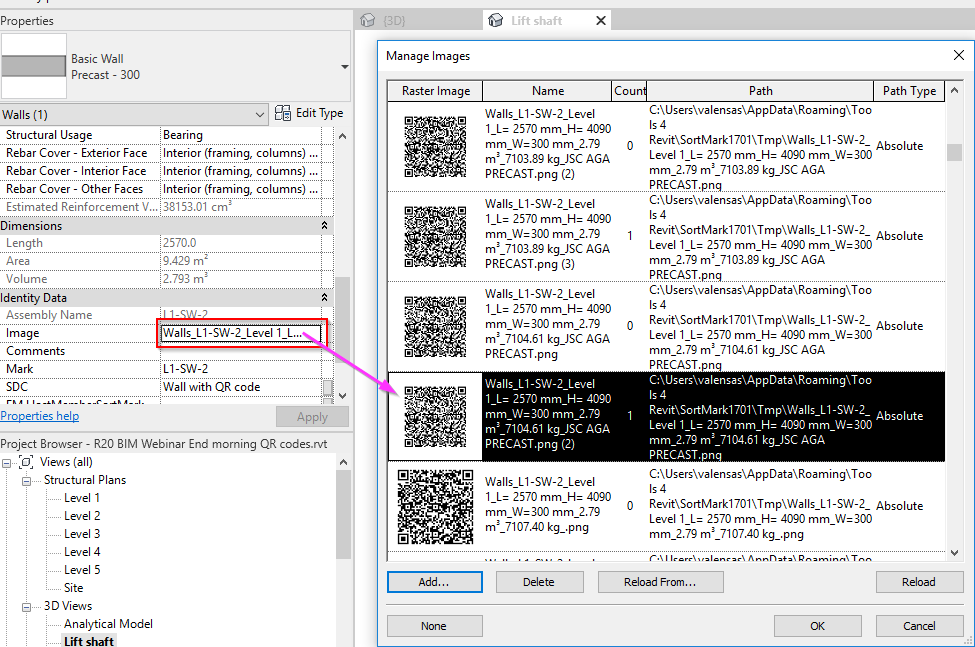
After clicking OK, the images (QR in this case) are created and added to each of your precast walls in the model:
Place on sheets
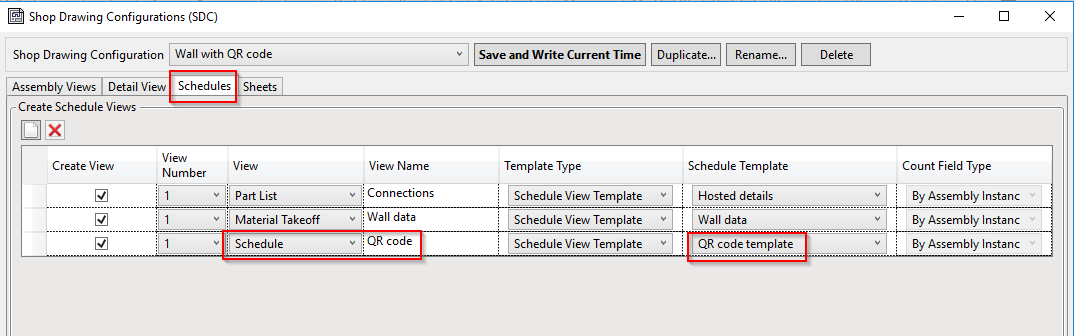
Now you can add this parameter to the schedules and place schedules on your shop tickets.
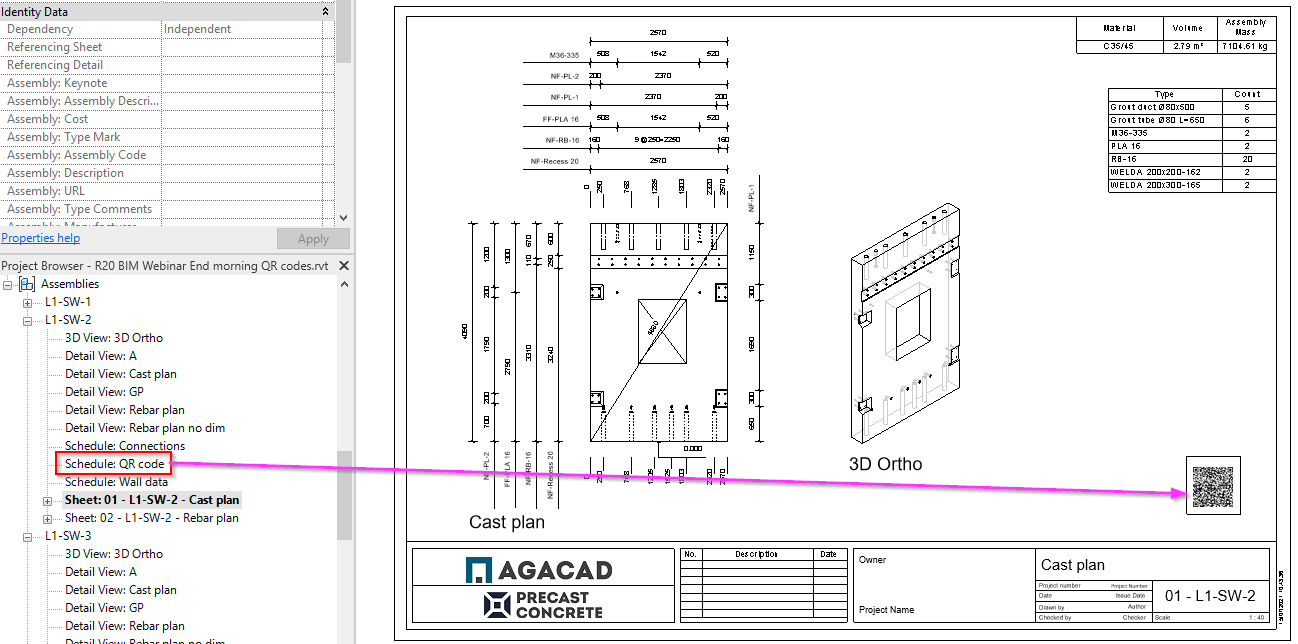
Place schedules manually for each assembly sheet or automatically using the Smart Assemblies tool. If you use Smart Assemblies to create shop drawings, besides getting all dimensions automatically, your selected schedules will be created and placed on sheets automatically for each precast element assembly. Just define the number and types of Schedules you want to have in the Shop Drawing Configurations window:
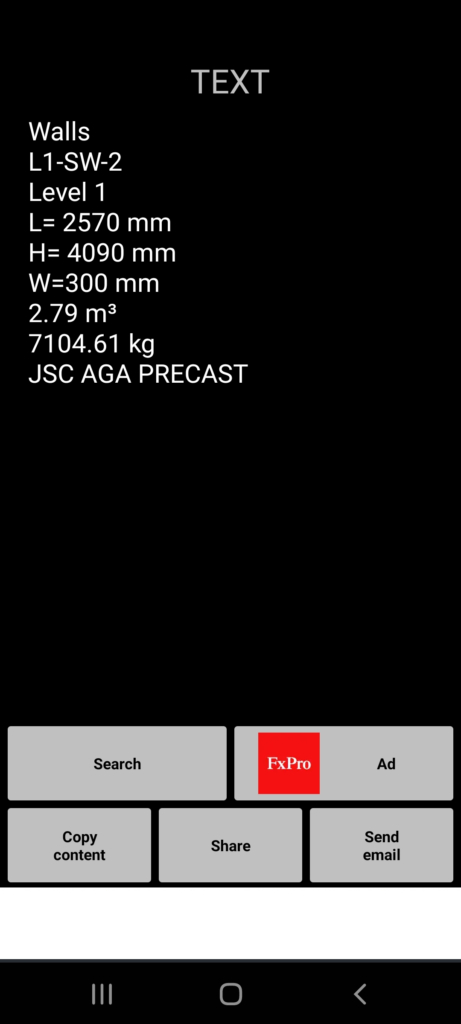
If you scan any of those codes with even the free QR scanner on your mobile phone, you will see the information that is attached to them.
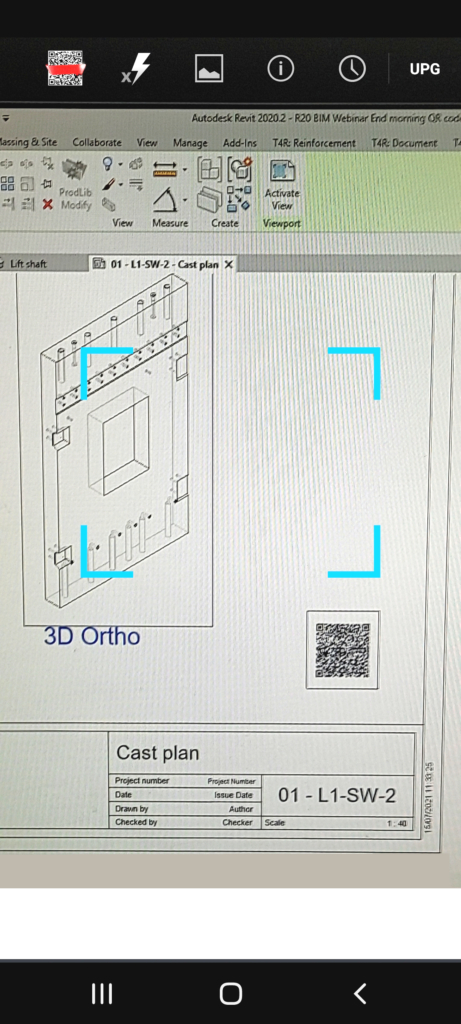
Codes may also be printed out as stickers to be placed on fabricated elements.
If you will be using a specialized app or scanners designed for the AEC industry, then your possibilities will be extended, like being able to comment, change the status of the element, upload data back to the cloud, link a barcode to a digital model, etc.
What can a QR/barcode be used for?
- For scanning elements after production to see if a quality check has been made
- For inventory control in the yard
- For tracking shipping and delivery dates, arrival on site, installation date, etc.
- For reporting issues from site back to the office
- For attaching operational procedures and instruction manuals
- For requesting information, such as the position of the element in the BIM model if the code was placed on a physical element
- For alerting workers or contractors of changes made to a room
- For commenting on inspection results, recording pictures, etc.