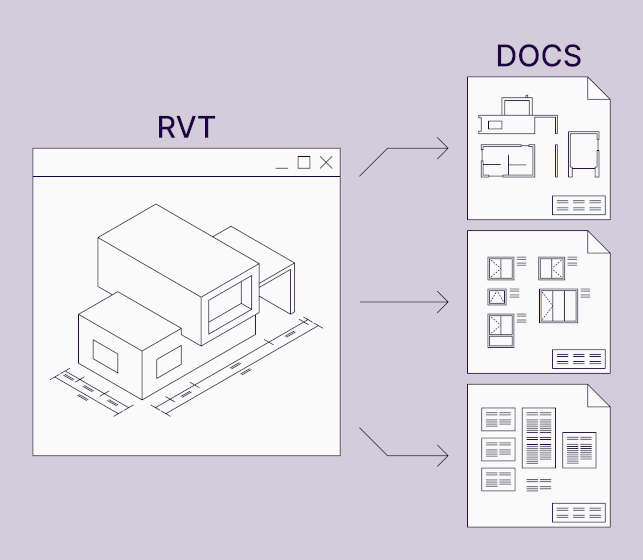
With our Smart Assemblies BIM tool, you can quickly place dimensions on many kinds of Revit elements. In this post, we will look at precast walls since walls are one of the most time-consuming elements to detail. The same approach could be used for beams, columns, floors, and other elements.
Smart Assemblies cuts out a ton of clicking that goes along with preparing shop drawings in Revit, reducing BIM stress and leaving you with more time for actual design work.
No matter where in the world a client may live, one thing that many of their drawings have in common is that two different dimension styles need to be used in the same view. And with Smart Assemblies that is no problem. Just use the Smart Dimensions configurations.
Let’s walk through an example to see how to set up the configurations, using a precast wall as an example.
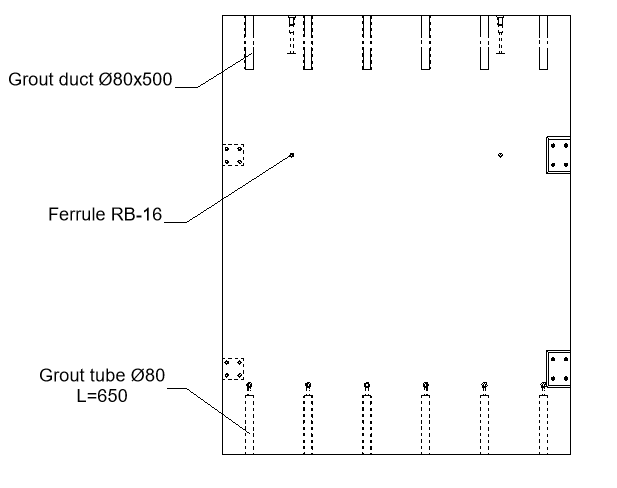
The goal is to measure the grout ducts and tubes using an ordinate dimension style and the ferrules using a continuous dimensioning style.
1. Configuration
Open Smart Dimensions configurations and begin creating a new configuration.
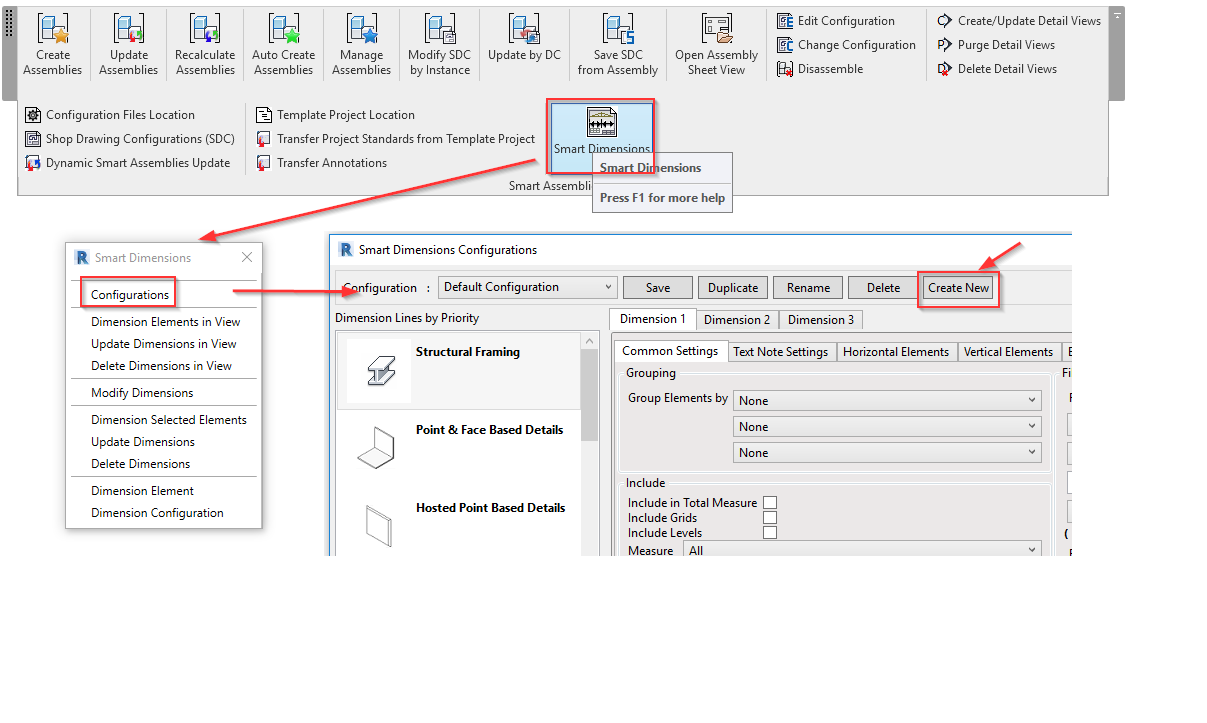
2. Include host
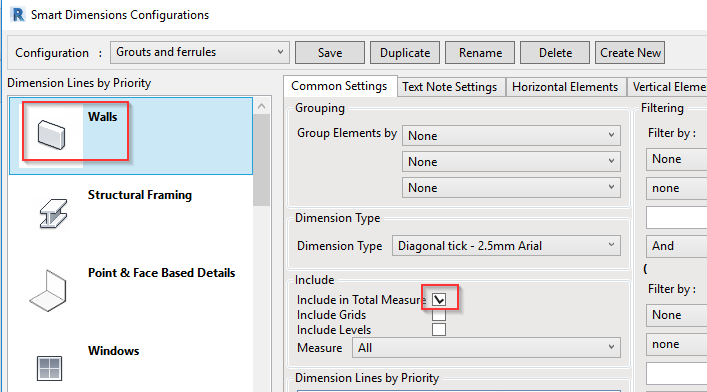
Include the host in the totals.
In this case it’s walls, but if you’re working with, say, beams, then you’d include Structural Framing in the totals. This will serve as a boundary for dimension offsets and as a baseline from which to measure other elements.
3. Dimensioning settings
Select the appropriate tab and define dimensioning settings for such elements.
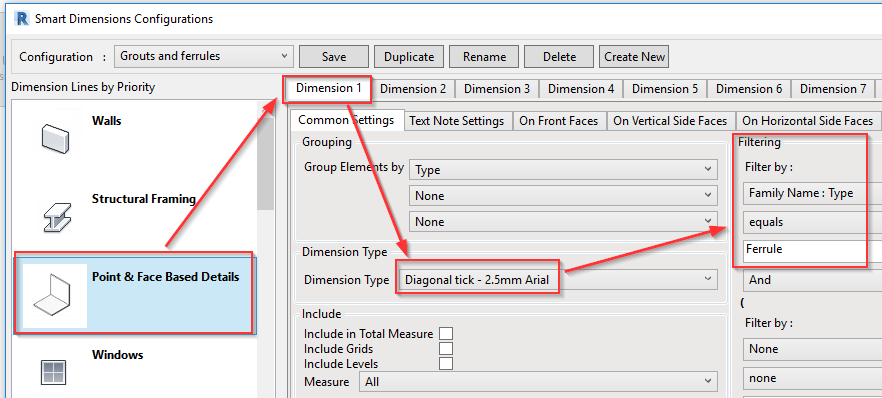
My connection families are face-based, so I selected the ‘Point & Face Based Details’ tab.
3.1 In the ‘Dimension 1’ tab, define settings to dimension the Ferrule family:
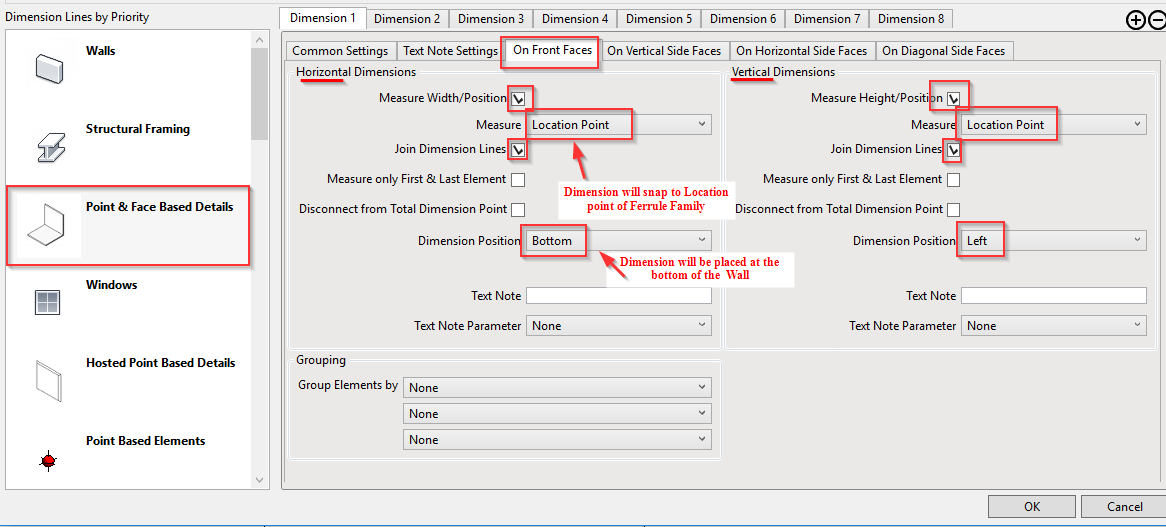
Since this Revit family is placed on the front face (in this particular view) of my host (wall), I go to the ‘On Front Faces’ tab and define that I want to have horizontal and vertical dimensions for it. So I need both, Horizontal and Vertical dimensions, and I want to snap with dimension to the center of the Ferrule family. Dimensions should be at the bottom and on the left side of the wall.
After this short setup, it will dimension only filtered elements and will look like the image below. Try this by using Dimension Elements:

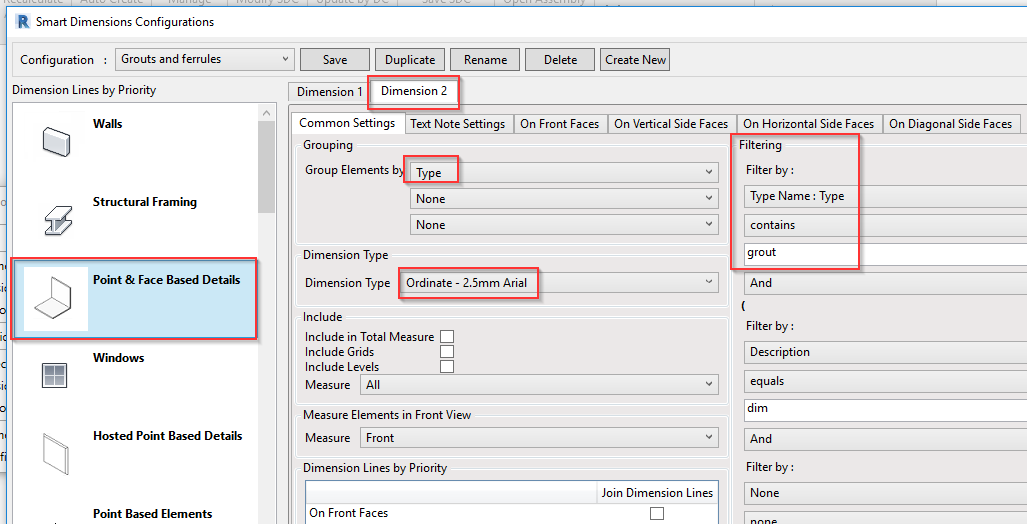
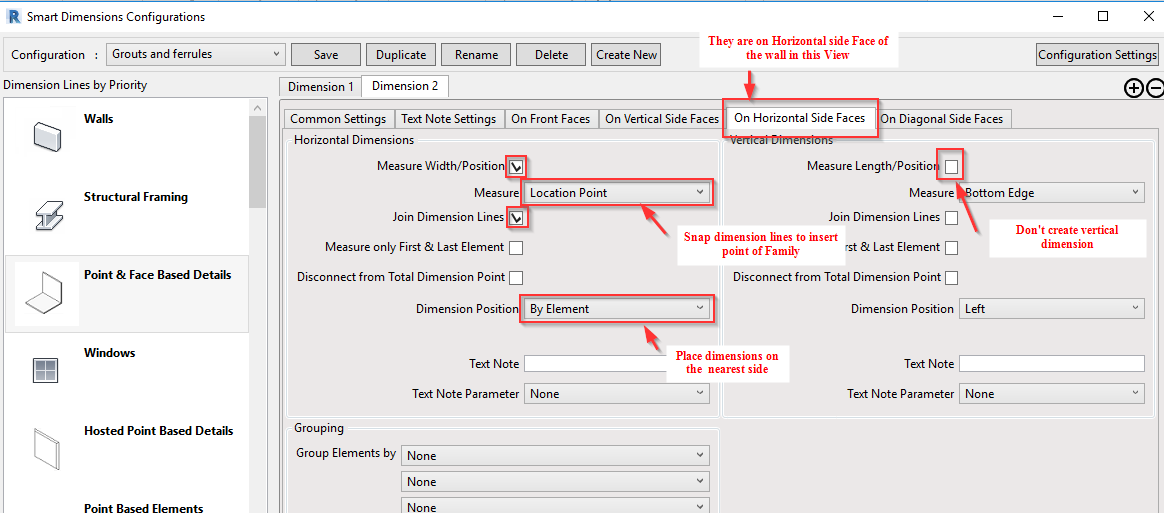
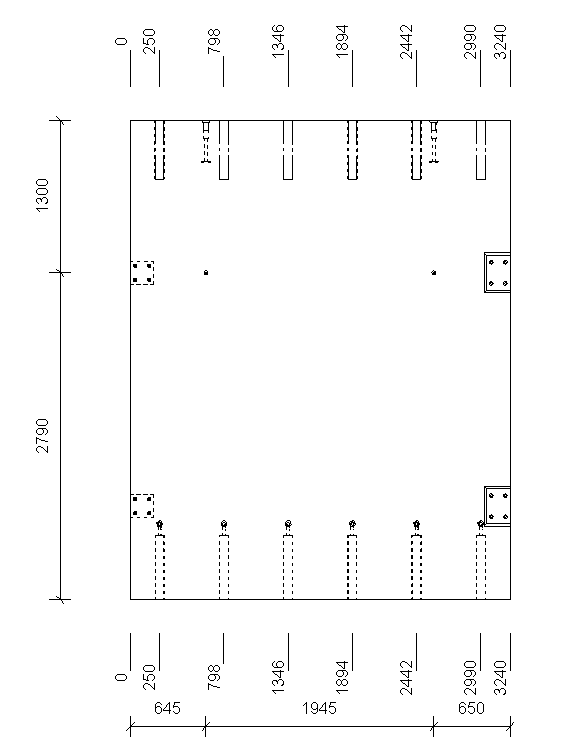
3.2 Dimension Grout elements. I want to have dimensions positioned at the nearest side, and, since I have elements for grout at top and bottom, I want one dimension string at the bottom and another at the top. Also, I want to use Ordinate dimension style for them, so I use filter with keyword “grout” and apply dimensioning settings.
To dimension cuts, plates, lifting embeds, etc., indicate if they are on the far face or near face, and add text notes, parameters, and other things that need to be automated in your final drawing.
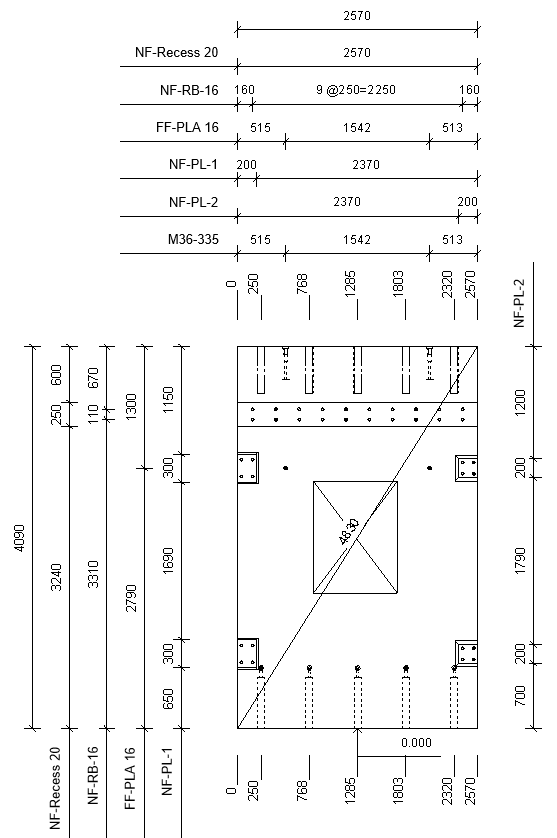
4. Result
Incorporate Smart Dimensions configurations into Smart Assemblies
Once Smart Dimensions configuration is complete, you can incorporate it into Smart Assemblies Shop Drawings Configuration and apply it to all walls at once.
This could be an example of the full setup for a similar wall and may be obtained with one click after the configuration is complete: