We’ve updated our Wood Framing and Metal Framing BIM Solutions for Revit with an important new feature called Framing in Groups. This major enhancement comes from working with top experts in the framing design industry and will especially benefit Revit users who work with large projects or projects comprising mirrored building parts. In the spirit of sharing BIM advances, we bring it to you now.
The Framing in Groups command allows you to frame walls in groups, a valuable feature because walls that are grouped may be used to repeat and also mirror framings many times throughout a project. Incorporating this into the framing workflow has the potential to save architects and designers a lot of time.
Watch our webinar about multi-framing:
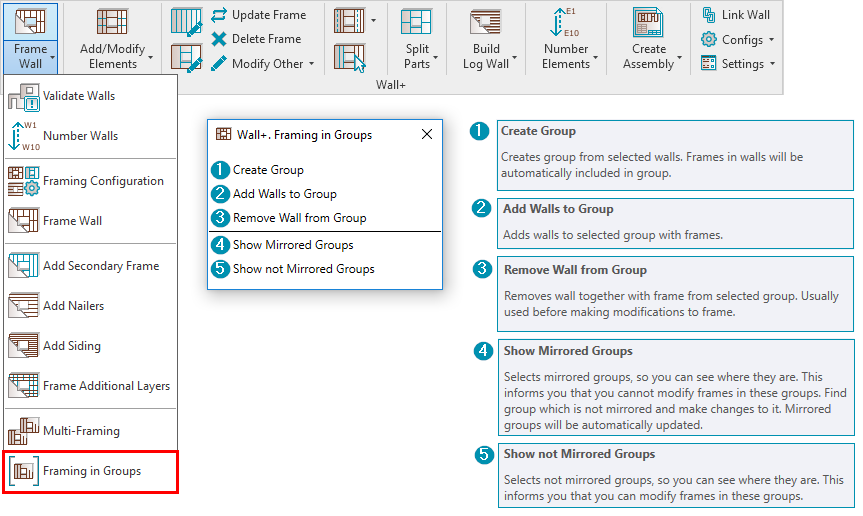
There are five new functions that fall under the Framing in Groups feature. Let‘s take a look at each one as enumerated in the image above.
Create Group
This feature creates a group from the selected walls. Frames in those walls will automatically be included in the group.
A note regarding grouped frames, mirrored frames, and making modifications. Grouped frames cannot be modified. If you need to modify a frame that has been grouped, it is necessary to first remove it from the group. More on that below. As for mirrored frames, they cannot be modified; only non-mirrored frames can be modified — mirrored frames will then reflect the changes.
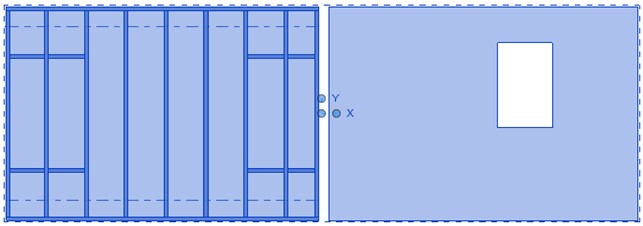
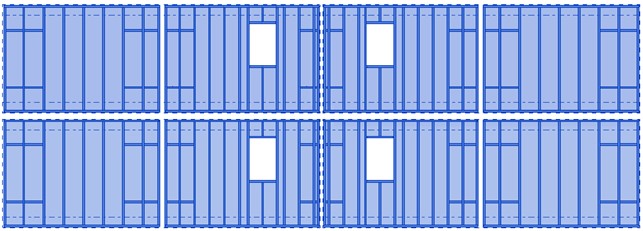
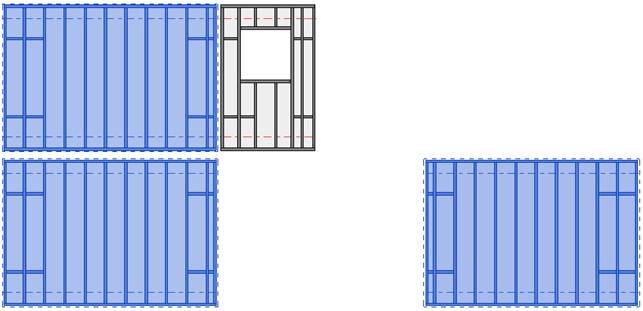
The group can be copied or mirrored multiple times in the project.So now when you frame walls in the group with the Frame Wall command, all the other groups will be updated accordingly.
Result:
Add Walls to Group
Adds walls – with their frames – to the selected group. This feature is typically used after having made changes to a frame. In order to modify a frame, remove the wall from the created group by selecting Remove Wall from Group, make your desired changes to the frame, then click Add Walls to Group, and select a group with the modified frame.
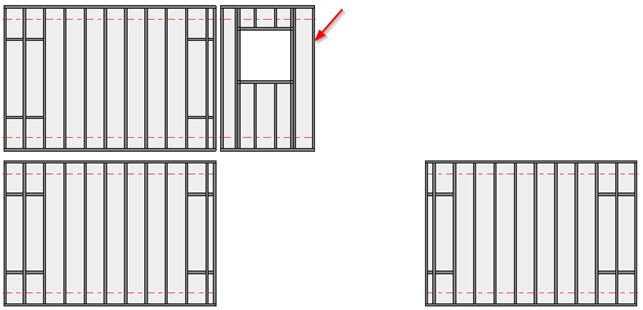
For example, let’s add this frame to the selected group:
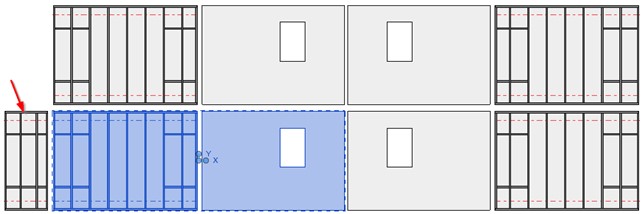
Result: The selected wall – along with its frame – is added to the group:
Remove Wall from Group
This removes a wall and its frame from the selected group. This feature is most often used before making modifications to a frame.
For example, let’s modify one frame. First, remove it from the group by clicking Remove Wall from Group:
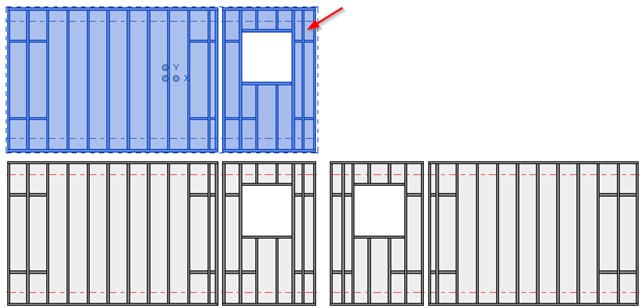
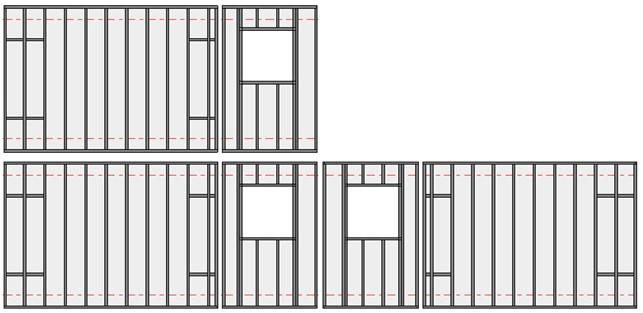
Now, this wall and frame have been removed from the group. It may be modified using Modify Frame or other modification features.
The frame has been modified:
Now, we can add that wall to the group again with Add Walls to Group:
Show Mirrored Groups
Selects mirrored groups so that you can see where they are. This informs you that you cannot modify frames in these groups. To modify mirrored frames, you must find a group which is not mirrored, make the necessary changes, and then mirrored groups will be automatically updated.
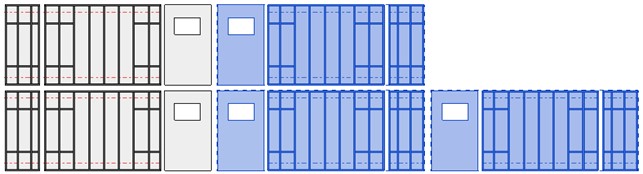
Example: Select any group and the function will show the others that have been mirrored:
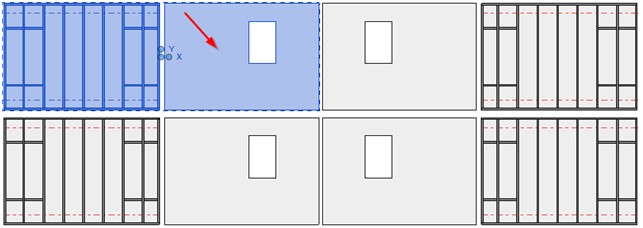
Show not Mirrored Groups
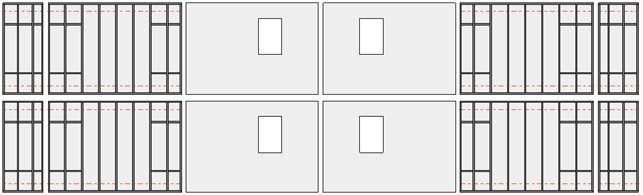
This function selects groups that have not been mirrored. This let‘s you see where they are, and informs you that you may modify frames in these groups.
Example: Select any group and the function will show ones that were not mirrored. Frames in such groups can be modified:

So that is the new Framing in Groups feature that‘s been developed for our Wood Framing Wall and Metal Framing Wall BIM Solutions. Current users of either of those tools: be sure to download this latest update and put it to use in your framing projects.
For those who are not (yet!) users of our framing software, we invite you to try it out for free for 14 days. All you need to do is download our Agacad Dock. Once you have that, you can select which of our tools you‘d like to trial. Don‘t forget that we offer free live demos of our Revit tools during your trial period, so be sure to take advantage of that.