When making drawings in Revit, it’s important to be consistent and maintain some kind of system. The same goes for modeling and numbering. Our Sort Mark add-on is valued by many Revit users because it lets you number any Revit elements you want, saving you time and headaches.
There is one thing I would like to point out, though, that users might not know about Sort Mark app. It’s possible to renumber elements sequentially by drawing model lines and using them as a reference for numbering. Previously this feature worked fine with point-based elements, and now it works with walls too.
I’ll show an example of renumbering precast concrete walls, but this workflow can be applied to wood or metal framed walls too. Step-by-step instructions are below the video.
Create Revit model lines
Draw model lines near walls you want to renumber. Ends of model lines should be connected to form one continuous perimeter. In my case, the model line is 1000 mm from the walls.

Select Revit elements you want to renumber
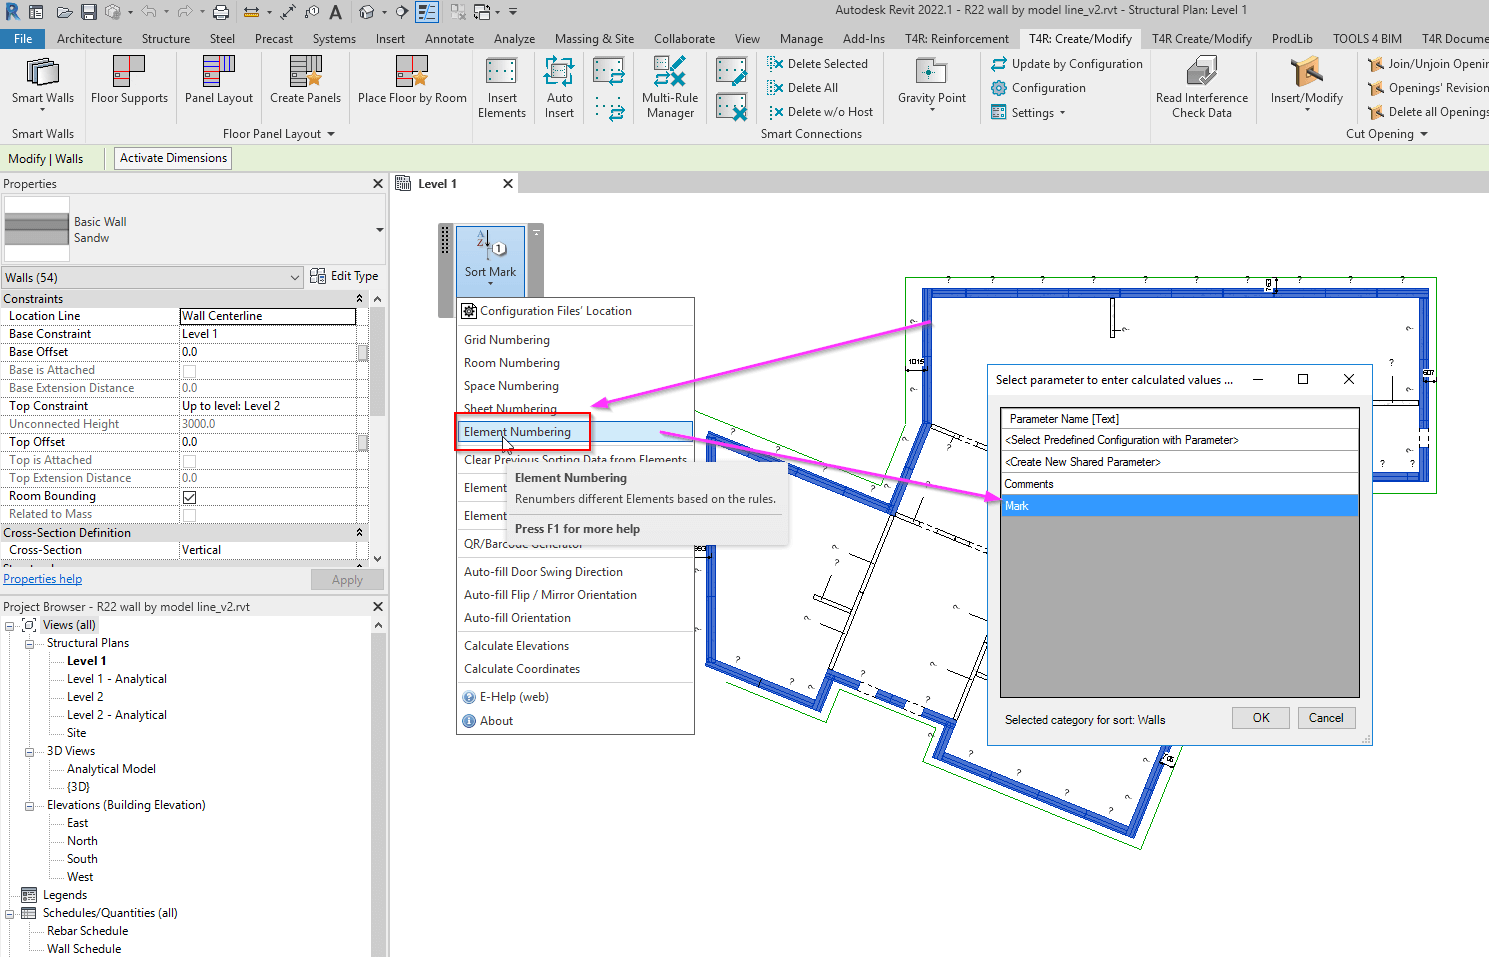
In this example, I use walls, but it can be any Revit element. Select elements of one Category and choose Renumber elements. In the first dialog window, pick the parameter where you want to place your numbering results. Here I have chosen Mark:
Set up numbering configurations
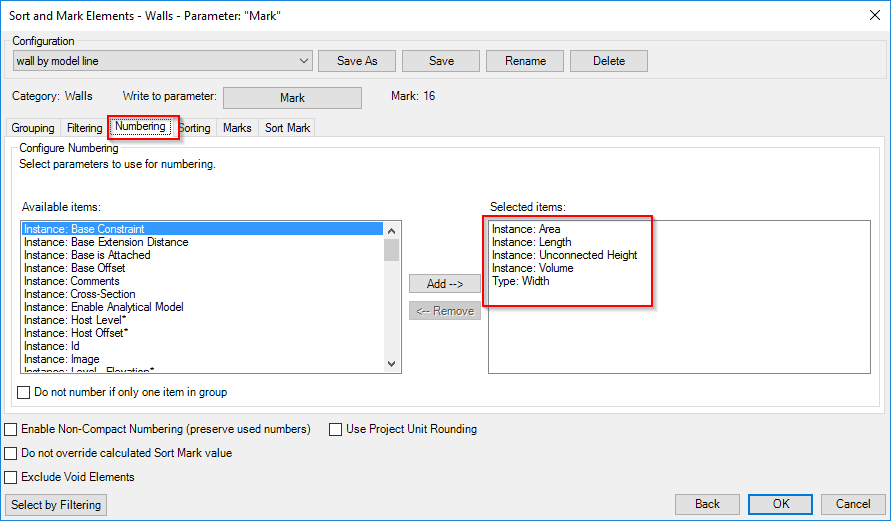
In the Numbering tab, select parameters that should affect numbering difference. If any of these is different, then the number will be different.
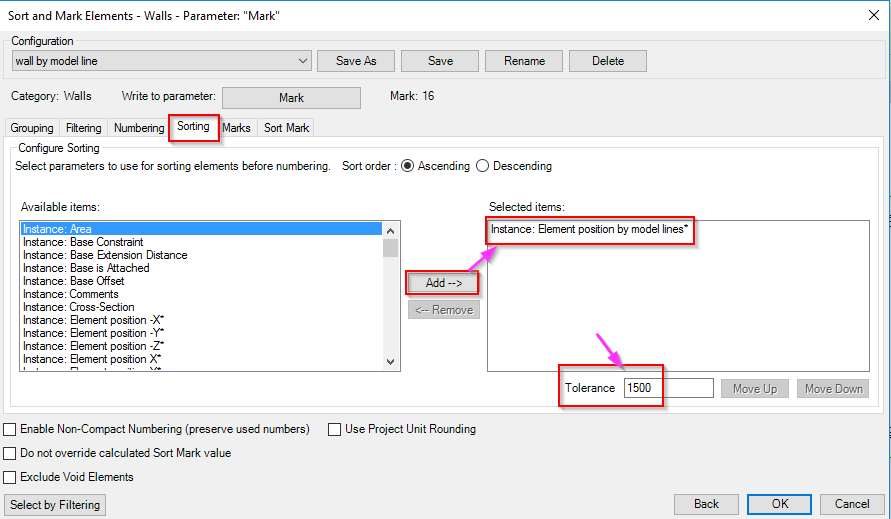
In the Sorting tab, select Instance: Element position by model lines* and set the Tolerance (distance to wall center).
In the Sort Mark tab, just select Calculated: Sort Mark Number and a prefix for it.
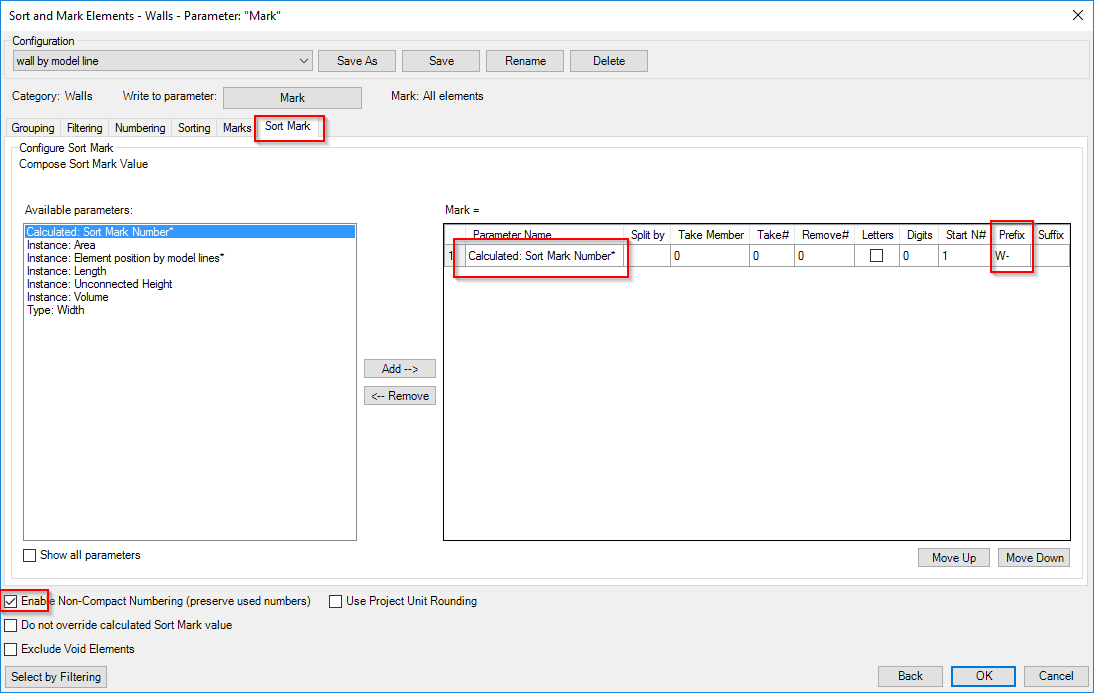
After you have these settings, you can also use Enable Non-Compact Numbering (preserve used numbers). That way the software will not use numbers that have already been used.
Once the settings are all set, the software will ask you to pick a model line – you just need to select one of them. The direction of numbering will depend on which end of the model line in the chain is selected. Here, I selected the one that I drew first, and here is the result in just 1s: