How to create grid lines in Revit assembly views

Ever wondered how to make grid lines appear in assembly views in Revit?

By default in Revit, grids are only visible in model views. So, to remedy that, we spiffed up the shop drawing configurations of our Smart Assemblies add-on.

Now there’s an option to show grid lines in assembly views if they cross your element in the model. It works with different categories, and grids can go in both directions. All you need to do is to select ‘Insert Grids’ in the far right column of the Shop Drawing Configurations window for the views that you would like to see grid lines on.

Insert grids option in shop drawings configuration in Revit

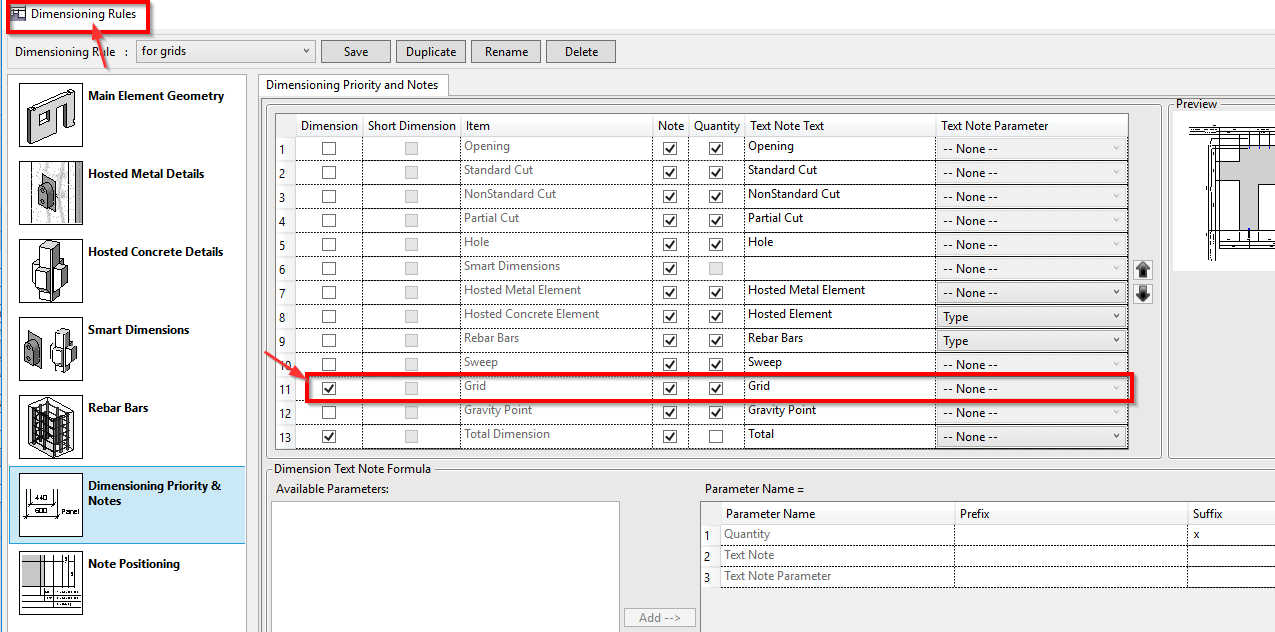
In the Dimensioning Rules window, you can indicate if grids should have dimensions:

dimensioning rules - dimension grid lines in Revit

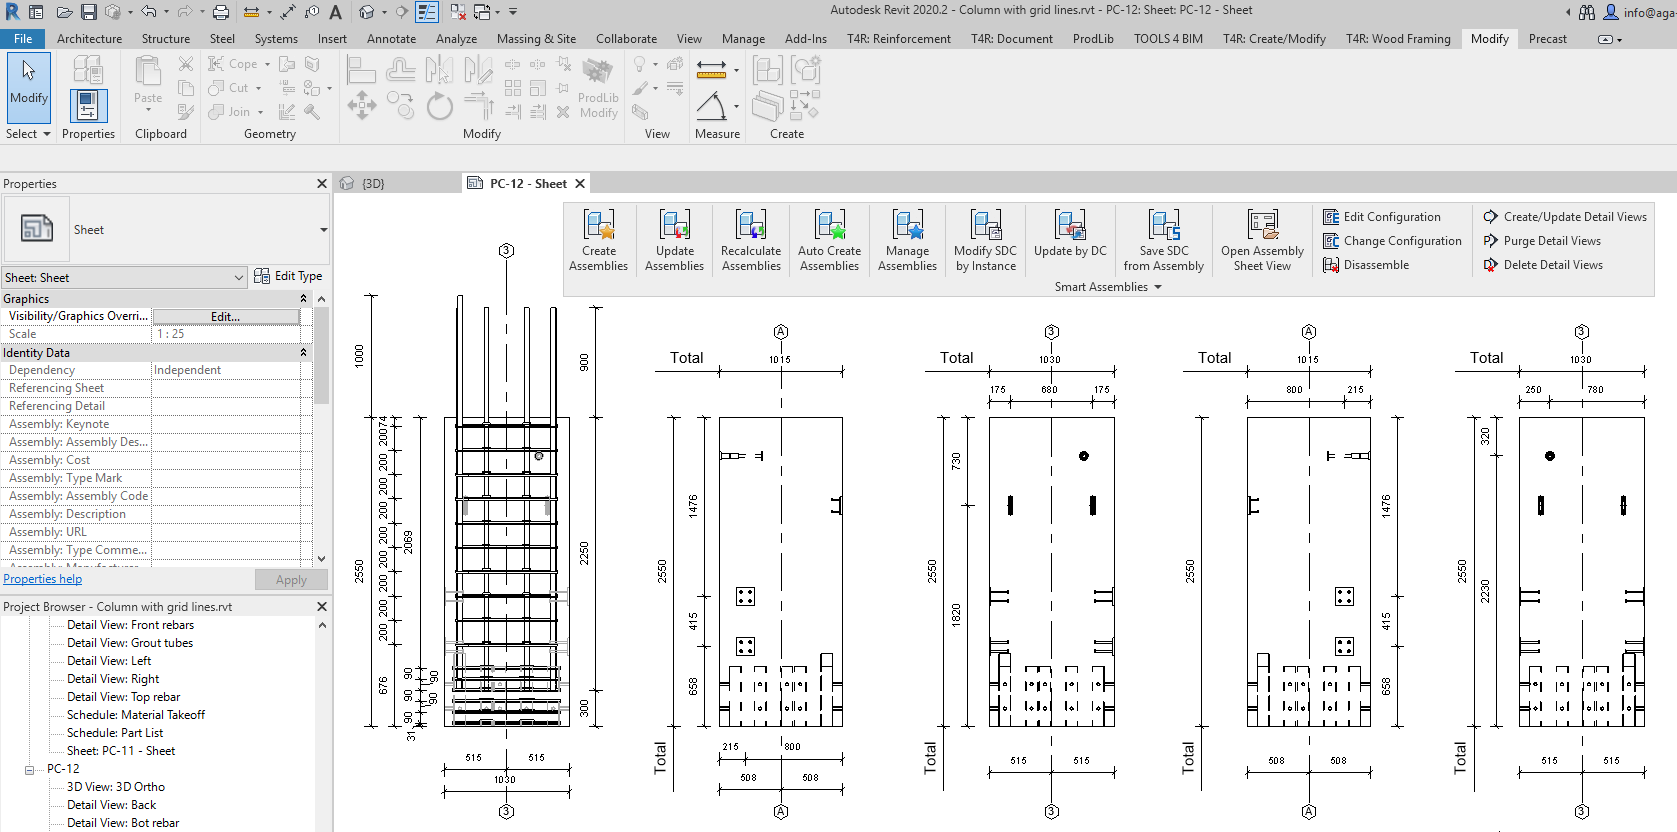
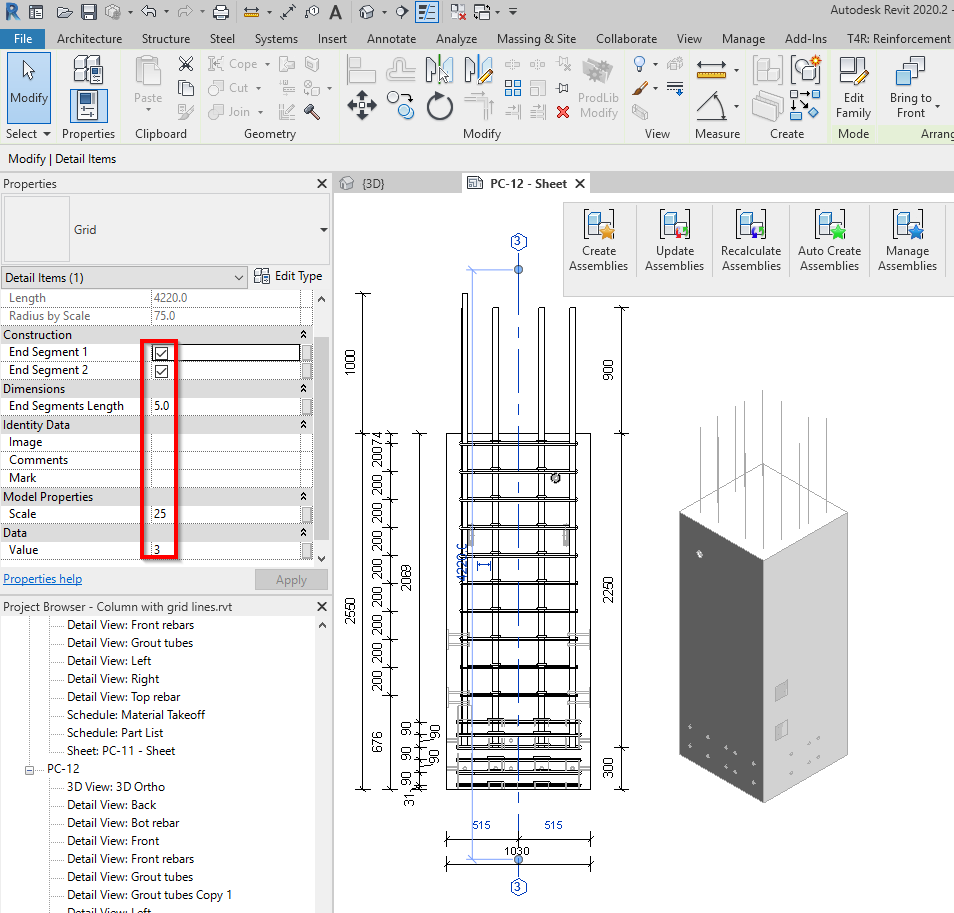
After the assembly has been created, grid lines will be visible in the views that you selected.

production ticket of precast column modeled in Revit with grids visible
column assembly in Revit with grids in horizontal section

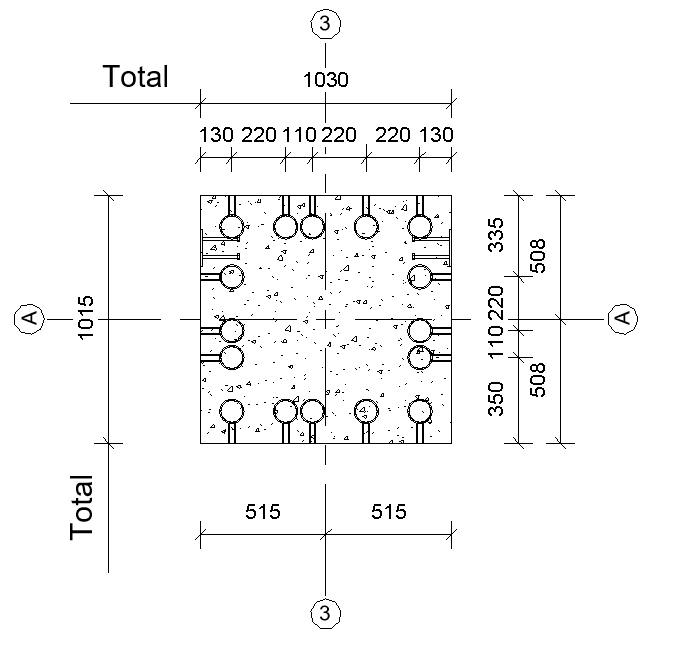
The grid family has some type and instance parameters, which you can control to fit your needs.

grid line parameters in Revit

Here’s a quick video showing how to do it.

Featured products

Precast Concrete Smart Documentation
Subscribe
Never miss important updates

Precast Concrete

3D modeling and drafting software for precast concrete buildings
Try for free Contact us

Related blog posts

All posts

How to use SIP Panels solution to automate framing in Revit

We are thrilled to announce an exciting upgrade to our Be.

Read more

How to use Post & Beam Framing plug-in to automate heavy timber frames in Revit

We recently released a major UI enhancement of our Be.

Read more

BIModular’s CEO: As LOD rises, the value of tools like Agacad’s soars

When it comes to digital building models with a high level of detail (LOD), it’s hard to find anyon...

Read more
Copyright © 2013-2024 AGA CAD, UAB. All rights reserved | Privacy policy